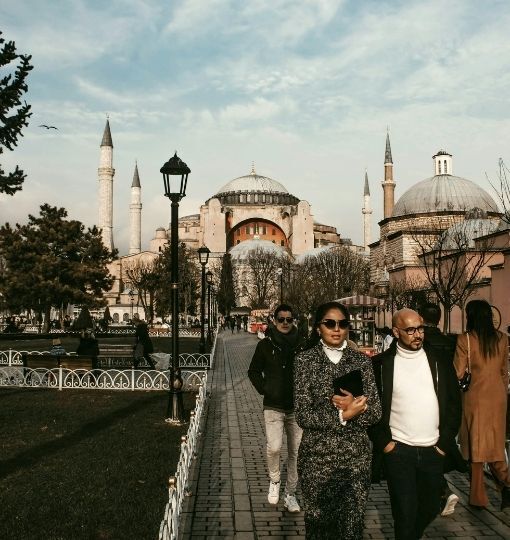
Unlock the insider's guide to Istanbul with our tips and recommendations. Maximize your Istanbul experience with our expert insights. Discover the joy of traveling like a local with insightful advice and handy tips from those who know best. This section offers valuable insights into transportation, etiquette, safety, and other useful topics, ensuring that your trip to Istanbul is both smooth and enjoyable.


.jpg)
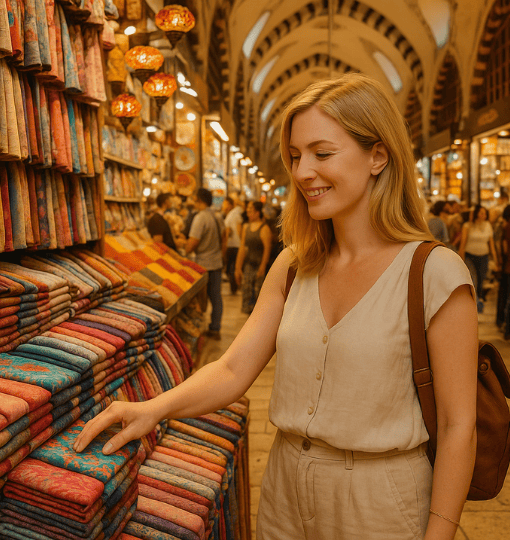
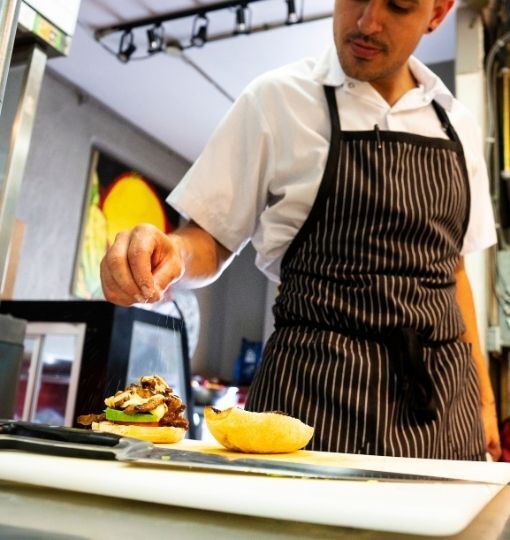
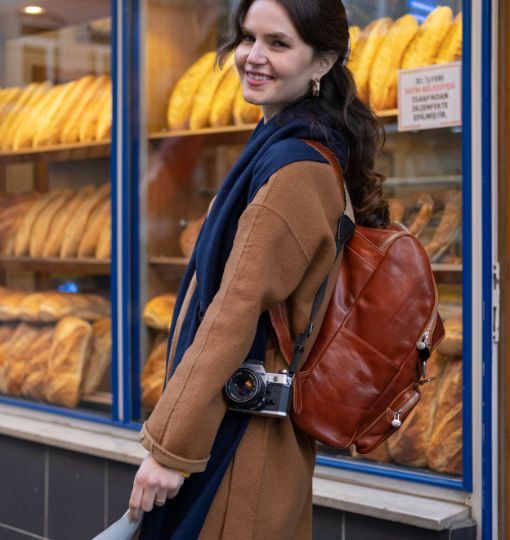
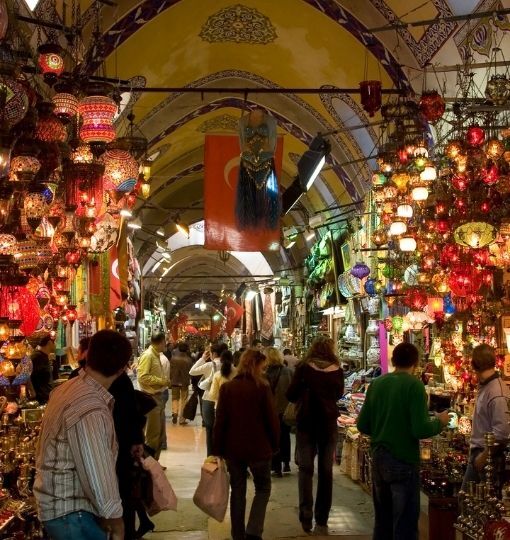
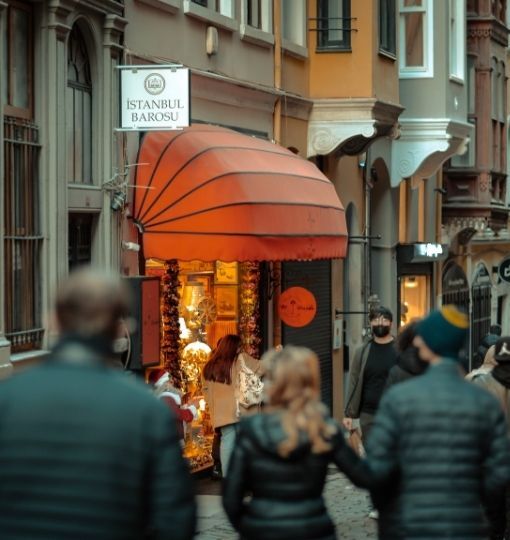
If you are planning a city break with culture, food, and serious retail therapy, the best shopping malls in Istanbul will fit your itinerary perfectly. These centers are weather proof, family friendly, and easy to reach by metro, tram, or ferry. This guide is written for you, dearest Istanbul visitors who want clear directions, sensible […]

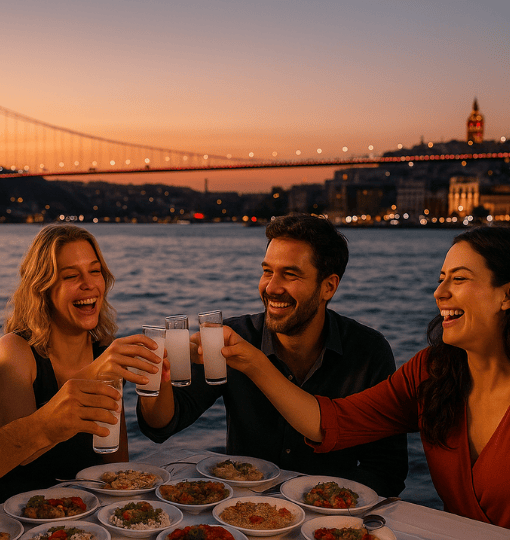
Turkey is one of the birthplaces of wine. Ancient grapevines still cling to volcanic slopes and sun-drenched valleys from Thrace to Anatolia. Yet Istanbul, this vast, vibrant metropolis spread across two continents, has no vineyards of its own. Instead, it has something just as inviting: a network of character-packed wine bars, shops, and “şarap evi” […]
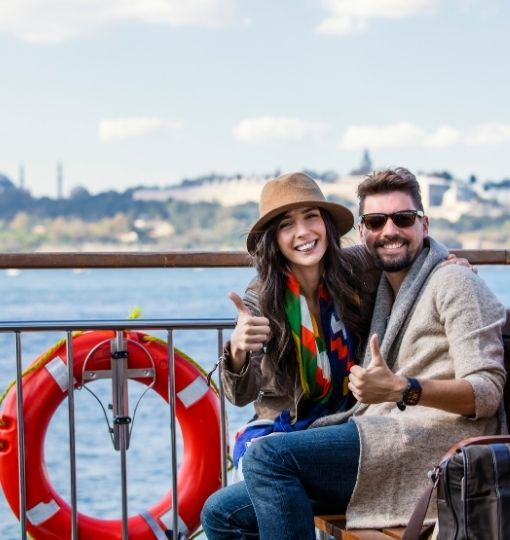
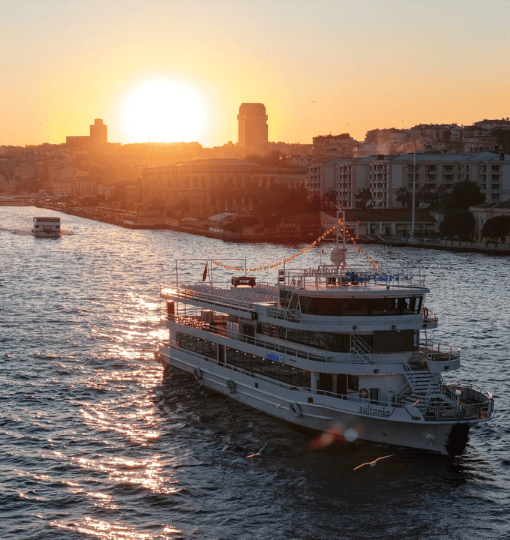
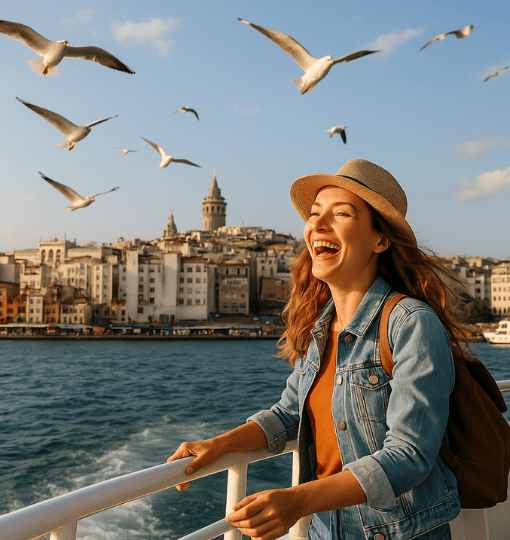
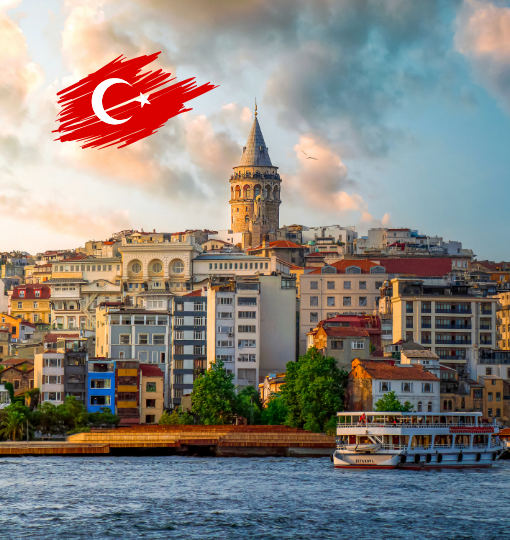
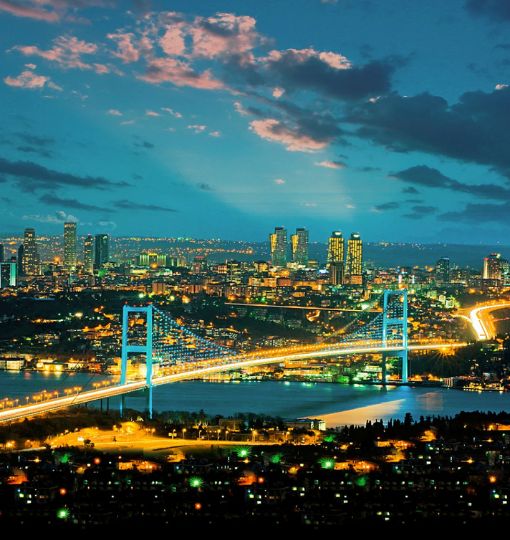
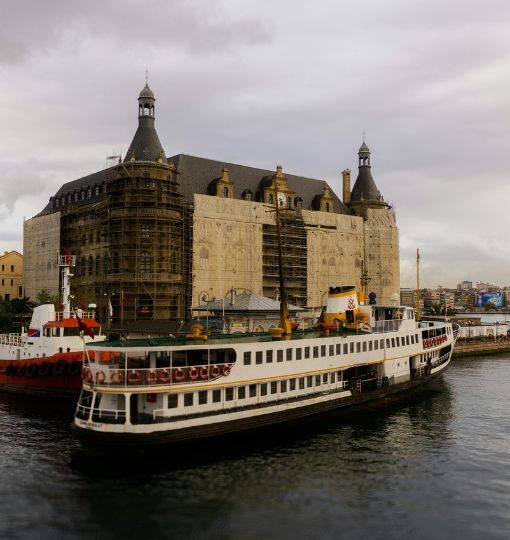
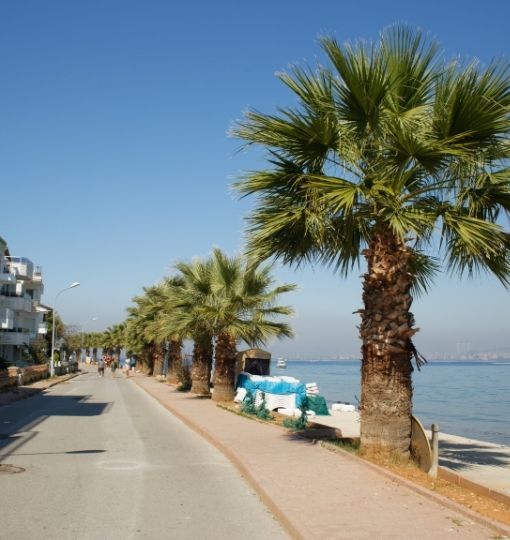
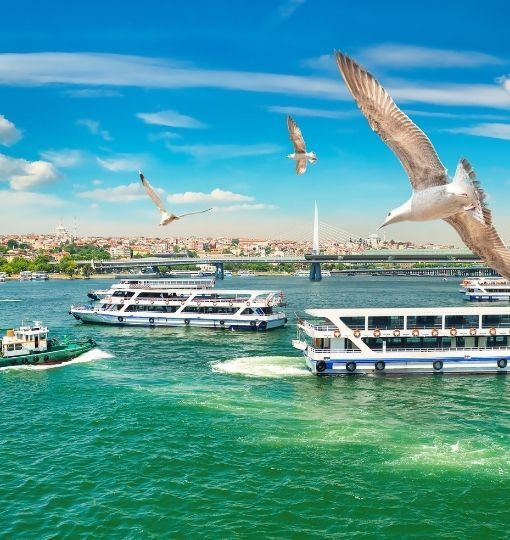
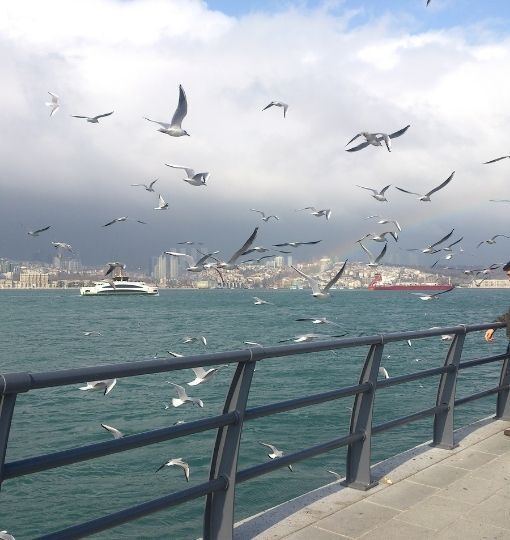
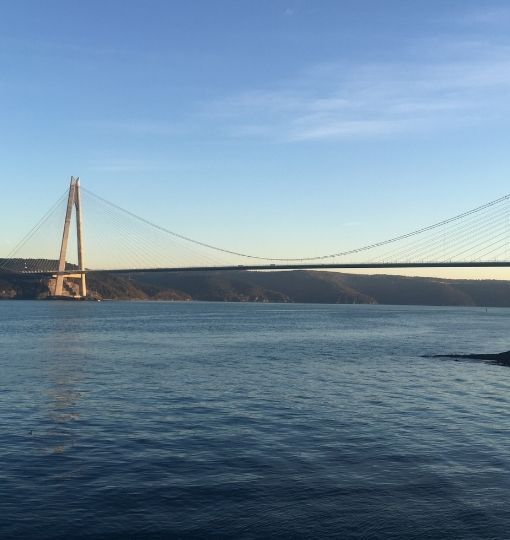
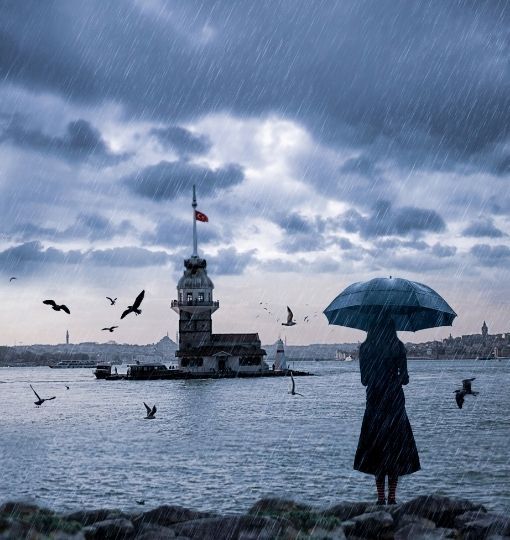
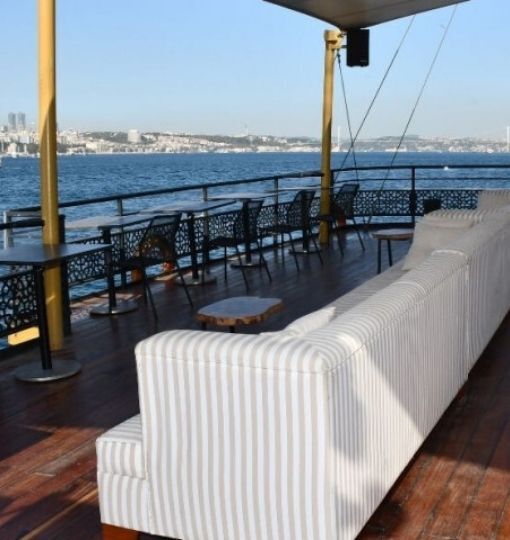
Istanbul, a city that brings two continents together, offers a unique blend of cultures, histories, and breathtaking landscapes. One of the best ways to experience the city's vibrant charm is by sea. The Bosphorus Strait, which divides Europe and Asia, is not just a natural wonder but also a vital waterway that has shaped the […]
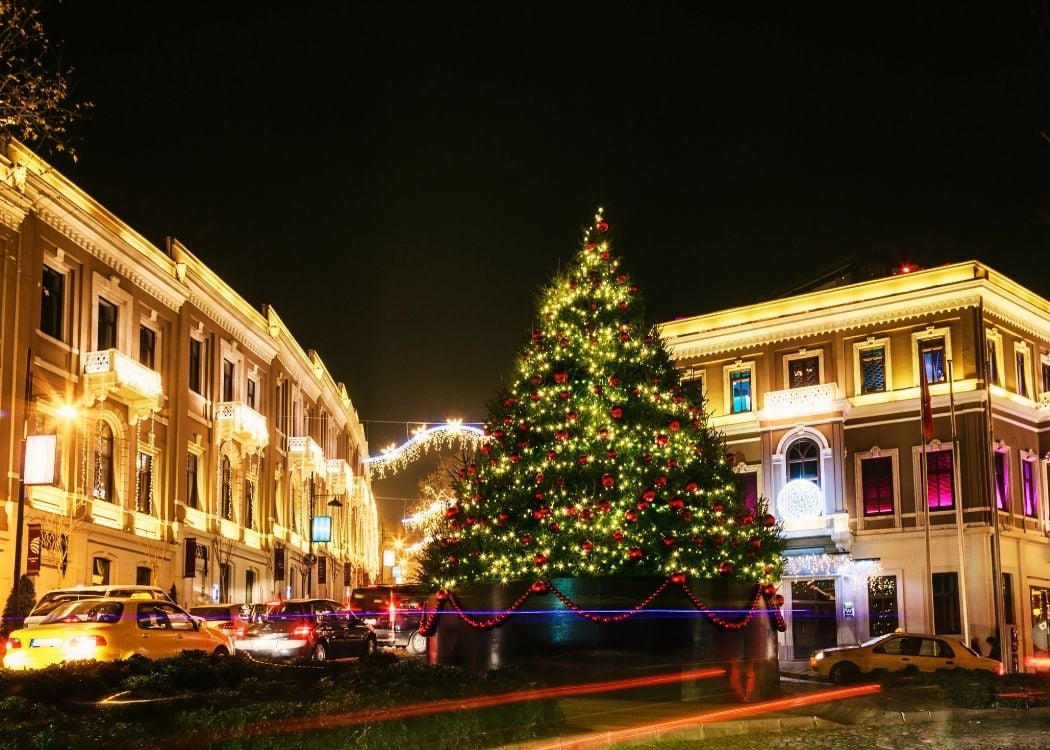
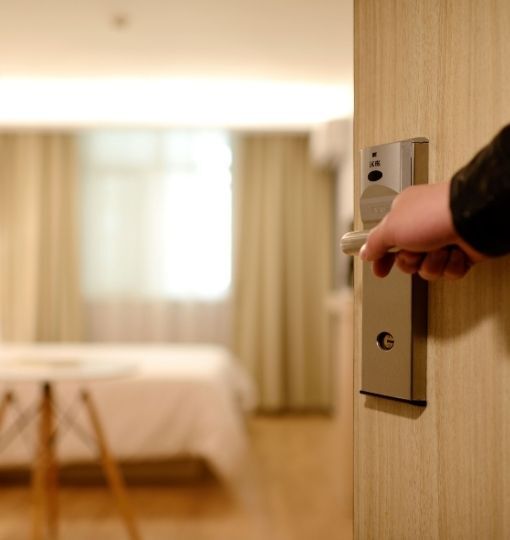
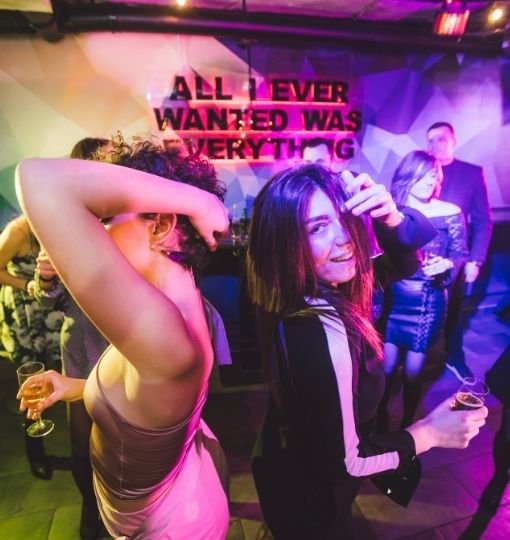
There is a special energy to New Year in Istanbul. The city glows along the Bosphorus, neighborhoods hum with music and warm lights, and every district offers a different way to count down. This guide keeps things evergreen and accurate, so you can plan with confidence. You will find practical ideas for a Bosphorus evening, […]
.jpg)
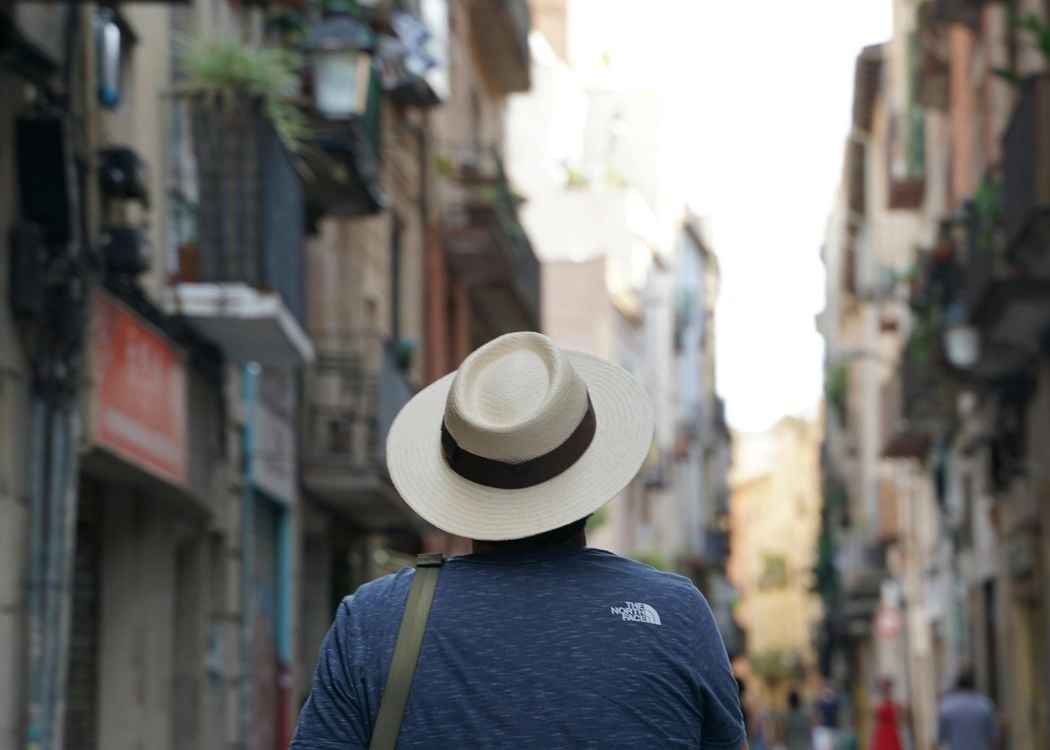
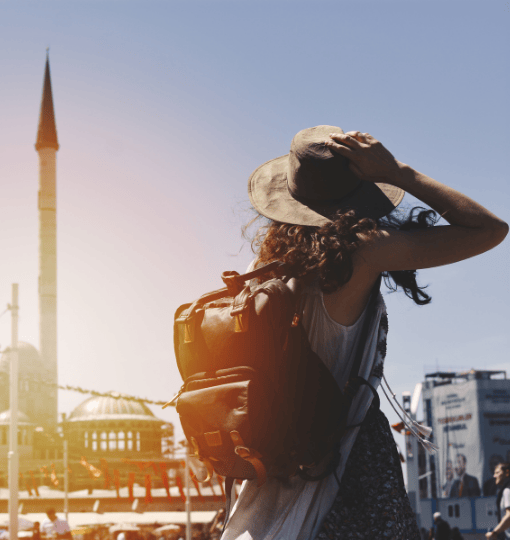
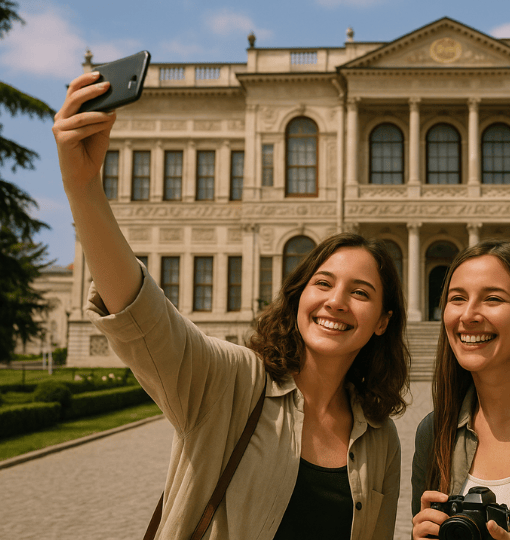
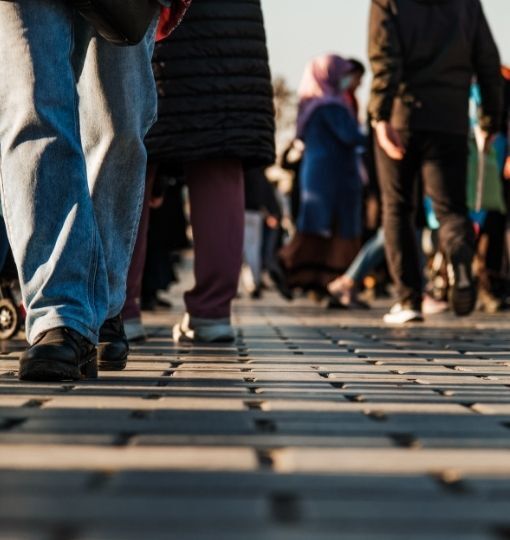
First time in Istanbul is exciting, loud, and sometimes a little confusing. The city is big, the energy is high, and small choices can save you hours. This local guide collects the most common istanbul travel mistakes we see every week and turns them into simple wins. Read it before you land, keep it open […]
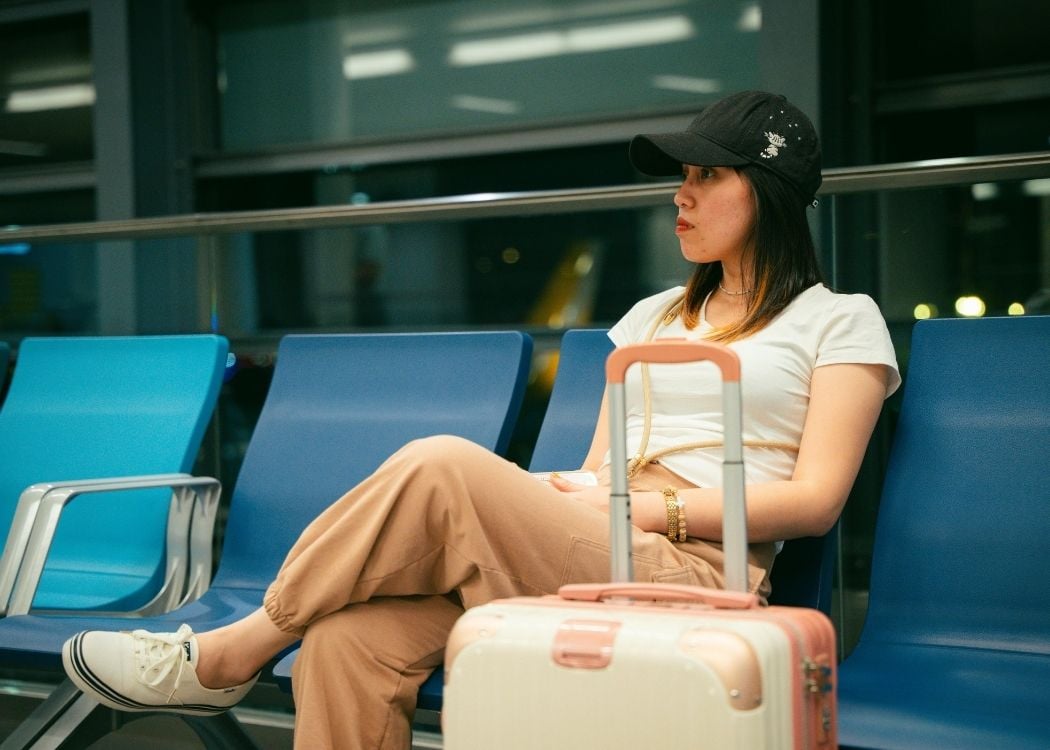
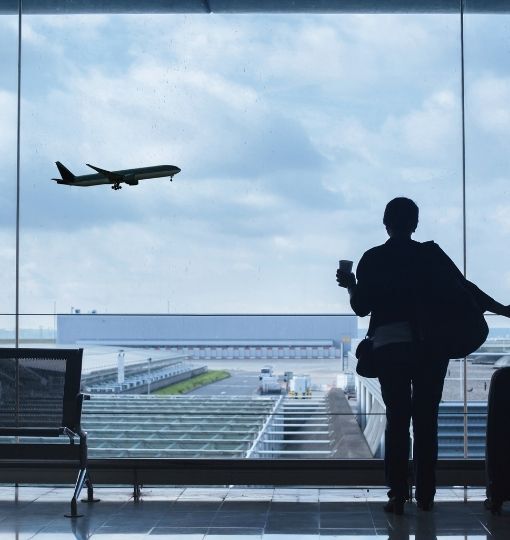
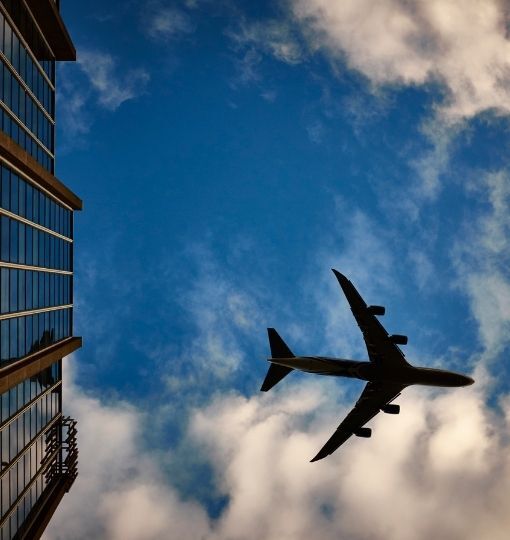
If your flight gives you a short window in Istanbul, you can still get a real taste of the city. This istanbul layover itinerary is built for first timers who want an easy route, quick transfers, and zero stress. Follow the steps, keep a safe buffer for airport security, and you will be surprised how […]

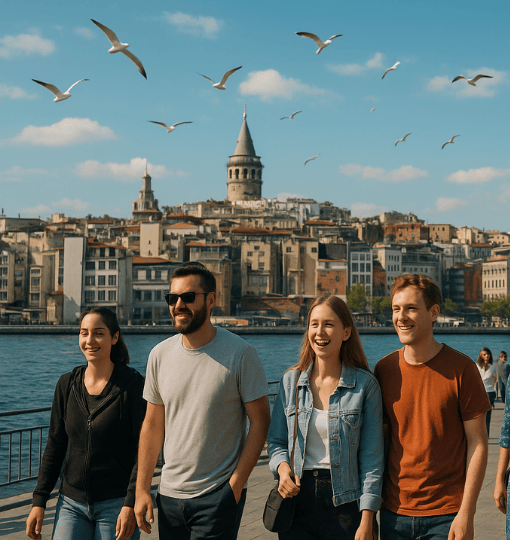
Istanbul won “Most Desirable City (Europe)” 2025. See why—and explore like a local with 7 smart routes, food tips, ferries, and money-savvy passes.
.jpg)
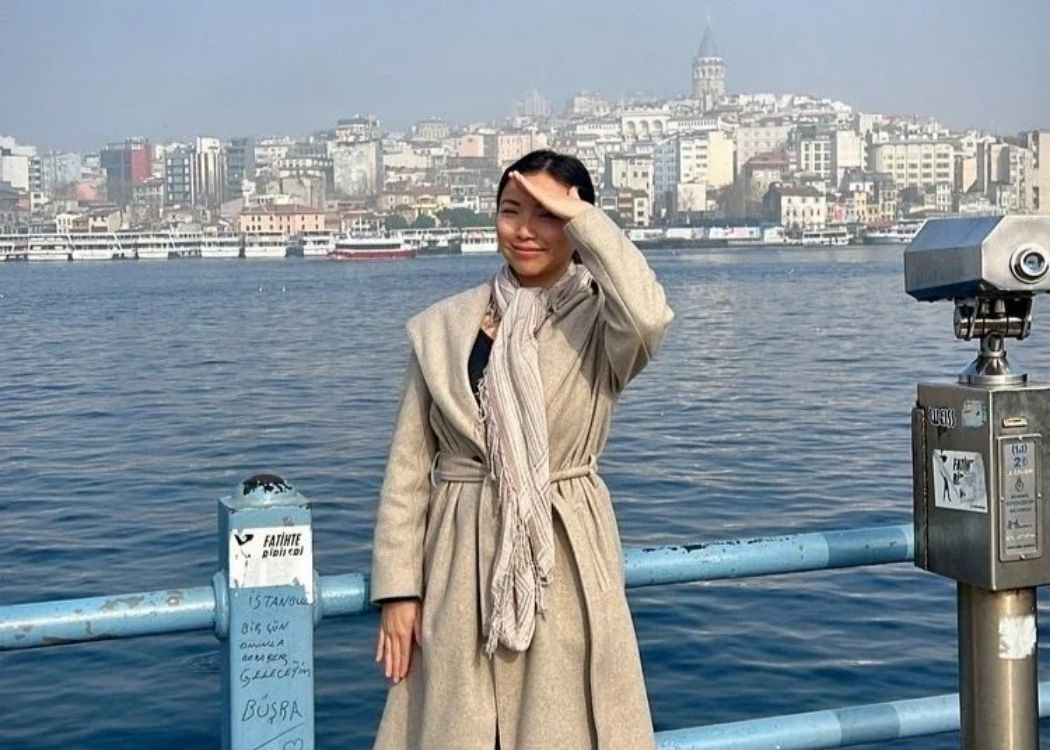
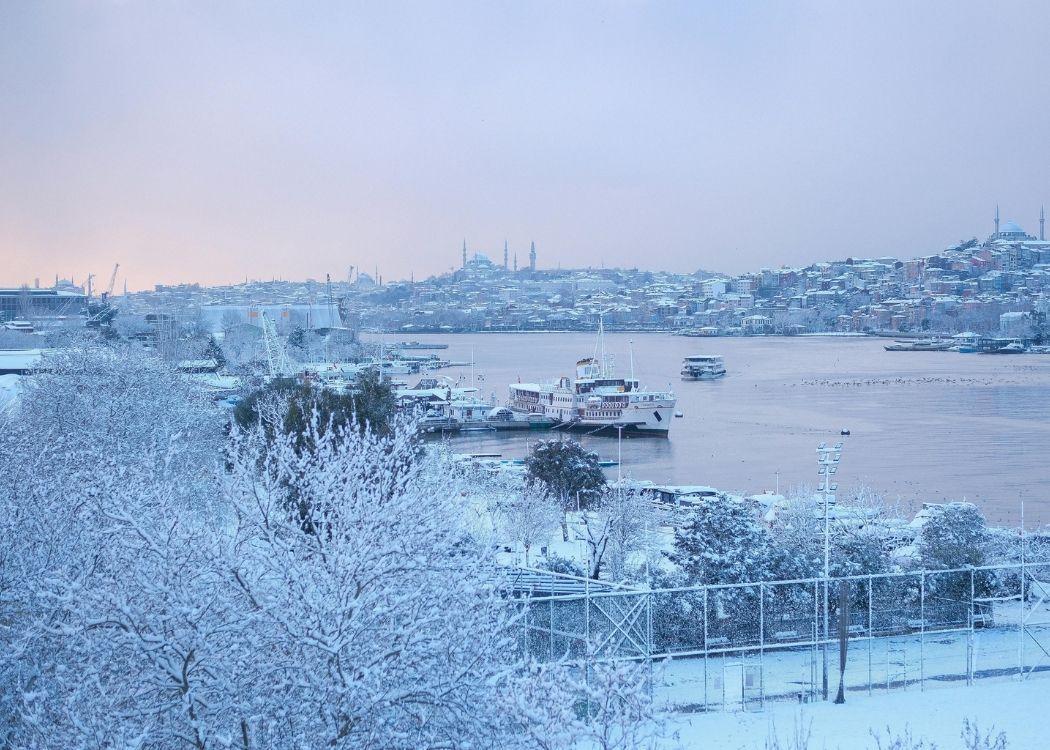
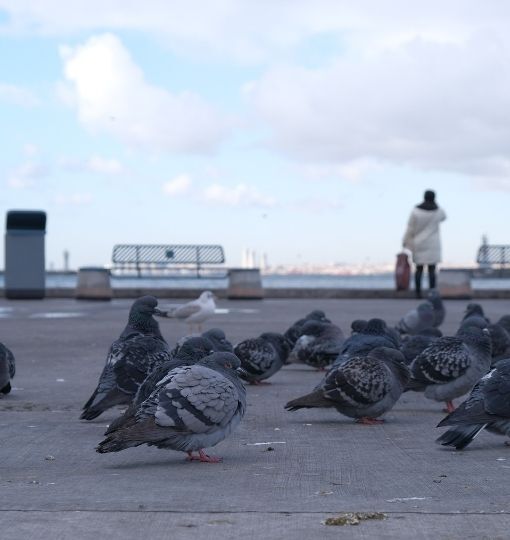
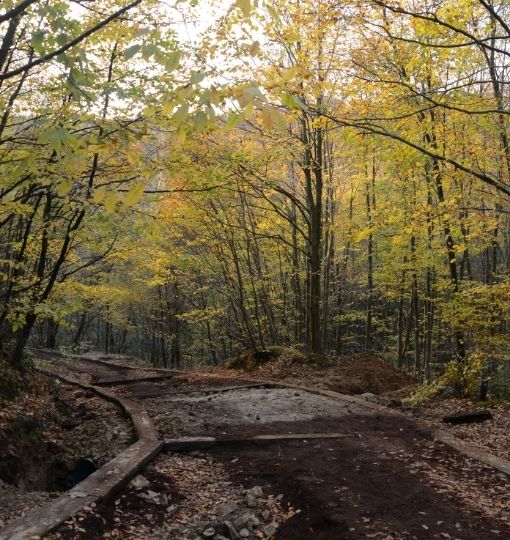
When the summer crowds thin and the Bosphorus takes on a silver calm, Istanbul reveals a softer rhythm. This is your gentle, year-round guide to making the most of the quiet months. Why Off-Peak Makes Sense There are moments when Istanbul finally slows down. Cafés feel unhurried, ferries are peaceful, […]
.jpg)
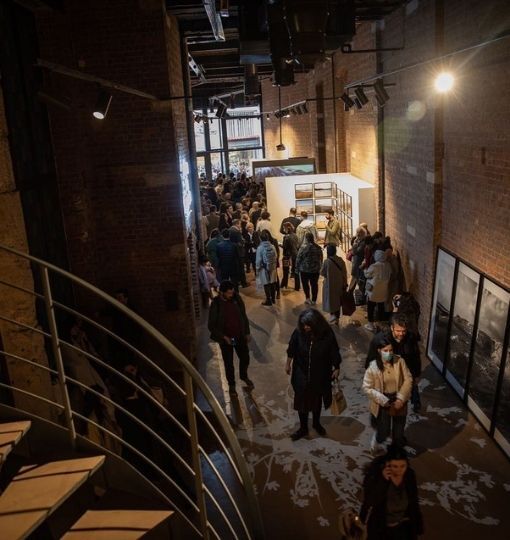
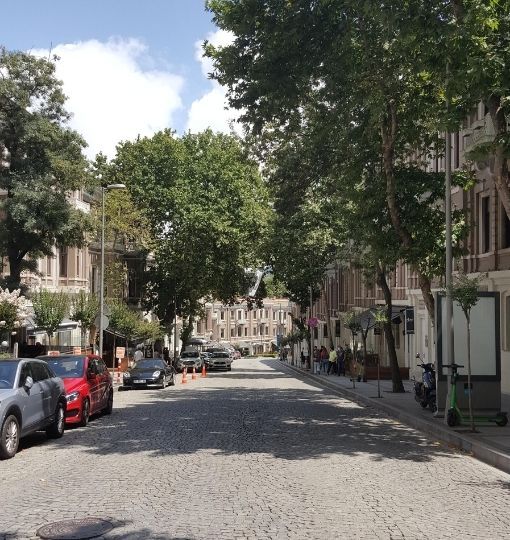
The Istanbul Biennial is Turkey’s flagship contemporary art event and one of the most watched biennials in the world. Founded by the Istanbul Foundation for Culture and Arts (İKSV) in 1987, it unfolds across multiple venues in the city center and welcomes everyone for free. You stroll from historic schools to old hans and waterside […]
.jpg)
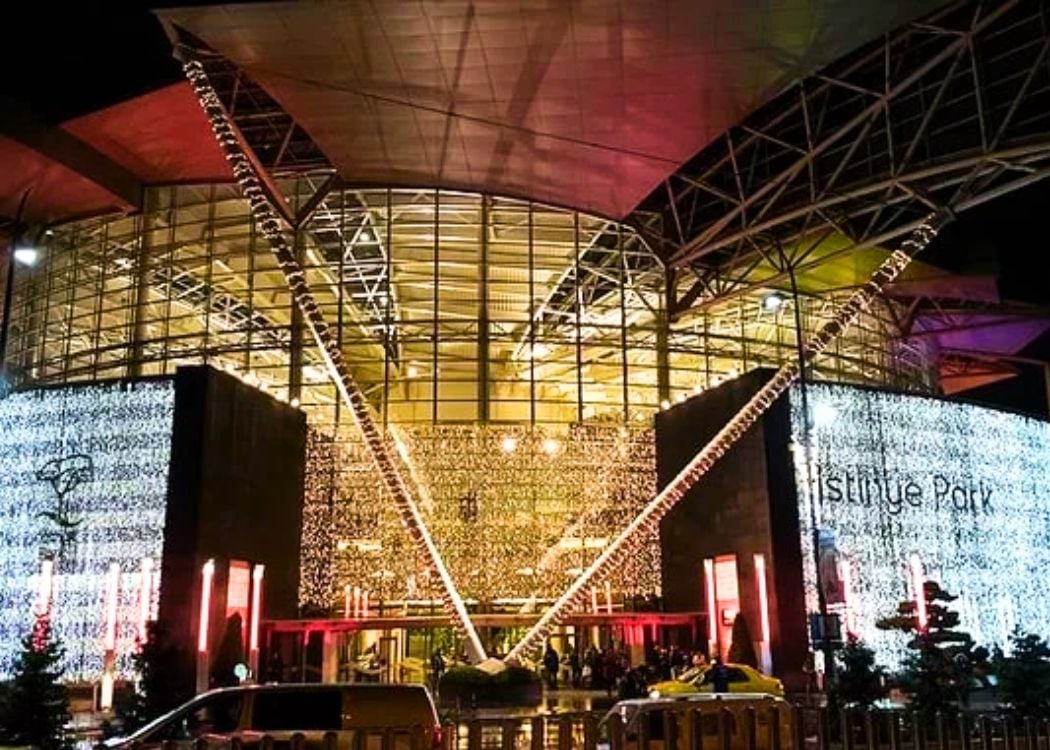
There are many lively, family-friendly winter and Christmas markets in Istanbul. Most are secular holiday events with lights, music, rides, and gift stalls. This guide gathers the biggest names, helpful dates, how tickets and sessions work, and easy ways to pair an evening market with a simple dinner or a Bosphorus view. […]
.jpg)
The Golden Horn curls through old Istanbul like a quiet moat and marks the edge of the Historic Peninsula. Along its northern and western shores, villages once filled with tanners, fishermen, and sailors. Each neighborhood needed a bathhouse to wash away salt and soot. Many of those domed sanctuaries still survive. Some work daily. Some […]
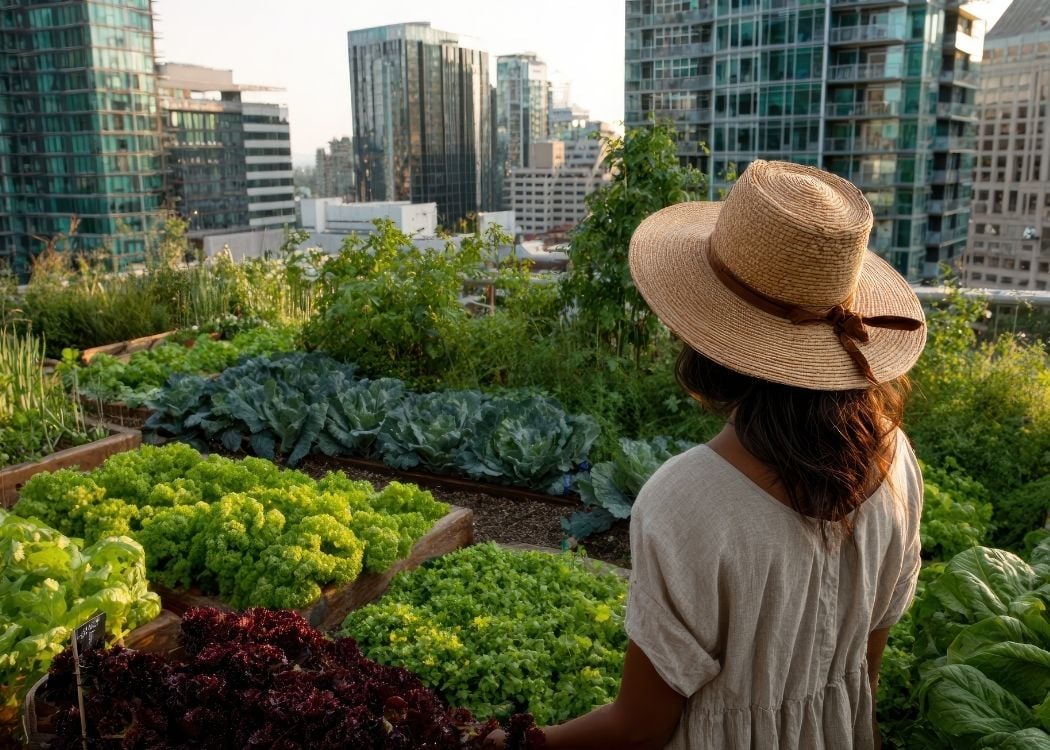
Istanbul looks different when you climb a few floors higher. Up here, tomatoes blush beside satellite dishes and basil waves at ferry funnels. Hotel stewards pick herbs minutes before dinner service, and volunteers turn compost with views of minarets. The city’s new farmers have traded wide fields for narrow skylines, proving that soil can thrive […]
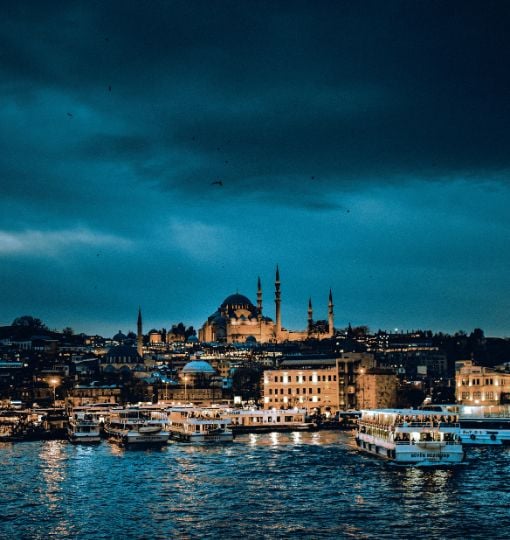
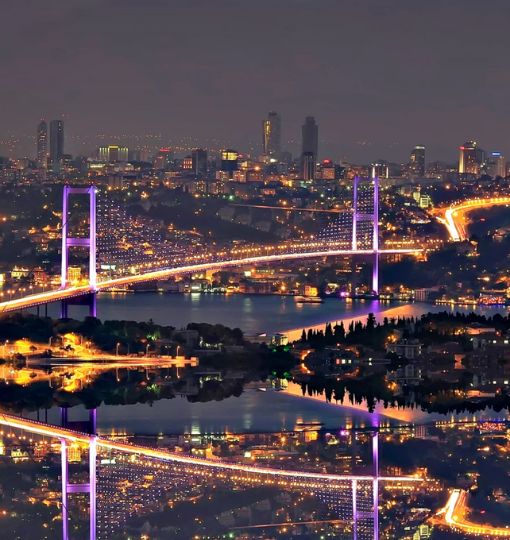
The Bosphorus never sleeps. Long after daytime ferries dock and museum gates close, the water keeps moving, scattering moonlight across palaces and fishing boats. At midnight the strait feels like a quiet festival, lit by bridge LEDs, tea-stained lanterns and the glow of late ferries sliding between two continents. This guide helps night […]
July paints Istanbul in bright sunlight, long evenings, and a steady hum of festivals on both sides of the Bosphorus. Temperatures tip toward true summer, ferries stay busy until late, and café tables spill into every shaded corner. Yet the city still offers hidden breezes, pockets of calm, and plenty of local flavor if you […]
Karakoy hugs the mouth of the Golden Horn where it meets the Bosphorus, and the neighborhood feels alive from dawn until long after the last ferry. Fresh-painted warehouses line a brand-new promenade, fishermen still guard their spots on Galata Bridge, and cruise passengers step straight into city streets instead of a fenced-off terminal. […]
Kadikoy is one of Istanbul’s most vibrant neighborhoods on the Asian side, known for its unique blend of local spirit and modern flair. This bustling district has soared in popularity in recent years , even earning a spot among the world’s coolest neighborhoods, thanks to its hundreds of new cafes, bars, restaurants, and shops that […]
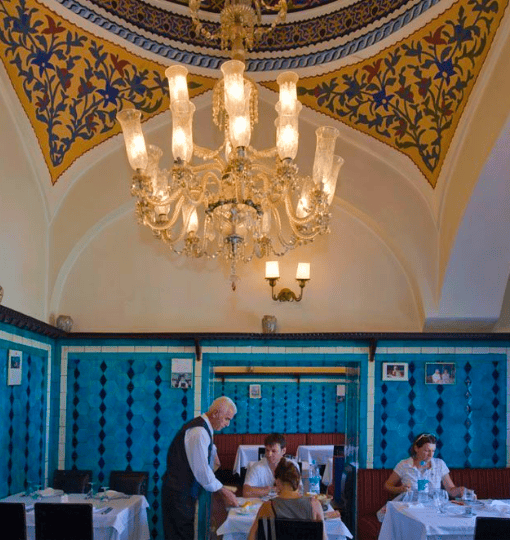
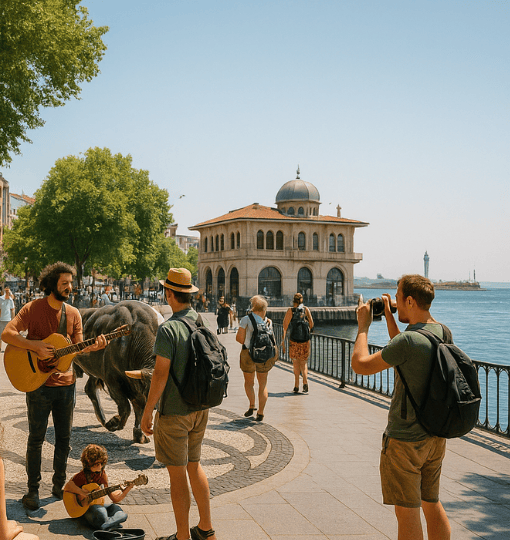
Istanbul’s dining scene is ever-changing, yet a handful of venerable eateries stand as living time capsules. These are places where recipes endure for a century, where the decor whispers of sultans and paschas, and where each bite carries the flavors of history. In this blog-style journey, we visit some of Istanbul’s oldest still-operating […]
Istanbul – a city of over 15 million where Europe and Asia meet – is a vibrant tapestry of history, food, and social traditions. From bustling spice markets to the serene Bosphorus shores, the city offers countless ways to experience its rich culture. But ask any Istanbul local, and they’ll tell you some of the most […]
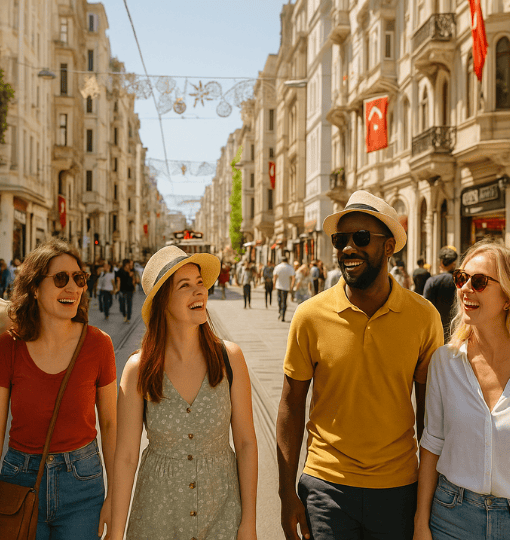
Hey there! I’m your friendly Istanbul local, the kind of person who loves sharing a cold beer by the Bosphorus while chatting with tourists. I've rounded up the top 50 real questions I get from foreign visitors everything from safety to simit to the nightlife scene. Whether you're planning your first trip or just curious, […]
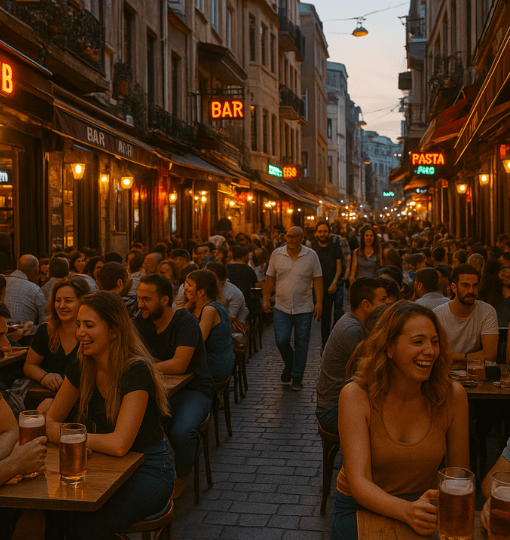
Istanbul is a city of contrasts where Byzantine walls stand beside glass towers and where the clatter of ferries mixes with the call to prayer. Tea and rakı might grab the headlines, yet beer has quietly become one of the city’s favorite drinks. From big-name lagers to bold new microbrews, the scene in 2025 is […]
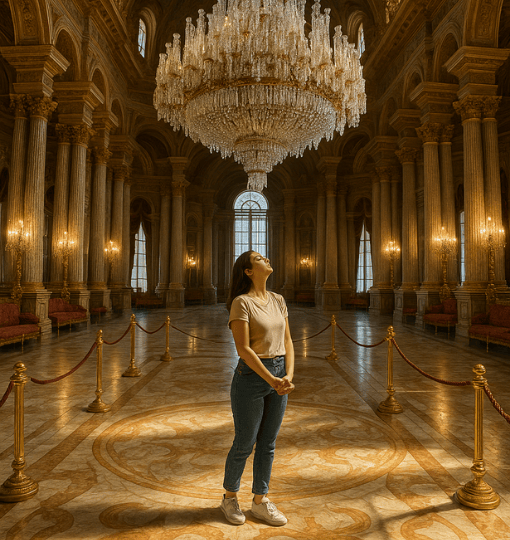
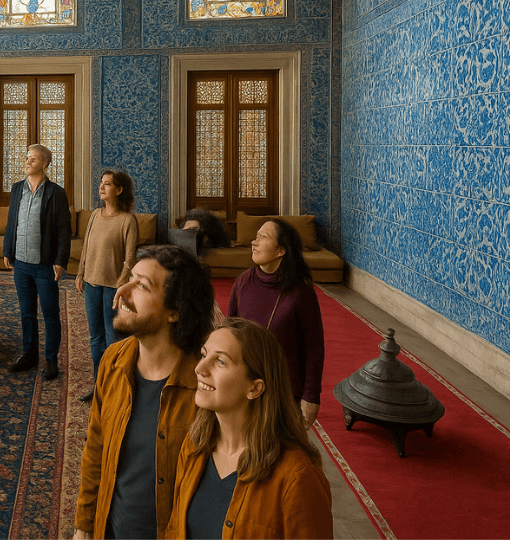
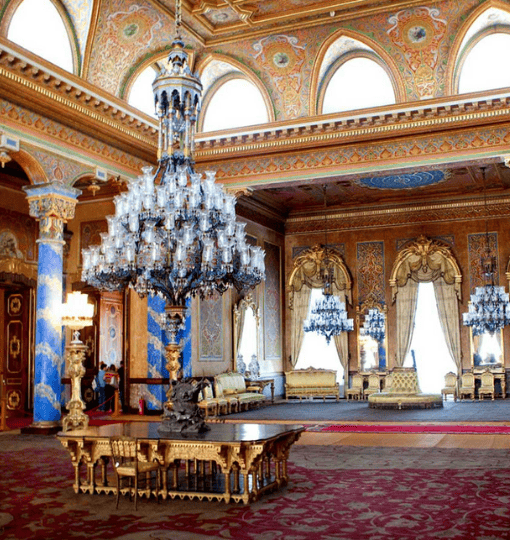
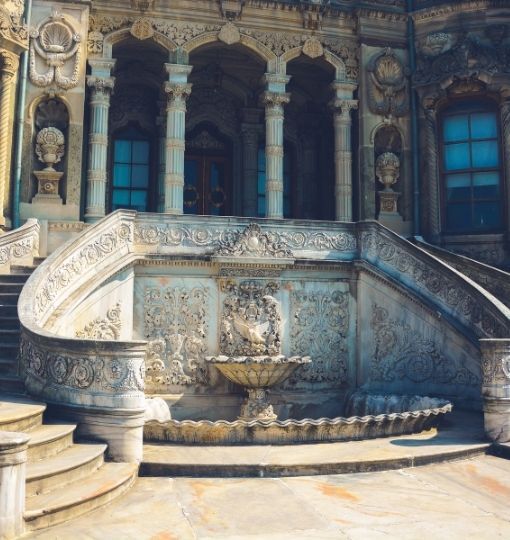
Istanbul is a city of layers. Streetcars rattle by fish boats, call to prayer meets car horns, and every corner holds a story. The richest stories belong to the Ottomans, whose sultans built homes fit for an empire. Four of those homes still shape the skyline. Topkapi watches over the Golden Horn. Dolmabahçe […]
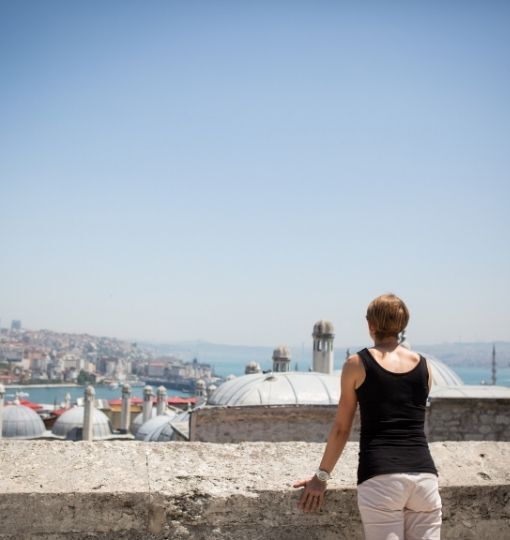
Discover the most breathtaking viewpoints across Istanbul—from historic towers and mosque terraces to serene hilltops and Bosphorus cruises. Explore the city’s skyline like never before.
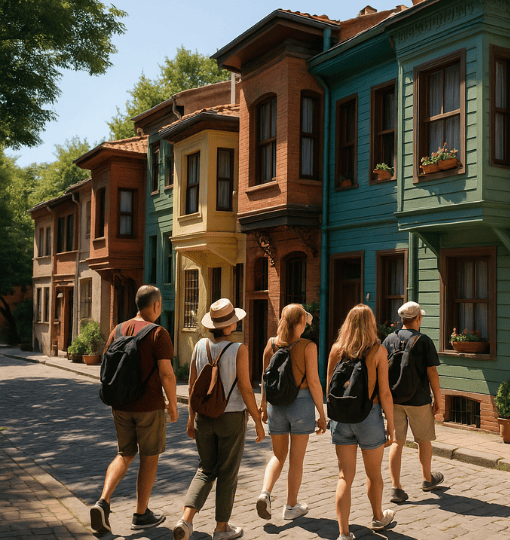
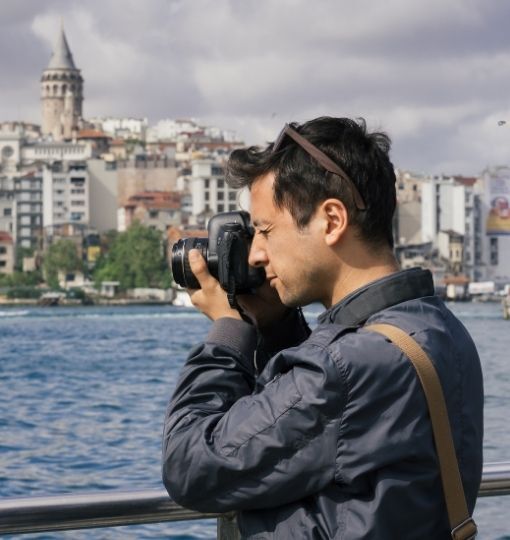
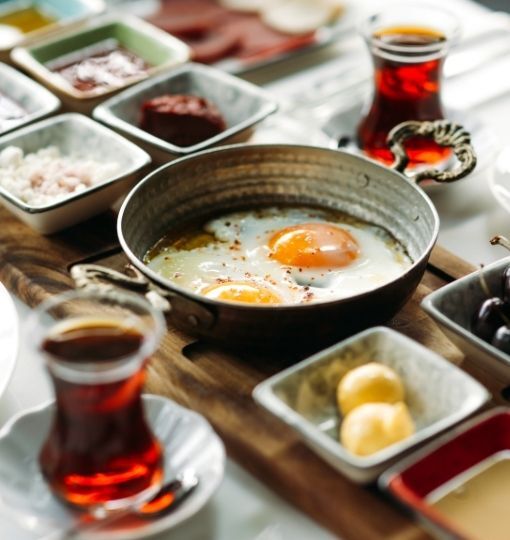
Discover Istanbul beyond the tourist trail—immerse yourself in authentic neighborhoods, ride the ferry like a commuter, and enjoy a traditional Turkish breakfast. This guide shows you how to experience the city like a true local.
Explore the wonderfully weird side of Istanbul. From underground palaces to feline-friendly neighborhoods, this guide dives into the city’s most unexpected and offbeat experiences that will surprise even seasoned travelers.
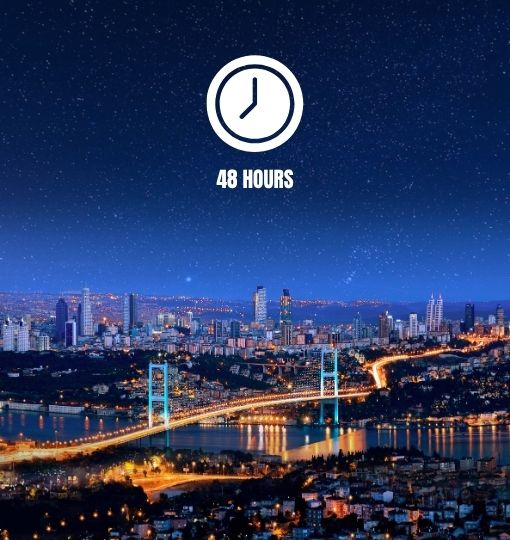
Only have a weekend in Istanbul? Discover how to make the most of 48 hours with this expertly crafted itinerary. From historic palaces and mosques to vibrant markets and stunning Bosphorus views, this guide will help you experience the city’s top highlights in just two unforgettable days.
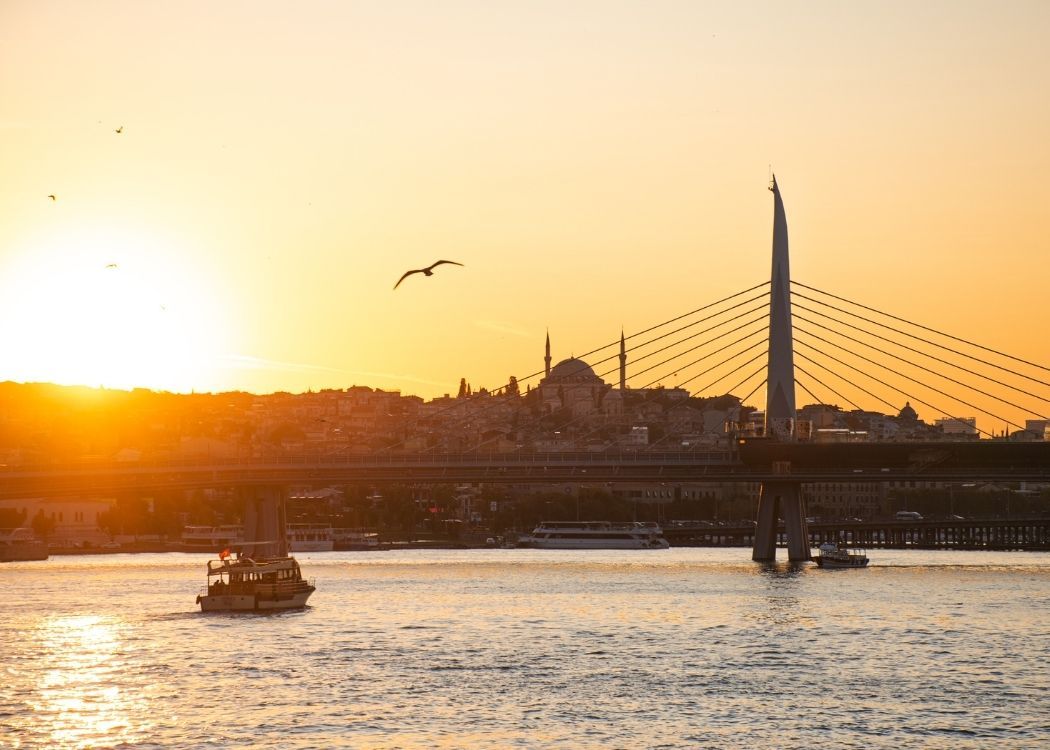
Discover the most breathtaking sunset spots in Istanbul—from iconic towers to serene coastal parks—and see the city transform under golden skies.
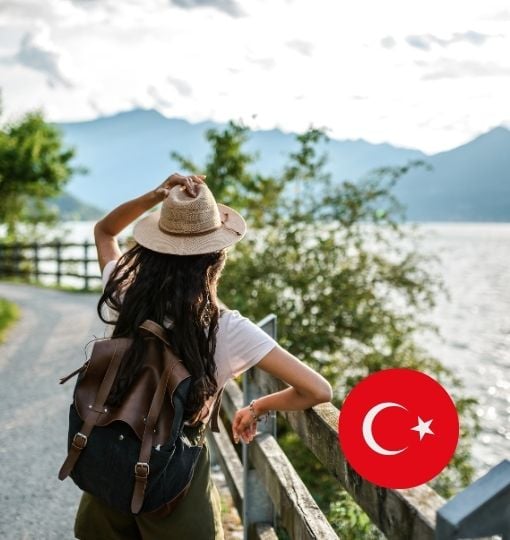
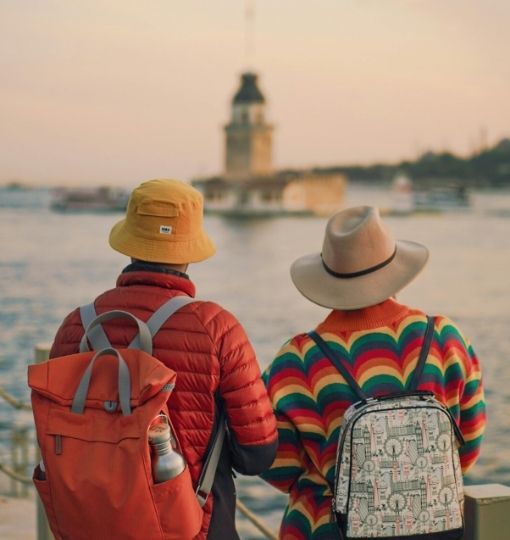
Discover the ultimate guide to solo travel in Istanbul—an empowering, safe, and unforgettable journey through one of the world’s most captivating cities. From insider safety tips to top attractions and hidden gems, this article shows you how to make the most of your solo adventure.
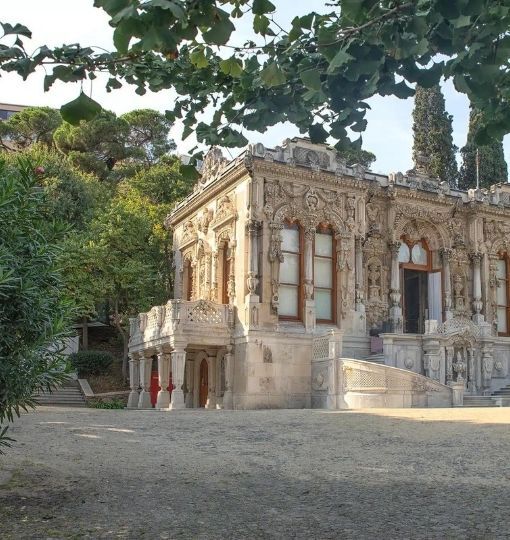
Istanbul spreads across two continents like an open-air museum, its skyline crowned by minarets, domes, and hill-top pavilions. Glide along the Bosphorus and you’ll first spot the grand façades of Topkapı and Dolmabahçe, but follow the wooded slope behind Beşiktaş and another treasure appears: verdant Yıldız Park, hiding a palace complex once reserved for sultans […]
Istanbul is a city that never runs out of stories. Its skyline mixes Byzantine domes, Ottoman minarets, and sleek modern towers, all mirrored on the blue surface of the Bosphorus. Walk a few steps and you move from Roman ruins to lively street-food stalls, from trendy galleries to time-worn tea gardens where locals still debate […]
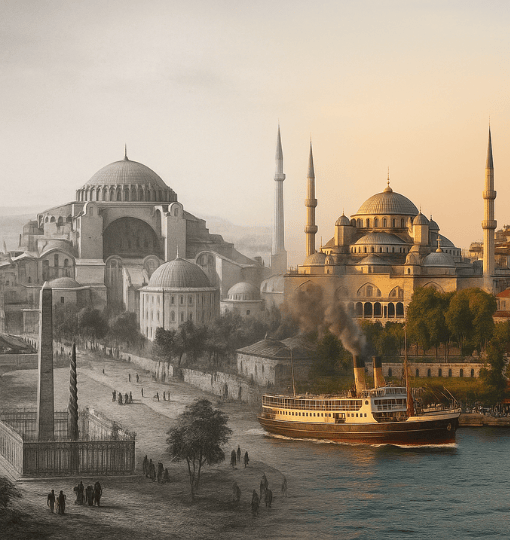
Istanbul in 2025 feels alive every hour. Ferries glide between two continents while café chatter rises over the call to prayer. Skyscrapers share space with sixth-century domes, and the city’s spirit seems to stretch both forward and back at the same time. To understand how this modern scene came to be, we need […]

Istanbul isn’t just grand mosques and busy bazaars—it also offers peaceful escapes through its many green spaces. From forested groves to tulip-filled gardens, the city’s parks provide a breath of fresh air and a different kind of beauty for travelers seeking tranquility.

Uncover the hidden layers of Istanbul beyond the famous landmarks. Explore ancient walls, forgotten cisterns, and quiet neighborhoods with rich multicultural history.
Discover Istanbul’s top neighborhoods for remote work, creativity, and connection. Whether you seek buzzing coworking spaces or peaceful café corners, the city has it all.
Step off the beaten path and explore Istanbul’s thrilling side—from underground cisterns to rooftop views, island bike rides, and night cruises. Perfect for adventurous travelers.
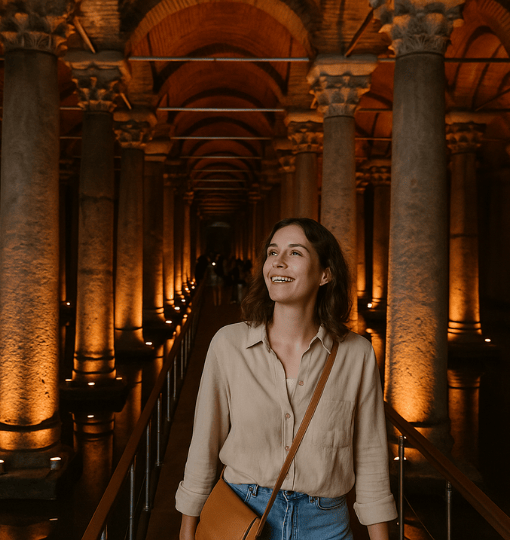
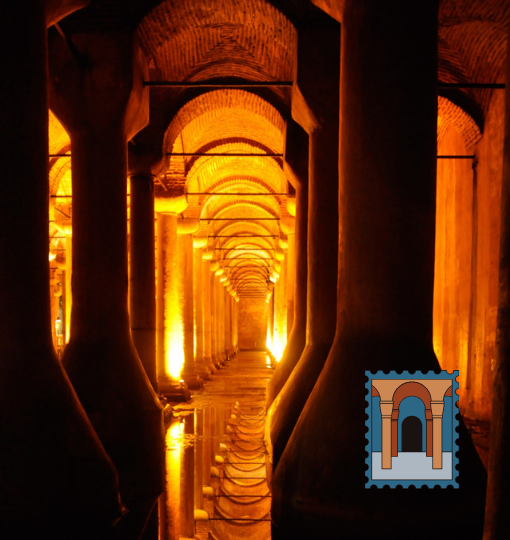
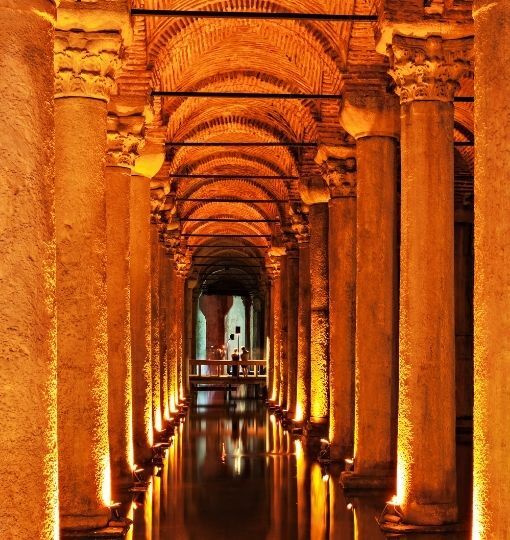
Istanbul dazzles in the sun. Minarets catch the morning light, ferries leave white trails across the Bosphorus, and shopkeepers sweep their doorways as the city wakes. Yet a different Istanbul waits far below the cobblestones. There, under layers of brick and time, cool water once flowed through hundreds of stone chambers. Most travelers line up […]
Discover a different side of Istanbul through its hidden contemporary art galleries tucked away in quiet courtyards, historic buildings, and trendy neighborhoods. From DEPO’s thought-provoking exhibits to Gaia Gallery’s digital installations, each space offers a unique reflection of Turkey’s evolving creative identity. Perfect for curious travelers and art lovers alike, this guide introduces you to lesser-known venues that go beyond the typical tourist attractions—revealing a deeper, more authentic cultural experience in Istanbul.
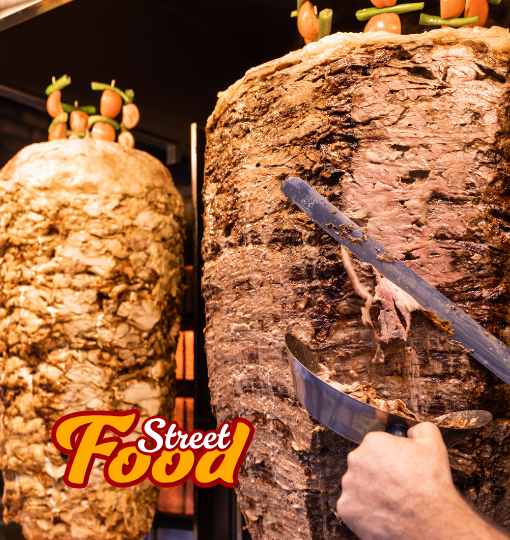
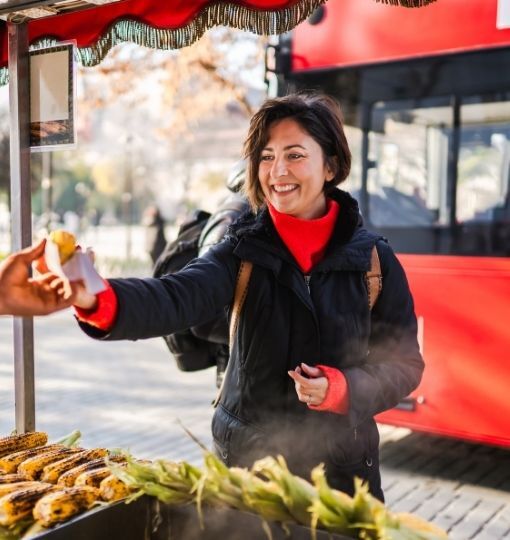
Taste your way through Istanbul with this beginner-friendly guide to the city’s most beloved street food—authentic, affordable, and full of flavor.
The first light hits the domes of old Istanbul and every street wakes in its own way. Ferries honk across the Golden Horn, shopkeepers lift metal shutters, and the smell of fresh simit drifts over the bridges. Spend a few days in this vast city and you soon crave a breather from the roar of […]

Go beyond the guidebooks and uncover Istanbul’s secret courtyards, forgotten mosques, and hidden cultural treasures waiting to be explored.
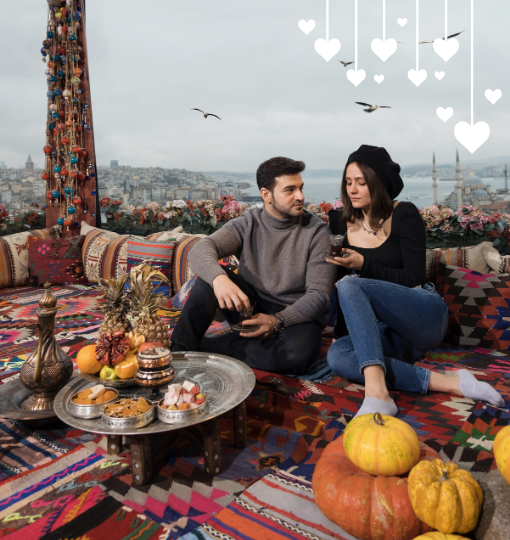
Discover Istanbul’s most romantic experiences—from sunrise views at Galata Tower to moonlit Bosphorus cruises. Perfect for honeymoons, anniversaries, or a spontaneous getaway.
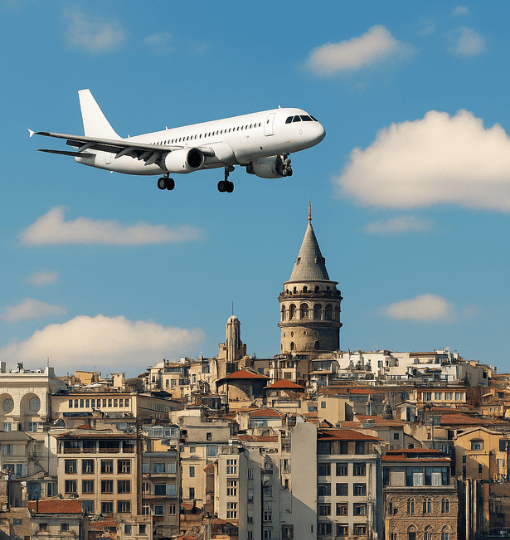
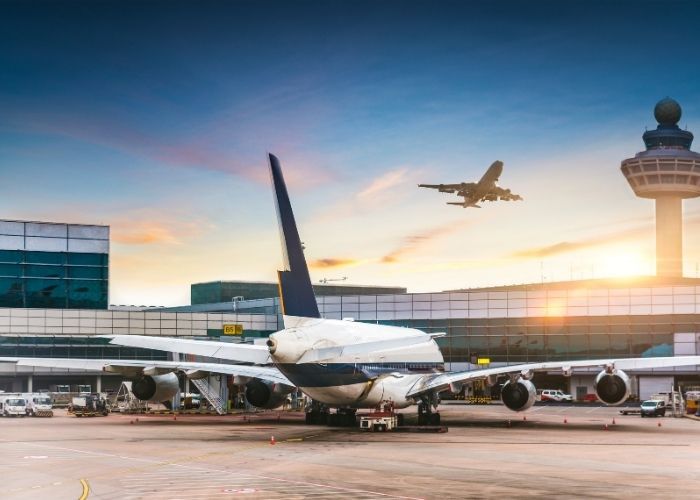
Istanbul feels brand-new every time you arrive. The ferry horns still echo across the Bosphorus, yet the skyline keeps stretching higher. Sabiha Gökçen Airport mirrors that energy. A second runway opened at the very end of 2023, so more flights touch down every hour and queues move faster. Low-cost […]
Uncover the timeless wonders of Sultanahmet, where Istanbul’s empires come alive through iconic landmarks, ancient relics, and architectural masterpieces.
Only have 24 hours in Istanbul? Maximize every moment with this fast-paced itinerary that takes you from iconic landmarks to sunset cruises, ancient bazaars, and rooftop views—all in one unforgettable day. Perfect for travelers on a tight schedule who want to see Istanbul’s best highlights without missing a beat.
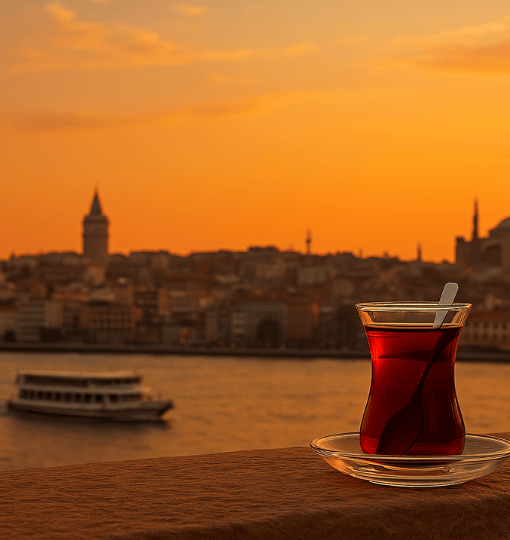
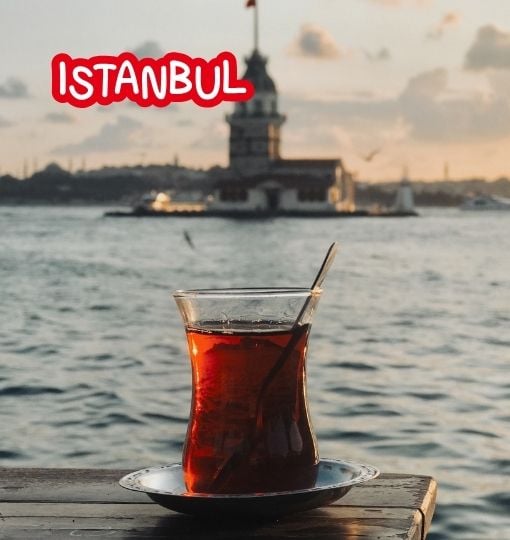
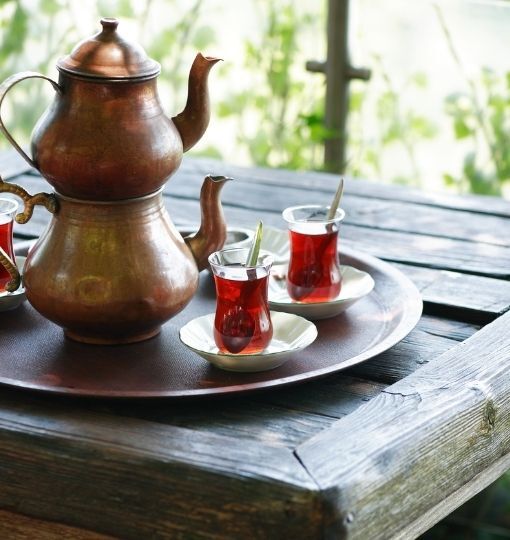
Istanbul greets you with layers of history, the hum of ferry horns, and the comforting aroma of black tea rising from tulip-shaped glasses. The city lives on both sides of the Bosphorus, blending Europe and Asia the way leaves swirl in a çaydanlık. From sunrise call to prayer to the last tram rattling home, tea […]
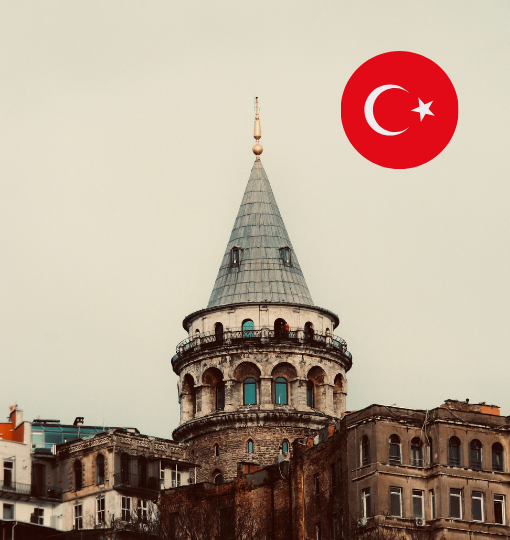
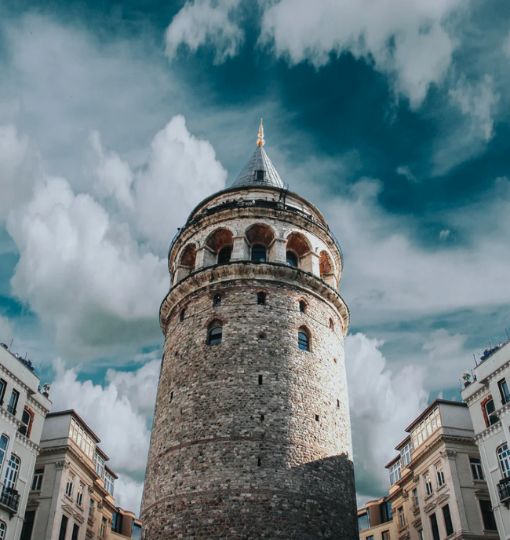
Explore Galata, Istanbul’s historic district where cultures, religions, and empires converged. Discover the iconic Galata Tower, diverse architecture, spiritual music, and vibrant cafés. With Istanbul Tourist Pass®, skip lines and access over 100 attractions, making your journey through this unique neighborhood seamless and unforgettable.
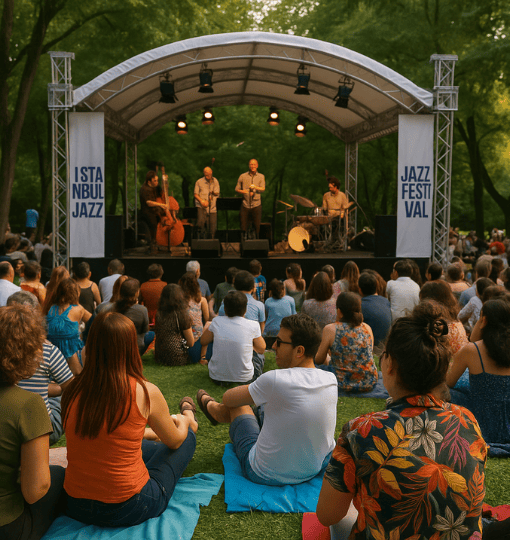
Istanbul never sits still. Ferries glide along the Bosphorus, street musicians brighten quiet lanes, and cafés buzz well past midnight. Music lives in every corner of the city. From 1 to 17 July 2025 the Istanbul Jazz Festival turns that daily rhythm into a full celebration. The thirty-second edition brings almost forty concerts […]

Istanbul is a city of dazzling contrasts. Palaces shimmer beside Ottoman mosques, Byzantine churches hide in winding lanes, and every ferry ride brings a different skyline. From the Bosphorus to the Golden Horn, each waterfront tells its own story. Nowhere does that story feel more alive than on the northern curve of the Historical Peninsula, […]
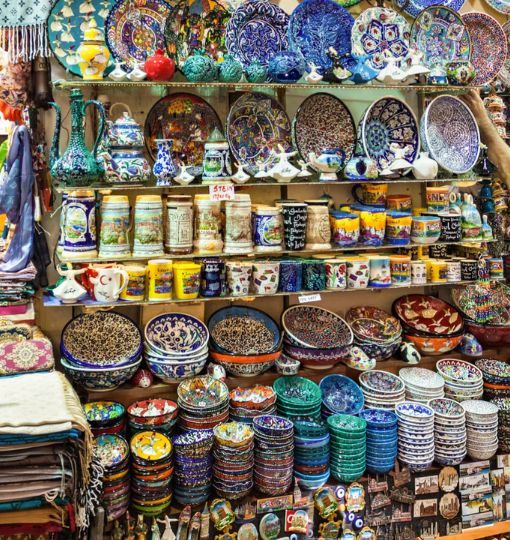
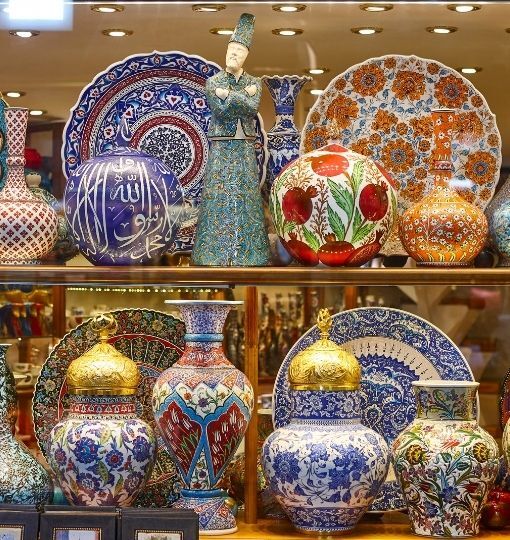
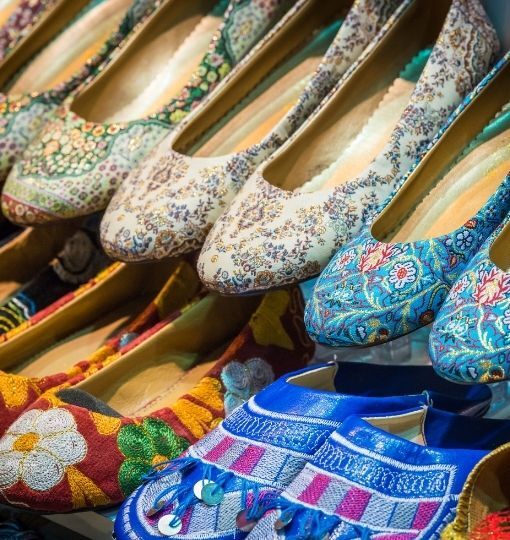
Discover the best souvenirs in Istanbul—from intricate Turkish ceramics and the iconic evil eye to fragrant spices and handwoven carpets. These cultural keepsakes capture the heart of Turkey, making perfect gifts or personal mementos. Plus, save time shopping by skipping queues at major sites with the Istanbul Tourist Pass®.

Istanbul grew where continents meet, and its spirit still carries notes from every culture that once sailed into the Golden Horn. Byzantine mosaics share the skyline with Ottoman domes. Songs from ferry decks mix with the call to prayer. This mosaic life also lives in the cafés, where conversation rises above clinking glasses of tea […]

Istanbul glows when summer arrives. Street musicians fill the air with music, ferry horns echo across the Bosphorus, and every district sets the stage for festivals, pop-up markets, and late dinners under the stars. Families can find playgrounds on every corner while friends drift from waterside cafes to amazing rooftop concerts. Long daylight hours invite […]
Istanbul never hides its landmarks, yet some of its finest corners sit just above eye level. Ferries dock at Eminönü, vendors pour tea, and pigeons whirl around the New Mosque. Look up from the square and you will see a small stone bridge leading to a modest two-story building. This is the Hünkar Pavilion, once […]
.png)
Istanbul is a city of waterfront palaces. Marble façades line the strait, each one built for days when sultans escaped the heat of the Old City. On the Asian shore, north of the crowded bridges, Küçüksu Pavilion rests in a small meadow between two streams. Sailors once called this spot “Sweet Waters.” Today the pavilion […]
Istanbul wakes up to the call of seagulls and the clatter of trams. The city’s bridges join two continents, yet its old markets still feel like car-free time capsules. Traders call out in many languages as aromas drift through narrow lanes. Follow the tram to Eminönü and you step into this world. The […]
Istanbul lives on two continents and grows along two coastlines. If you wish to visit Istanbul, you will find many landmarks are in the 'must-see' lists. Mosques rise beside glass towers, and ferries glide under bridges that join Europe and Asia. In this layered city, every neighborhood has a story that reaches back centuries. Today […]

Istanbul is a metropolis of more than fifteen million people, spread across Europe and Asia. The Bosphorus slices the city in two, and steep hills and narrow lanes shape many districts, especially the historic quarters on the peninsula. In this complex landscape the metro is not just handy; it is the backbone that keeps daily […]
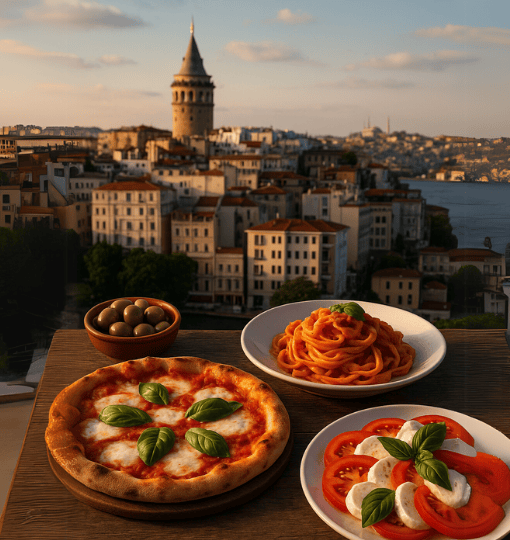
Istanbul’s food scene is a living collage. Ottoman palace recipes mingle with Armenian meze, Greek seafood, Kurdish stews, and modern global bites. Into this colorful mix, Italian cooking slips in almost effortlessly because the two shores of the Mediterranean already share olive oil, tomatoes, and a love of lingering over the table. Today you will […]
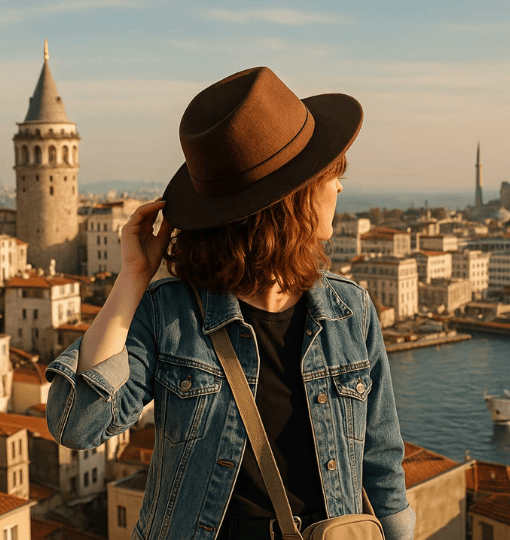
Hello, London friend. Picture this. You swap the grey morning drizzle of Camden for the call of gulls over the Golden Horn. Your Oyster card turns into a digital Istanbul Tourist Pass® that unlocks palaces, ferries, and hidden art corners with one quick scan. The city greets you with the smell of fresh simit, the […]

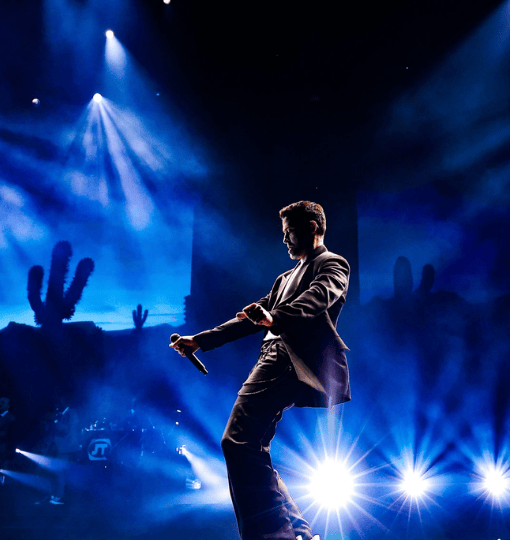
Istanbul never sleeps and 2025 proves it once again. Festivals light up the Bosphorus, small clubs echo with new sounds, and huge open-air shows pull global stars into the city every month. Travelers mix with locals on warm summer nights and share the same rhythm. Music is part of daily life here, as essential as […]

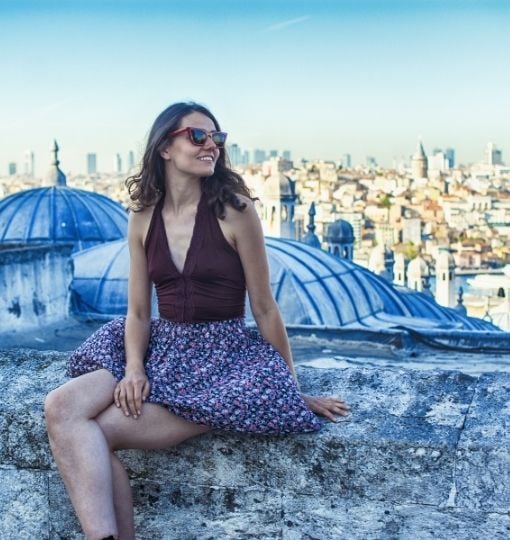
One city that defies clichés is Istanbul. This vibrant, ever-evolving city is a blend of innovation and tradition, where women play a vital role in many aspects of life, and modernity and history coexist. Whether you are a student, an expat, or a lone tourist, Istanbul has something to offer everyone. From its rich history […]

Istanbul is a city that always feels alive. Its skyline rises between two continents and two seas. Filmmakers love this mix of east, west, old, and new. From James Bond to arthouse dramas, countless shows and movies have chased light in its winding streets and grand palaces. Istanbul Encyclopedia brings a fresh gaze […]

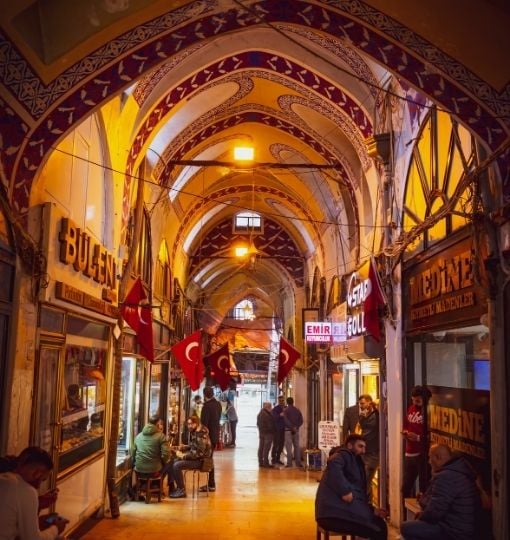
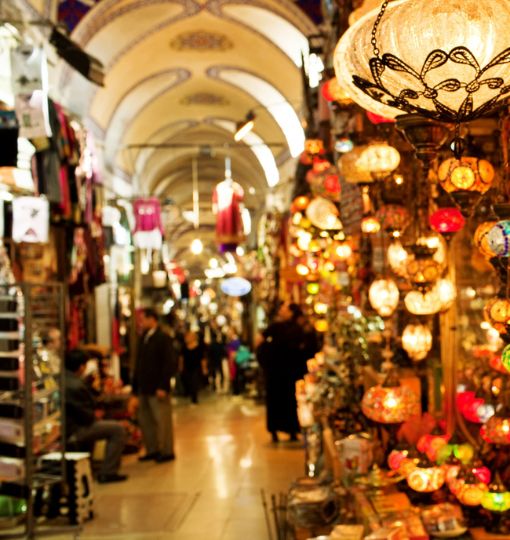
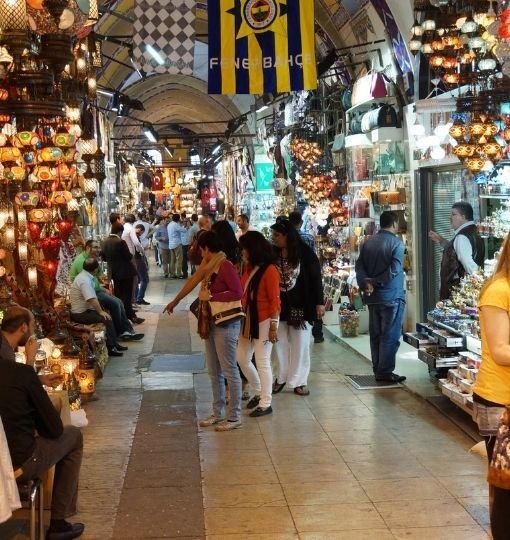
Explore the best shopping spots in Istanbul, from historic bazaars like the Grand Bazaar to luxury shopping in Nişantaşı. Find everything from Turkish delights to high-end fashion and unique souvenirs, and make your shopping experience even better with Istanbul Tourist Pass®.
Istanbul is a city that never sits still. Ferries criss-cross the Bosphorus, prayers drift from slender minarets, and side streets burst into sudden song. Yet behind all the movement, the city keeps pockets of calm where artists think, cats nap, and conversations spill out of tiny cafés. One of those pockets is Cihangir. […]

Istanbul spreads across two continents like a living mosaic. Palaces and buzzing bazaars fill the European side, yet a quick ferry ride lands you in Kadikoy on the Asian shore where life slows down. Street markets spill onto wide sidewalks, musicians play on corners, and sunset turns the Bosphorus a soft shade of gold. This […]

Summer in Istanbul feels like a festival on its own. Sunlight gilds the Bosphorus, open-air stages pop up in palace courtyards, and every week another rooftop turns into a dance floor. From sunset cruises to marathon concerts, the city invites you to hop between landmarks, museums, and late-night gigs without ever losing sight of that […]
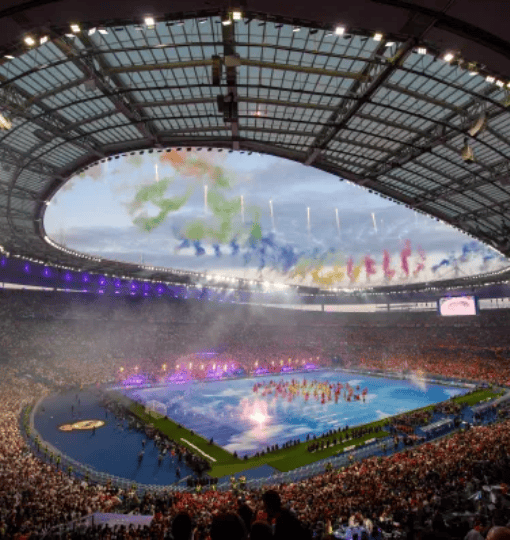
Will you be in Istanbul on Saturday, 31 May 2025? Save the date. From 3.00 PM the Ritz‑Carlton rooftop turns into a football festival. A huge LED screen will show the Champions League Final live. DJs will keep the beat between the key moments. Chefs will serve gourmet street food that feels right at home in this city of […]
Summer in Istanbul has a soundtrack of its own. Ferries glide across the Bosphorus, café terraces fill with laughter, and music drifts from every corner of the city. From open‑air jazz evenings in Sultanahmet to indie gigs in Kadıköy parks, July is festival season here. This year, one of the biggest dates on the calendar […]

Few cities sing the way Istanbul does. From late‑night jazz on the Bosphorus to indie showcases in back‑street Kadıköy bars, the city’s music scene is a thrilling crossroads where East meets West and tradition flirts with tomorrow. On any given night you can slip from thumping techno in a converted hamam to a saz‑led folk […]
.jpg)
Join the Istanbul Tourist Pass® Giveaway for a chance to win a 3-night stay in the heart of Istanbul and free access to 100+ top attractions!
.png)
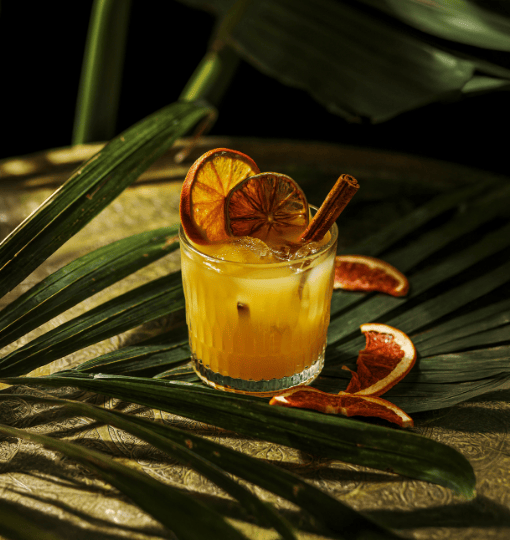
Picture this: You step out of the elevator onto a rooftop. The lights of Istanbul flicker below. The first thing you notice is the smell! The aroma is of grilled lamb, warm spices, and a hint of citrus. Someone hands you a cold glass of a delicious Welcome Cocktail. Across the room a darbuka […]
Istanbul has always been a city where contrasts meet and melodies mingle. From the echo of the call-to-prayer drifting over the Bosphorus to indie gigs hidden in Karaköy basements, the metropolis hums with sound. Galleries pop up in old hans, experimental theater fills repurposed factories, and rooftop bars shake each sunset with DJ sets that […]
Make Your Romantic Getaway Unforgettable Discover Istanbul’s most romantic spots with the Istanbul Tourist Pass! Skip the lines and enjoy intimate experiences with your loved one. Get your pass now and make your trip unforgettable!
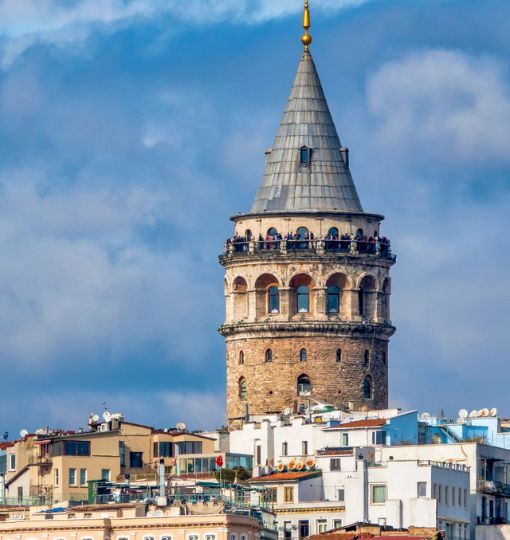
Explore Galata with Ease Discover the beauty and history of Galata with the Istanbul Tourist Pass! Skip the lines at top attractions like the Galata Tower and more. Get your pass today for an unforgettable experience.

Travel guides usually send you straight to mosques, palaces, and bustling bazaars; but if you really want to eavesdrop on a city’s heartbeat, grab a seat at a local stand-up show. Comedy compresses politics, pop culture, and everyday quirks into punch-sized stories, giving travelers instant insight into what makes residents roll their eyes or roar […]

Few cities swing so effortlessly between epochs as Istanbul. Minarets pierce a skyline crowned by Roman domes and Byzantine mosaics; neon-lit side streets thrum past midnight with indie gigs, Anatolian psych-rock, and hip-hop cyphers; ferries pulse across the Bosphorus, stitching Europe and Asia together in 20 breezy minutes. It is a metropolis that treats culture […]
.png)
Istanbul is one of the few cities that can easily combine old and new. The city is full of music, from the call to prayer resonating across the Bosphorus to late-night jazz coming from meyhanes on back streets. Its castles are the sites of chamber concerts and its parks are the settings for outdoor symphonies. […]
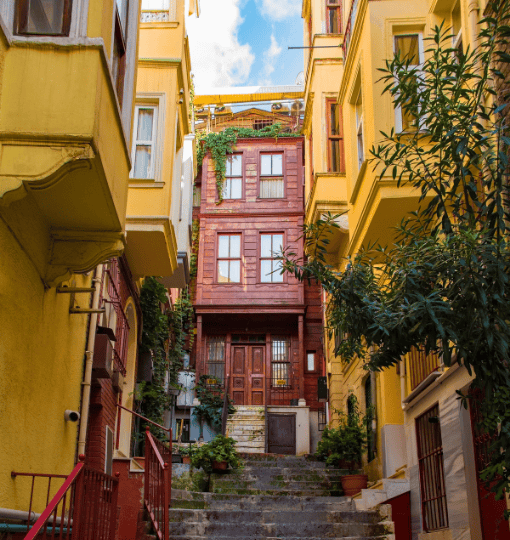
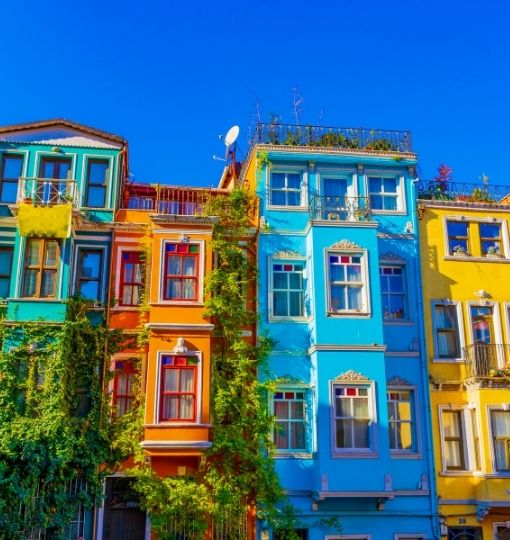
Discover Istanbul like a local! Explore hidden gems such as Kadıköy, Fener, and Balat, take a local ferry ride, and enjoy lesser-known food markets. Experience more with the Istanbul Tourist Pass.
Make Your Springtime in Istanbul Unforgettable Skip the lines and experience the best of Istanbul in spring with the Istanbul Tourist Pass. Get yours today and make the most of your visit to this beautiful city!
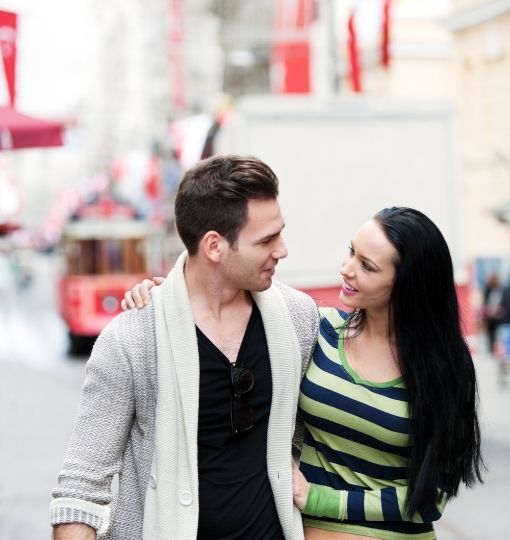
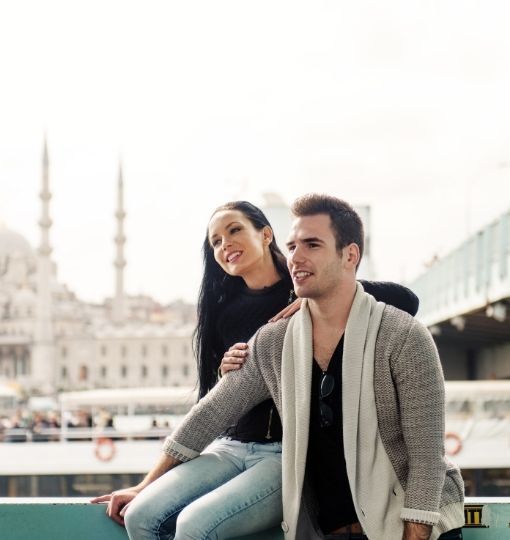
Explore the best couple things to do in Istanbul, from romantic sunset cruises on the Bosphorus to tranquil moments in Topkapi Palace gardens. Discover more with the Istanbul Tourist Pass.
Bring a piece of Istanbul home with you! Explore the city’s cultural souvenirs, from Turkish rugs and ceramics to delicious Turkish delight and traditional evil eye beads. Discover more with the Istanbul Tourist Pass.
Summer in Istanbul feels easy. Days are long, the breeze off the Bosphorus is gentle, and most evenings settle at a friendly 25 °C. Street corners fill with buskers, ferries glow under string lights, and rooftop bars stay busy until the small hours. It’s the season when the city seems to put on a show […]
Explore Istanbul’s most iconic attractions with the Istanbul Tourist Pass! Skip the lines and enjoy a smooth, unforgettable adventure. Get your pass now and make the most of your time in the city!
Experience Istanbul Indoors Don’t let the rain stop you! With the Istanbul Tourist Pass, you can skip the lines and explore top indoor attractions like Hagia Sophia, Topkapi Palace, and more. Get your pass today!
Istanbul is a vibrant, dynamic city that never gets boring. In historical areas, ancient alleys nestle next to modern cafes; ships traverse the Bosphorus while seagulls sing above. Oh, be sure to give them simit! The markets are busy during the day, and at night, the water sparkles.Music drifts from tiny bars, and new art […]
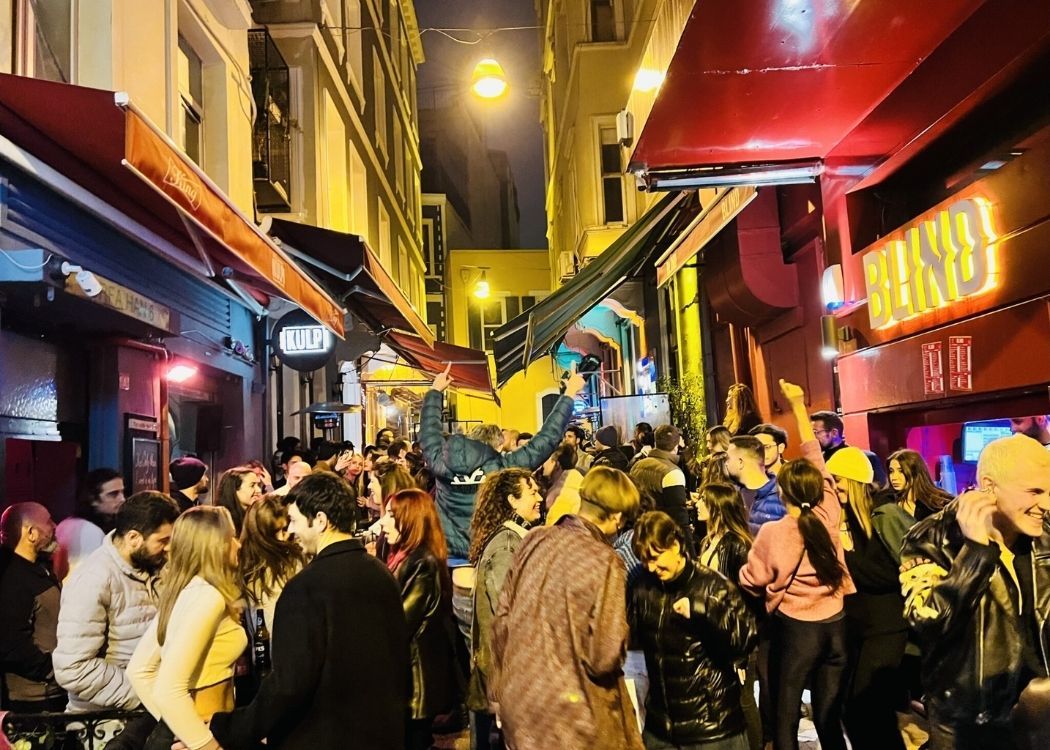
Discover the Best of Istanbul at Night! From scenic Bosphorus cruises to historical landmarks, Istanbul’s nightlife offers something for everyone. Explore vibrant streets, enjoy rooftop bars, and immerse yourself in Turkish culture with an unforgettable experience. Book your Istanbul Tourist Pass now!
Istanbul is a vibrant city with a lot going on all the time. Art exhibits overflow into ancient squares, open-air concerts reverberate over the Bosphorus, and food markets crowd small streets. The schedule is crammed with cuisine, music, and cultural events from spring to late fall turning every weekend into a celebration. Among […]
Uncover the hidden gems of Istanbul’s Old City, from the Basilica Cistern to the vibrant Fener & Balat districts. Explore the secrets of Istanbul with the Istanbul Tourist Pass.
Discover cozy indoor activities and explore Istanbul’s vibrant culture even on the coldest days. From museums to traditional hammams, make the most of winter in Istanbul with the Istanbul Tourist Pass!
Shop the Best of Istanbul. Skip the lines and shop till you drop with the Istanbul Tourist Pass! Enjoy access to top attractions and shopping experiences in Istanbul. Get your pass today!
Discover the Best of Sultanahmet Explore Istanbul’s historic district with ease! Get your Istanbul Tourist Pass today for skip-the-line access to Hagia Sophia, the Blue Mosque, Topkapi Palace, and more!
.jpg)
Istanbul, a city where history, culture, and modernity collide, is an incredible destination for all types of travelers. But not everyone has the energy or desire to rush around, especially when vacationing. If you’re the kind of traveler who likes to take it slow and enjoy the city at a relaxed pace, you're in for […]
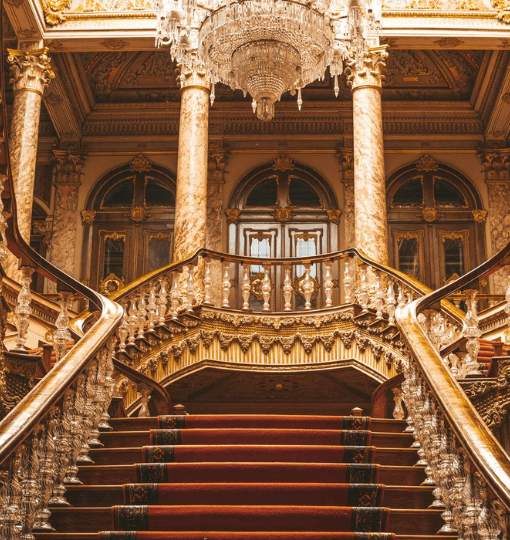
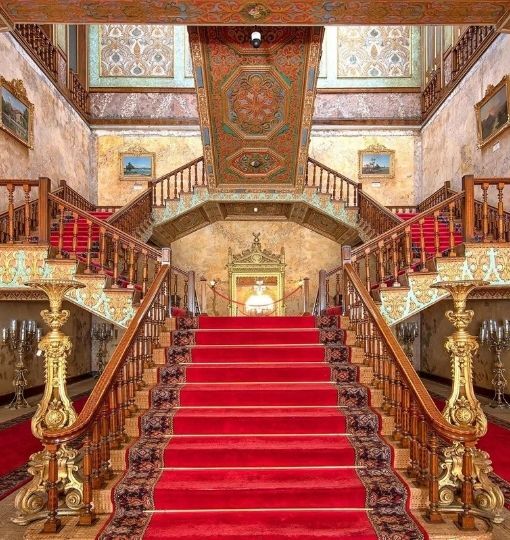
Visiting Dolmabahce Palace with a skip-the-line ticket and audio guide is the perfect way to explore this 19th-century Ottoman gem at your own pace with Dolmabahce Palace Skip-the-Line Entry & Audio Guide. To help you make the most of your experience, here are locally-informed tips covering everything from cultural insights to on-site practical advice. Enjoy […]
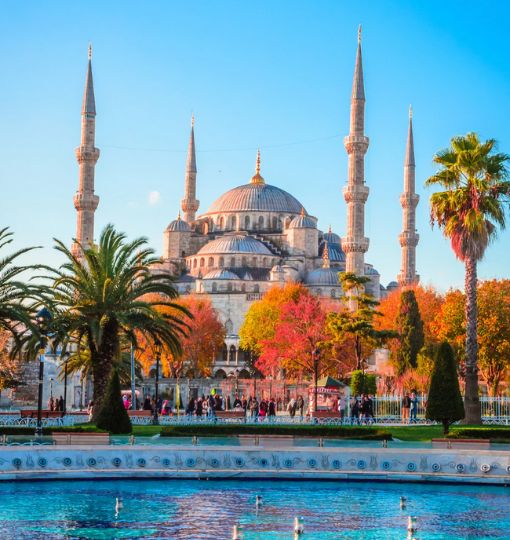
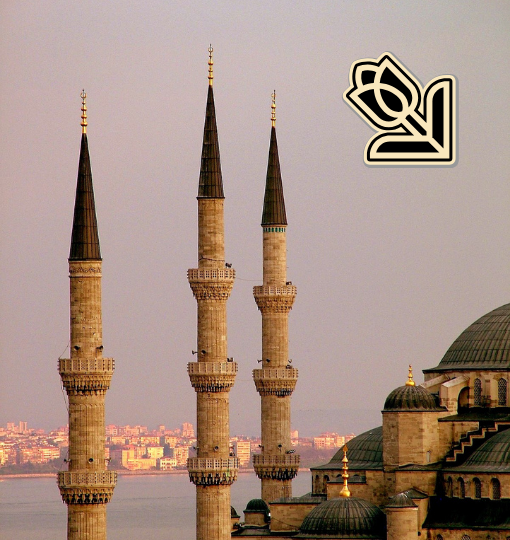
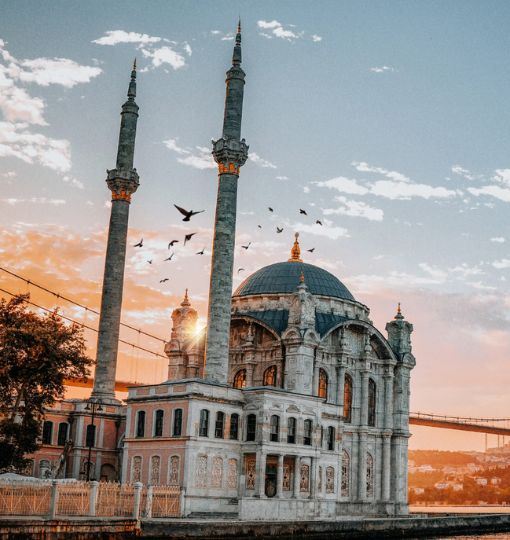
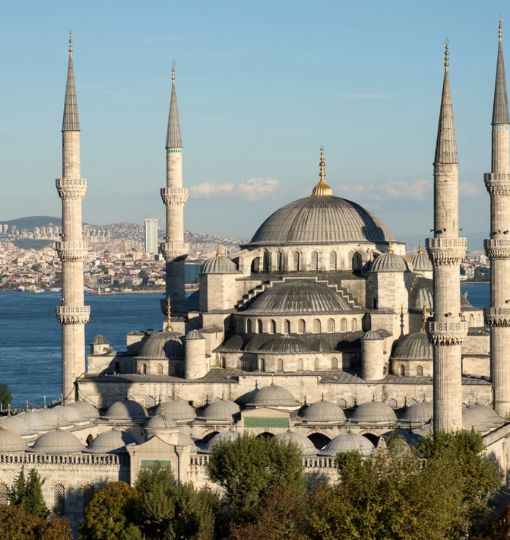
Explore the breathtaking mosques of Istanbul beyond the Blue Mosque, from the Süleymaniye to the Ortaköy Mosque. Dive deep into Istanbul’s architectural and cultural treasures with the Istanbul Tourist Pass.
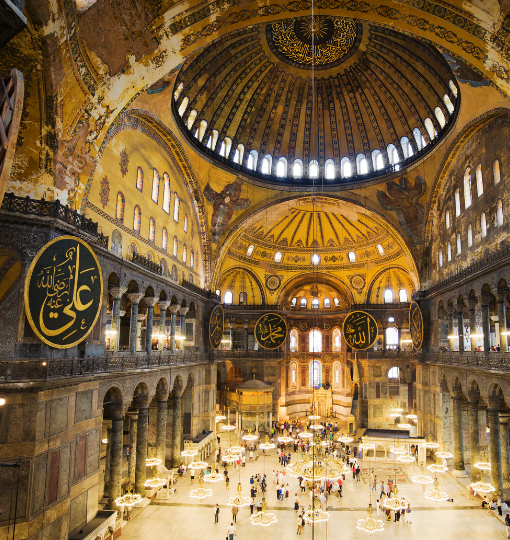
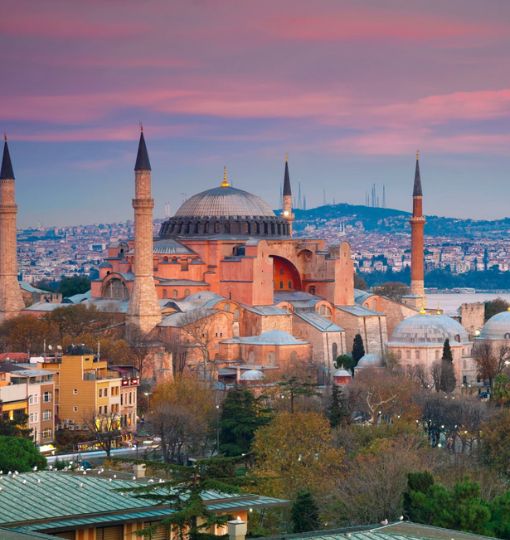
Hagia Sophia, a symbol of Istanbul’s rich history, is a unique blend of Byzantine and Ottoman architecture. Originally built as a church, then converted into a mosque, and later a museum, it stands as a testament to the city’s cultural and religious evolution. Explore its stunning mosaics, impressive dome, and fascinating history with the Istanbul Tourist Pass!
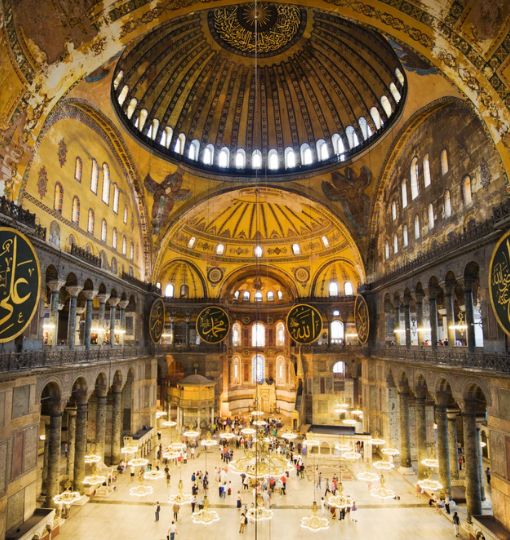
Discover 10 lesser-known facts about Hagia Sophia, one of Istanbul’s most iconic landmarks. From its construction in the Byzantine era to its role as a mosque and museum, explore the architectural wonders, historical transitions, and cultural significance that make it a timeless symbol of the city.
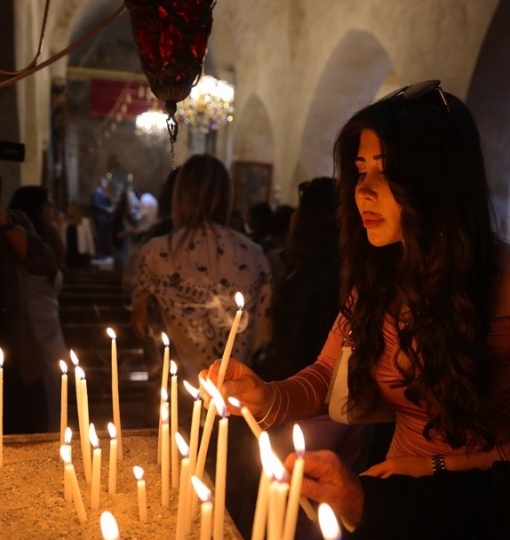
Spring in Istanbul is a sensory festival: tulips set Gulhane Park ablaze with exuberant color, boats cut across a sparkling Bosphorus where dolphins sometimes appear, and cafes spill back into sun-warmed pavements. Christians all over the world commemorate Easter during this seasonal reawakening, a festival of resurrection and regeneration. Though Turkey's population is mostly Muslim, […]
Maximize your 24 hours in Istanbul with the Istanbul Tourist Pass®! Skip the lines and explore top sights like Hagia Sophia, the Blue Mosque, and the Bosphorus Cruise. Your perfect day in Istanbul starts here!
.jpg)
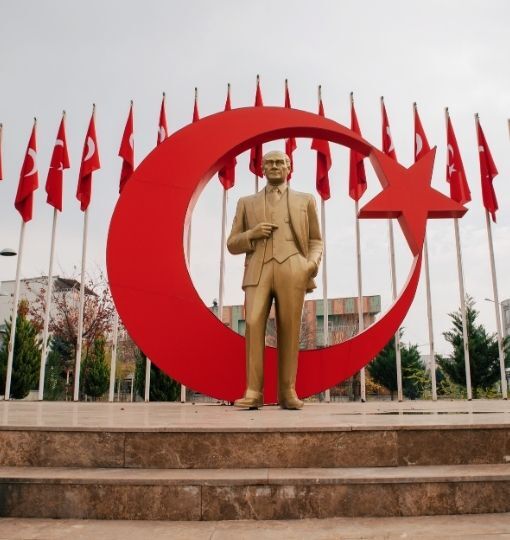
Napoleon Bonaparte once said, “If the Earth were a single state, Istanbul would be its capital.” Istanbul is truly amazing, and though Ankara holds the title, Istanbul is definitely the cultural, historical, and economic center of Türkiye. Istanbul has always been a bridge between East and West, past and present, given its unusual position as […]
.png)
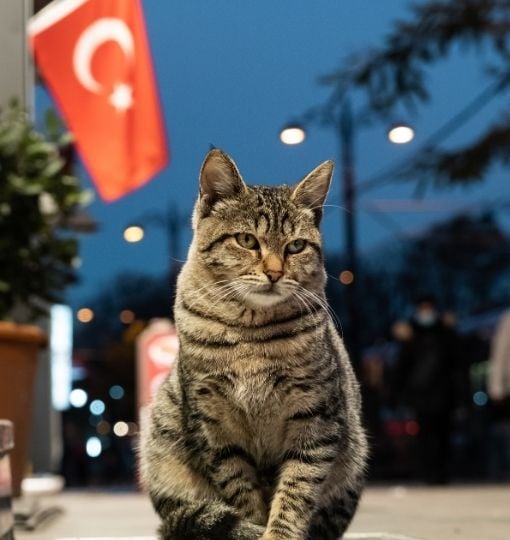
The most surprising meetings in Istanbul, a city where centuries-old mosques and palaces rub sides with busy bazaars and modern cafes, usually leave the most impact. Among its shining attractions—from the majesty of Hagia Sophia to the mystery of the Basilica Cistern—there now sits a modest, chonky tale resting in the center of the city: […]

Apocalyptica is coming; this summer in Istanbul is about to get loud! Istanbul, get ready! With events and performances illuminating the city for every sort of music enthusiast, summer 2025 is building up to be amazing. From pop and indie to EDM and jazz, there's something for everyone. For the metalheads out there, […]

Planning a family trip to Istanbul? You’re in for an unforgettable adventure! Istanbul, a city where East meets West, offers an exciting blend of history, culture, nature, and entertainment — perfect for families traveling with children. Whether you’re visiting for a few days or planning a longer stay, there are plenty of things to do in Istanbul with kids that will entertain, educate, and create lasting memories for your little ones.

deneme

No city quite like Istanbul, where East meets West, where historical marvels mix effortlessly with contemporary energy, and where every corner tells a narrative. Renowned for its ageless beauty, rich cultural legacy, and strategic position at the crossroads of continents, Istanbul is not just a destination for tourists but also a powerhouse for global trade […]
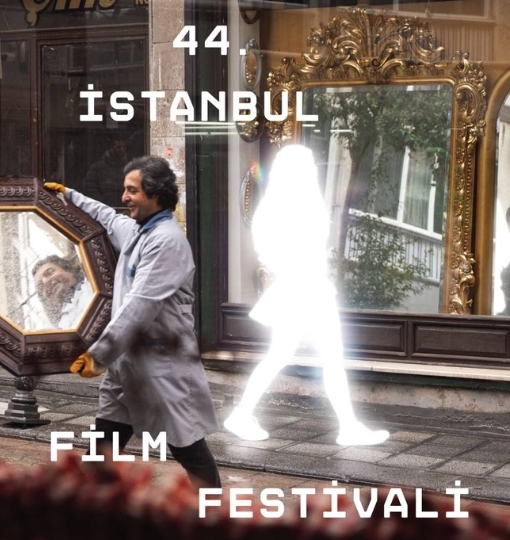
Once again, Istanbul has put out the red carpet for one of its most eagerly awaited cultural events of the year: the 44th Istanbul Film Festival, run by the Istanbul Foundation for Culture and Arts (İKSV). From April 11 to 22, the city changes into a center of cinematic brilliance, greeting film enthusiasts, renowned directors, […]
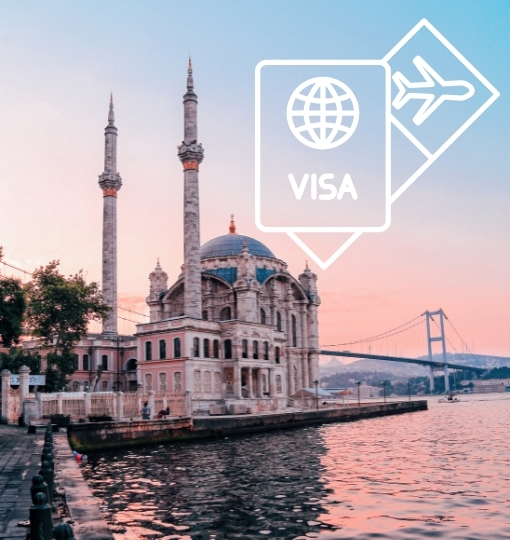
Istanbul is a magical city, and we believe that visiting Istanbul has been on your bucket list for so long! Understanding the visa rules at first seems like a difficult chore while planning a trip to Istanbul; but, you need not worry as we are here to assist you in simplifying the procedure! The process […]
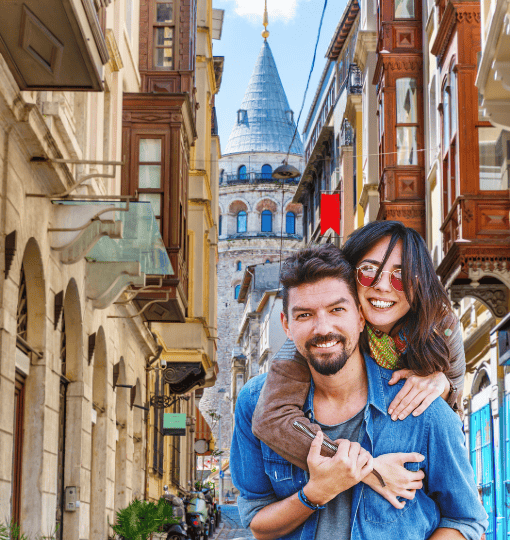
Istanbul is unique among all locations on Earth. A city straddling two continents where the call to prayer reverberates down historic passageways and trendy cafés serve flat whites just around the corner. It's where Roman, Byzantine, and Ottoman traditions live on—not just in the majestic palaces and mosques, but in the rhythm of daily life. […]
.jpg)
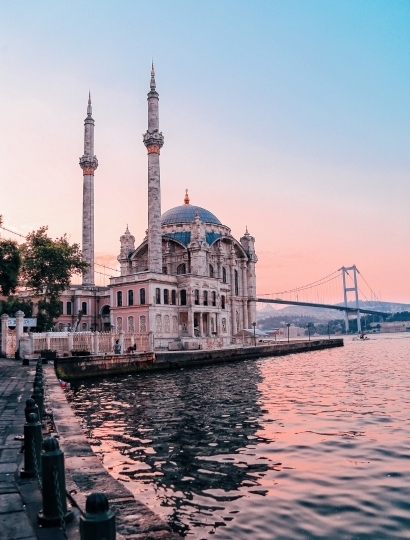
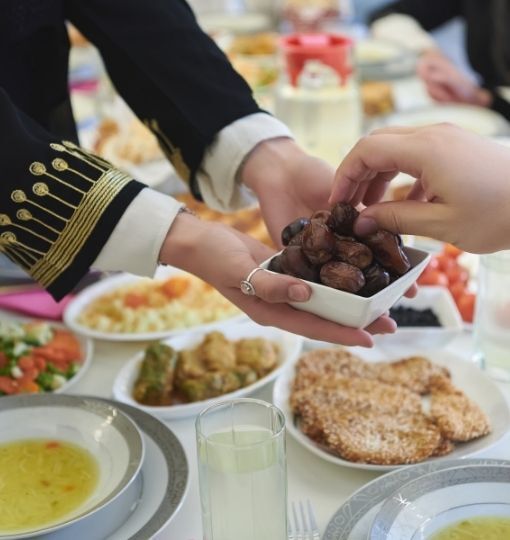
Istanbul is a vibrant and colorful city where the rich mixture of history, culture, and traditions intertwine beautifully, creating an enchanting atmosphere that makes experiencing Ramadan truly captivating. In this blog post, we will dig into one of the most special times of the year in this amazing city: Ramadan in Istanbul. First of all, […]

The Istanbul Museum Pass® opens the doors to some of the most iconic museums and historical sites across the city, making it the ultimate companion for those eager to explore Istanbul’s vibrant history and culture. With access to a curated selection of landmarks, including the breathtaking Hagia Sophia, the Topkapi Palace, and the Istanbul Archaeological […]
Istanbul Tourist Pass® Validation In order to extend your Istanbul Tourist Pass®, you can contact us. It is important that you contact us before your pass ends so that you can have a seamless experience. Istanbul is a magical city with tens of attractions to discover, and it is very normal to want […]
Touch down in Istanbul and the city feels huge at first, yet it starts to shrink as soon as you pick up the Unlimited Istanbul Transportation Card. This little card lets you ride every metro, tram, bus, ferry, funicular, and even the nostalgic red streetcar on İstiklal. You tap once and glide from the Grand […]
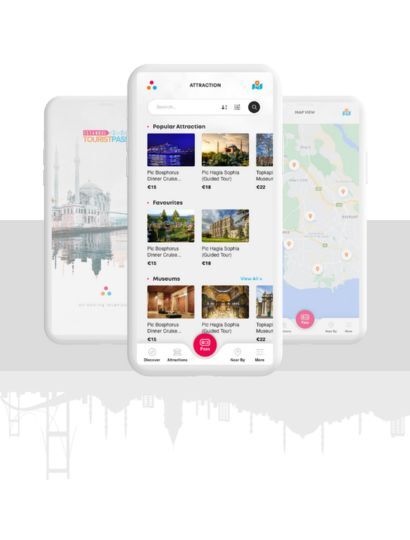
Discover Istanbul with ease using the Istanbul Tourist Pass® App! Our interactive map, powered by Google Maps, helps you locate attractions, get directions, and estimate travel times. With everything at your fingertips, Istanbul is in your hands! How Do I Get the Istanbul Tourist Pass® App? Once you purchase your Istanbul […]

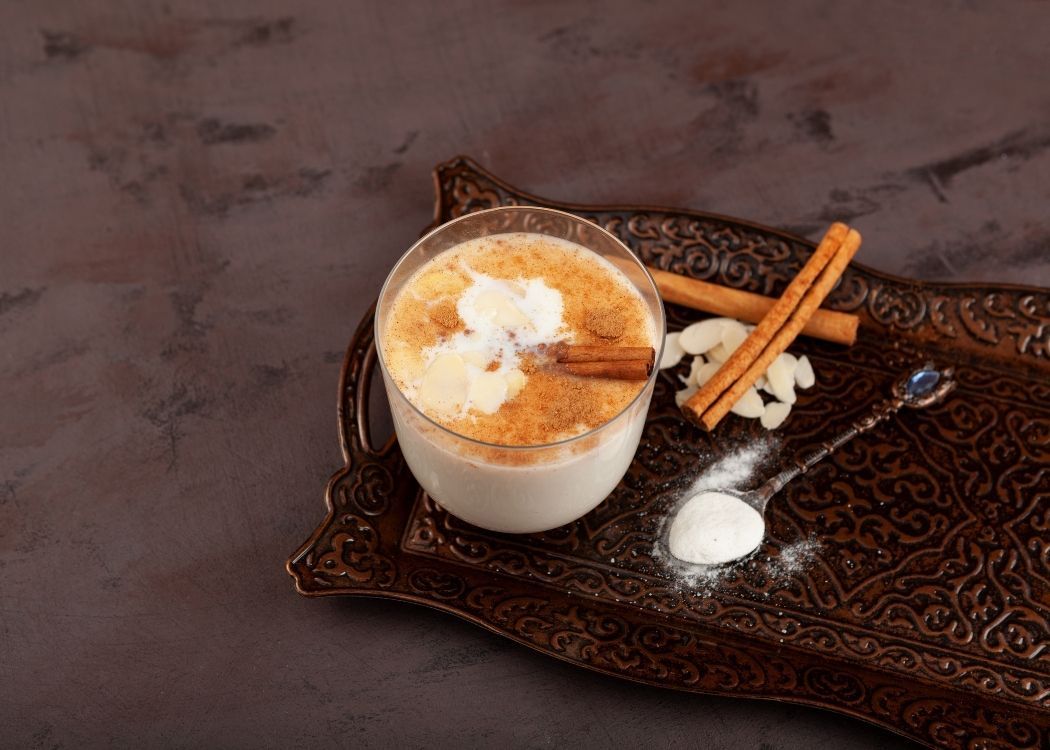
January in Istanbul In Istanbul, January is an amazing month to enjoy indoor activities and warm drinks. January is chilly and mostly rainy. Even if the sun is still out at the start of the month, the weather turns overcast towards the end, and snowfall is a possibility. The average temperature is 8 […]
Istanbul is a remarkable city that serves as a connection between different continents, diverse cultures, and a rich history spanning many centuries. This destination is characterized by its extensive historical background, impressive architectural designs, and lively ambiance, all of which contribute to a travel experience that is truly unique and unmatched. Every tourist who is […]

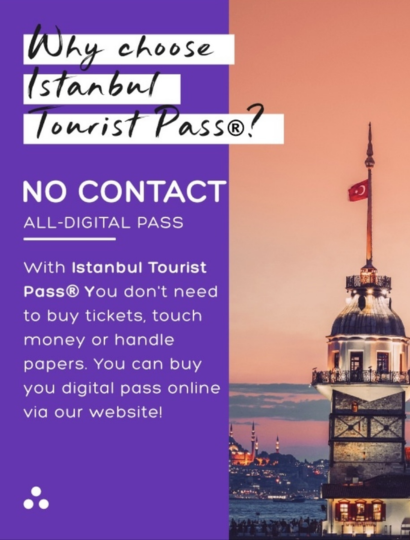
Istanbul Tourist Pass® will let you welcome easy exploring instead of lengthy lines. With just a QR scan, our innovative Show&Go technology lets you rapidly visit famous sites, therefore removing waiting periods and improving your sightseeing experience. Furthermore, the interesting audio guides provided allow you to explore Istanbul's rich history and cultural beauties at your […]
Exploring Istanbul has never been easier! With the Istanbul Tourist Pass®, you can unlock the city's top attractions, enjoy hassle-free entry, and save both time and money. Whether you're visiting iconic landmarks or seeking hidden gems, this guide will help you make the most of your trip. Why Choose Istanbul Tourist Pass for […]
For many people all over, visiting Istanbul is a dream. One of the most fascinating towns between Europe and Asia, it presents an unmatched fusion of history, culture, and modern energy. But efficiently seeing this large city might be difficult; that's why Istanbul Tourist Pass® is so helpful. The Smartest Approach to See […]
Istanbul is a city of countless beauties where modern vitality coexists with old legacy. There is something for everyone visiting from different parts and cultures of the world. From the magnificent Hagia Sophia to the stunning Bosphorus, this city has a narrative just waiting to be unearthed everywhere. With so much to see and do […]

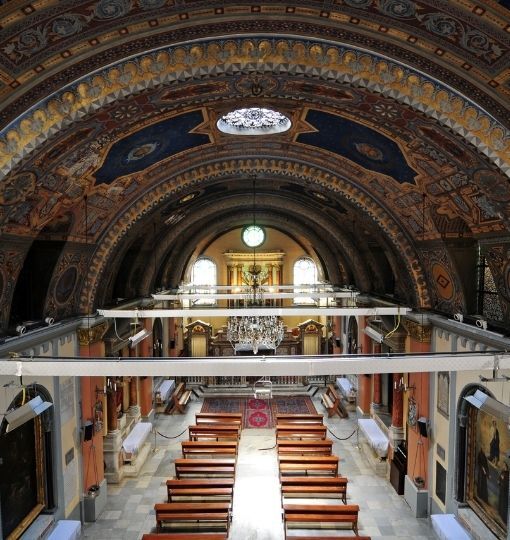
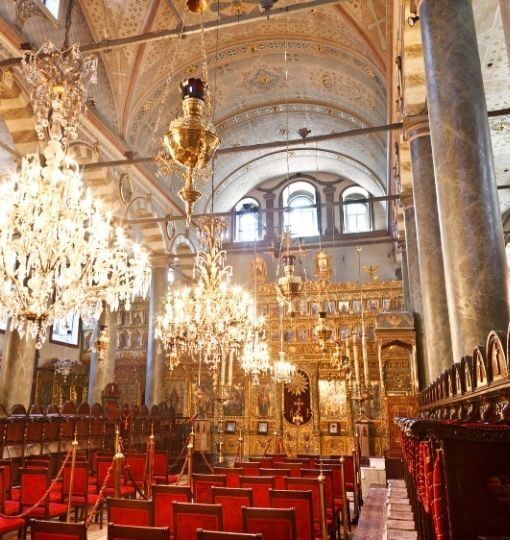
The Hagia Triada Church is a beautiful example of Istanbul's rich religious and cultural history. It is located in the busy district of Beyoğlu. Not just a place of prayer but also a living work of art that has endured the challenges of time, this amazing Greek Orthodox Church. Anyone wishing to investigate the many […]

Istanbul is a city where the past and current coexist most vibrantly and excitingly. From ultra-modern galleries to old bazaars, this city never gets old in inspiration. But Istanbul's appeal is in its neighborhoods, each with a different atmosphere than its famous sites. The hippest areas of Istanbul are where the city's creative energy really […]
Istanbul has been a colorful fusion of cultures and traditions for ages. With its famous skyline of domes and minarets, labyrinthine streets alive with bustle, and waters shimmering with tales, Istanbul promises an experience unlike any other. It is a place where ancient histories mingle with thriving modern communities, where every corner could hold a hidden story and […]
Istanbul is a beautiful city with its unique characteristics, and if you reading this blog now, you probably have seen many card postal-like photos of Istanbul – many of which include iconic landmarks of the city! Today, we will have a look at the best places to see Istanbul and fall in love with the […]
Istanbul is a unique city not just because of its cultural and historical background but also because it is the only city that connects two continents in the world. Being the connection point of Asia and Europe, the city is a bridge that connects two different worlds. Tourists coming from all over the world generally […]
.jpg)
Istanbul is a great city that has been the cultural center of many empires, cultures, and religions. From the early ages to the 21st century, the city has always attracted people from all over the world. Today, as of 2025, it is one of the most crowded and multicultural cities in the world. In this […]
.jpg)
Istanbul is a great city where cultures meet, blending the rich history of the East and West. This beautiful city has been the capital of three empires: Roman, Byzantine, and Ottoman, leaving behind countless landmarks that tell stories of the past. Among these treasures, Hagia Sophia stands as a masterpiece and a symbol of architectural […]
.jpg)
Istanbul, a city that seamlessly blends ancient history with modern culture, is a living, breathing tapestry of colors, sounds, and experiences. From the bustling streets of Taksim to the serene waters of the Bosphorus, Istanbul offers something for every traveler. Yet, beyond the iconic landmarks like Hagia Sophia and the Blue Mosque, lies a treasure […]
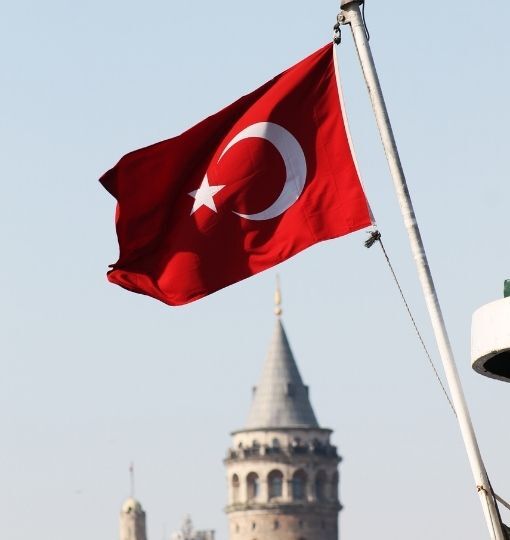
If you visit Istanbul on October 29th, a unique experience awaits you! Republic Day celebrates the founding of the Republic of Turkey, and it is a special day for both the Turkish people and tourists exploring this historic city. Every year, lively events, concerts, and celebrations fill the streets of Istanbul, creating a festive atmosphere. […]

Every October, beer enthusiasts worldwide come together to celebrate the traditional spirit of Oktoberfest. This year, the enchanting streets of Istanbul will host vibrant events that reflect the joyful atmosphere of Bavaria. This special festival is filled not only with beer but also with music and dance performances, making it one of the most amazing things […]
Turkey's rich history is reflected in its stunning palaces, especially in Istanbul, where imperial architecture shines. The city's palaces, each with its own story, represent different historical periods and showcase artistic and architectural excellence. These sites offer a look into the grand Ottoman past and are top places to visit in Istanbul, promising an unforgettable […]
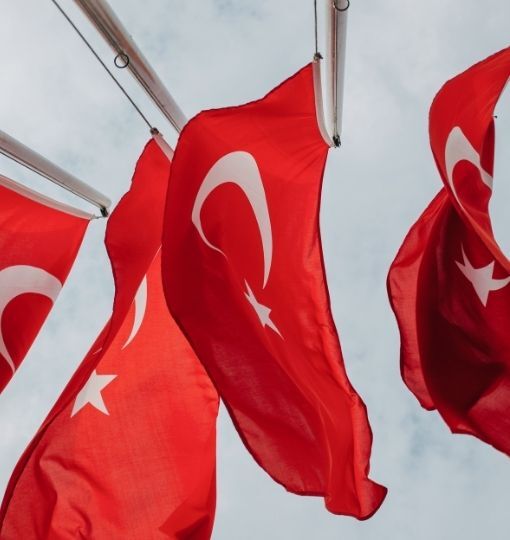
You will see Turkish flags and enthusiastic celebrations everywhere, if you visit Turkey on August 30th. This enthusiasm stems from celebrating August 30th, Turkey's national Victory Day. This important day symbolizes the great victory of the Turkish nation in the struggle for independence and freedom. Every year, this date is celebrated as a proud […]
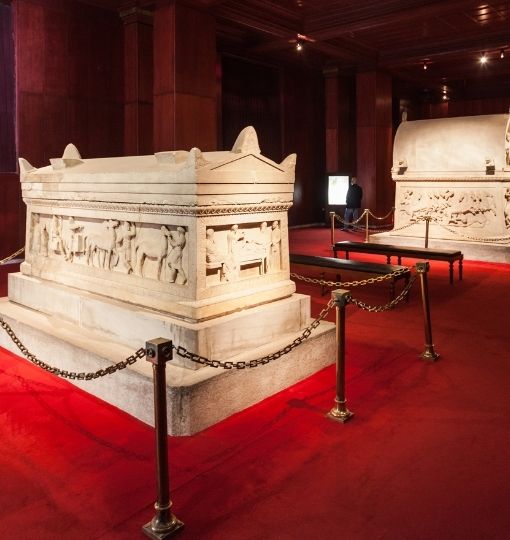
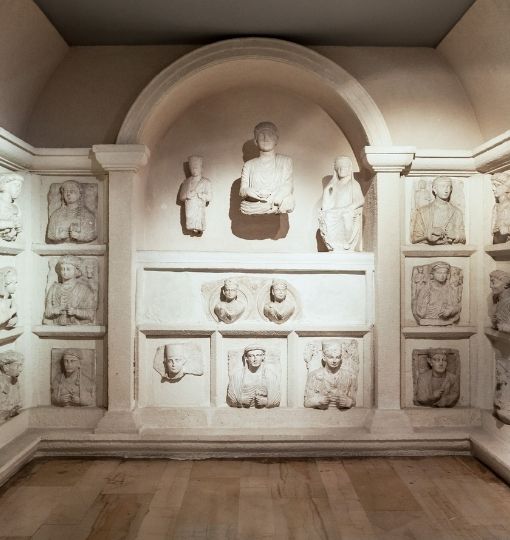
One of the most impressive points of Istanbul is undoubtedly the Istanbul Archaeological Museums. Thousands of artifacts from a wide geography ranging from the pre-Islamic periods of Anatolia to Mesopotamia, Greece, Egypt and the Arabian Peninsula await their visitors here. This museum is a treasure trove for archaeology enthusiasts and offers the opportunity to travel […]

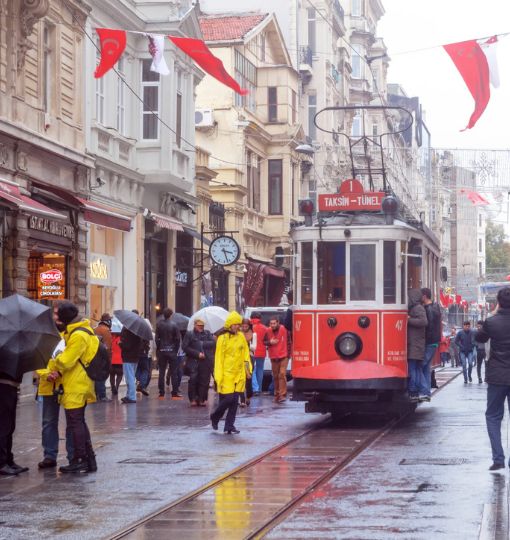
Taksim Square is the perfect starting point for exploring Istiklal Street. You can visit Istiklal Street all day long, starting from Taksim Square. Exploring Taksim and Istiklal Street individually with a great free audio guide offered by Istanbul Tourist Pass® provides a more efficient experience. With this audio guide, you can be informed and have […]
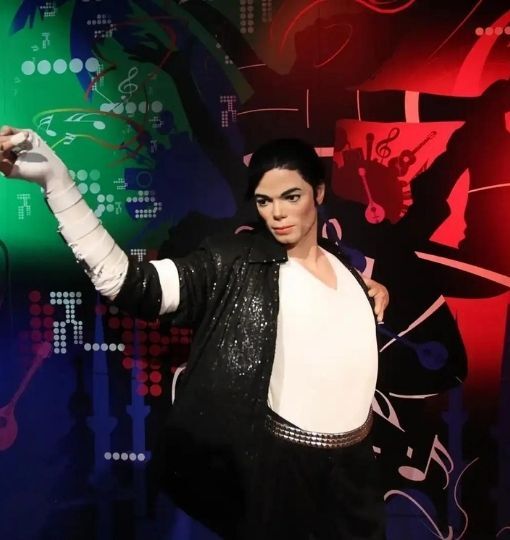
Madame Tussauds is a wax museum headquartered in London with 24 locations worldwide. The wax statues exhibited in this museum generally represent various famous people, from historical figures to famous actors, successful athletes, movie characters, and musical artists. Its branches include Hong Kong, Tokyo, Sydney, Berlin, Amsterdam, New York, and Istanbul. Madame Tussauds, […]
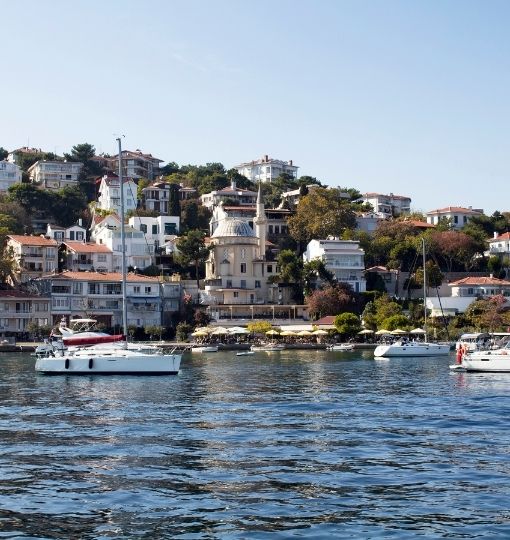
Burgazada is the third largest island of the Princes' Islands. Burgazada is the third largest island of the Princes' Islands and is located in the calm waters of the Marmara Sea. Get ready to experience this unique experience in Burgazada. This island offers unique experiences for every visitor, from day trips to long-term […]
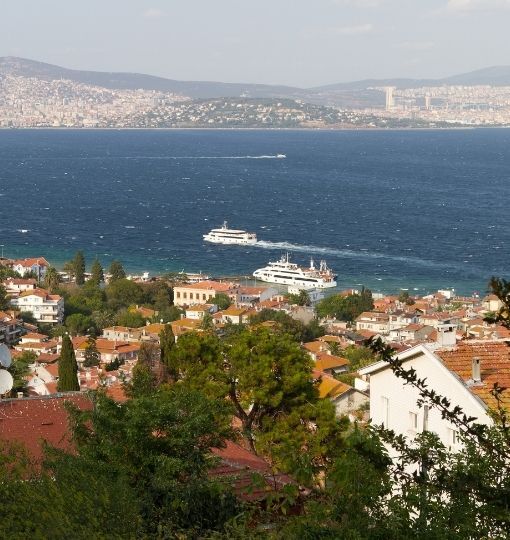
Leave behind the bustling energy of Istanbul and venture into the serene charm of Heybeliada for a day of delightful exploration. This tranquil island warrants dedicating an entire day to immerse yourself fully in its beauty and peaceful ambience. While it may seem like a substantial time commitment, the rewards of this experience are undoubtedly […]
Displaying dazzling beauty in the calm waters of Istanbul, the Princes' Islands are an essential destination for those seeking a peaceful escape from the city's crowds. In order of increasing size, the four main islands, each extensively settled (the Turkish word "Ada" means island), are Kinaliada, Burgazada, Heybeliada (Greek, Halki), and Buyukada (Greek, Prinkipos). […]
Istanbul's history extends from the Roman Empire to the Ottoman Empire. It is almost an open-air museum with traces from each period. The magnificence of Hagia Sophia from the Byzantine period and the riches of Topkapi Palace architecture of Suleymaniye Mosque are just a few examples of the city's historical and cultural heritage. […]
Istanbul is a city that stands out with its rich history and culture. It bears the traces of many civilizations throughout its thousands of years of history. This long and diverse history has made Istanbul one of the most important cultural centers in the world. The city contains artifacts from different periods on every corner. […]
Istanbul is a unique city that has hosted many civilizations throughout history and contains traces of different cultures. Its strategic importance, with its geographical location connecting Asia and Europe, includes traces from different periods. It was the capital of the Roman Empire, followed by the Byzantine Empire and then the Ottoman Empire. These […]
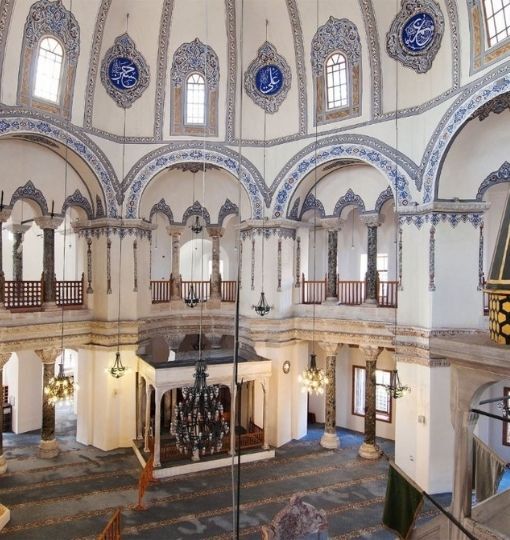
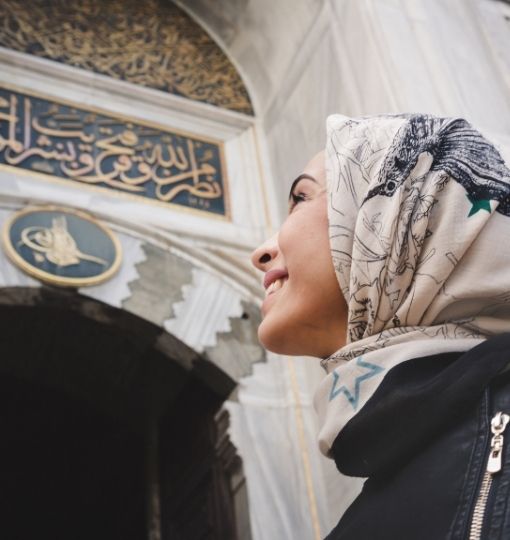
Istanbul, a city that brings two continents together, is renowned for its stunning architecture, vibrant culture, and rich history. Among its most iconic landmarks are the beautiful mosques that dot the skyline, each offering a glimpse into the city's Islamic heritage. For first-time visitors, stepping into these sacred spaces can be a profoundly moving experience. […]
Ah, Istanbul! A city that straddles two continents, bursting with history, culture, and mouthwatering cuisine. Its vibrant energy and enchanting allure make it a must-visit destination. However, arriving in this bustling metropolis can be overwhelming, especially when faced with the challenge of navigating a complex public transport system during rush hour. After a long flight, […]

Cruise ships are dream holiday places for many people, and also for me -the writer of this blog. If you are lucky enough to realize this dream make sure you get off the ship and enjoy the cities chosen in your cruise itinerary. Especially if Istanbul is on your list, get excited because there is […]
In the heart of Turkey's bustling metropolis, Istanbul, lies a day of profound significance — Democracy and National Unity Day. Observed annually on July 15th, this day marks a pivotal moment in Turkey's modern history, commemorating the resilience of its people and the strength of its democratic values. For those fortunate enough to find themselves […]
Turkey is a land of breathtaking beauty, where every corner tells a story of its rich history and diverse culture. Istanbul, in particular, stands out as a city of surprises, where ancient mosques stand alongside bustling bazaars and modern skyscrapers. Its unique blend of East and West creates an enchanting atmosphere that captivates visitors from […]
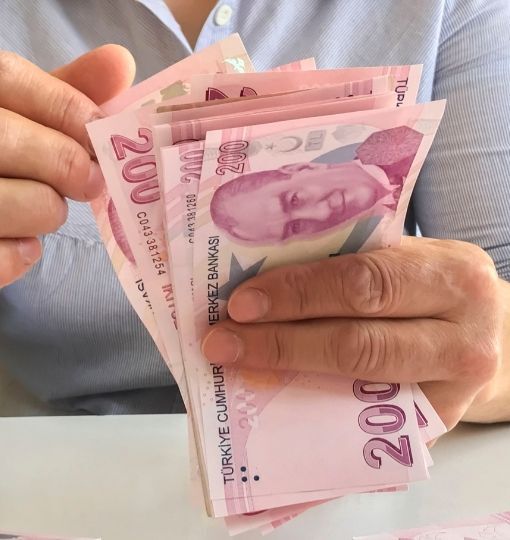
In the mosaic of Turkey's rich culture, understanding its currency is a fundamental thread for any visitor. Navigating the complexities of Turkish currency is practical and enhances the immersive travel experience. From the vibrant markets of Istanbul to the otherworldly landscapes of Cappadocia, having a grasp of currency essentials ensures smooth transactions and fosters deeper […]
Istanbul, where East meets West and history unfolds on every plate, is a treasure trove for food lovers. From Ottoman delicacies to vibrant seafood mezes, the city tantalizes taste buds with an explosion of flavors. Let's embark on a culinary journey through 10 of Istanbul's most authentic restaurants, each offering a unique glimpse into the […]
Istanbul, a city where the past seamlessly blends with the present, offers a perfect destination for a weekend getaway. With its rich history, stunning architecture, and vibrant culture, Istanbul has something to offer every type of traveler. In this article, we'll take you through a two-day itinerary to make the most of your weekend in […]

Istanbul is the city where the East meets the West with ancient domes harmonizing with modern skyscrapers, Istanbul invites you to savor its beauty from every corner. From Sultanahmet's cobblestone streets to the lively shores of the Bosphorus, each view tells a unique story. To truly capture the essence of this timeless metropolis, take to […]
Istanbul is full of colors, spices, and music. One of the most colorful places in this amazing city is the Eminonu Neighbourhood. In this article, we will delve into the Eminonu and Sirkeci together and discover both well-known and hidden gems of these places. But before we dig into Eminonu and its richness, let’s have […]
Istanbul, a city where the past and present coalesce in a harmonious dance, beckons travelers with its vibrant markets, historic landmarks, and warm hospitality. As you embark on your journey through this enchanting metropolis, it's essential to understand the unspoken guidelines that weave through the fabric of Istanbulite culture. Join us on a cultural exploration […]
Istanbul, a city steeped in history and vibrant culture, unfortunately, attracts its fair share of scammers who prey on unsuspecting tourists. While most locals are welcoming and honest, it's always wise to be cautious and aware of common schemes to avoid spoiling your trip. For this article, we have prepared a list for you of […]
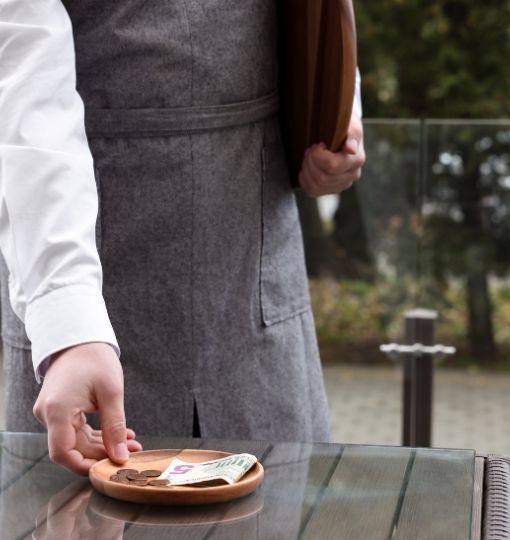
Istanbul, the vibrant heart of Turkey, offers a unique blend of history, culture, and culinary delights. While exploring this fascinating city, understanding the local tipping culture is crucial for ensuring a smooth and respectful experience. For this article, we have prepared a guide to navigating Istanbul's tipping culture for you. But before we dig into […]
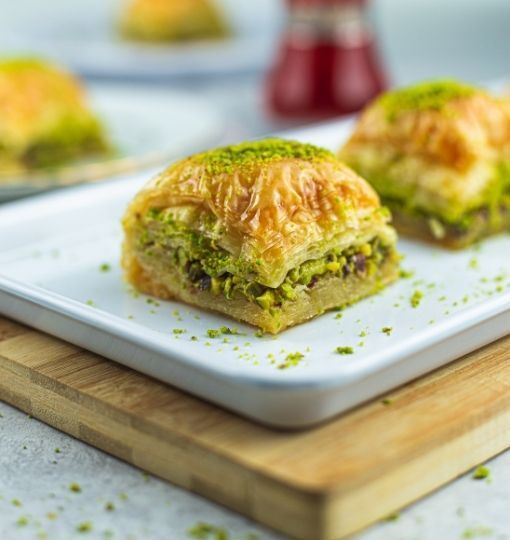
Dear readers, today we will have a journey around Istanbul to discover the amazing sweets culture. If you have a sweet tooth, beware yourself, this journey will be delicious! Turkey, with its rich history and diverse cultural influences, boasts a culinary scene that's as vibrant as its landscapes. Among the many treasures in Turkish cuisine, […]

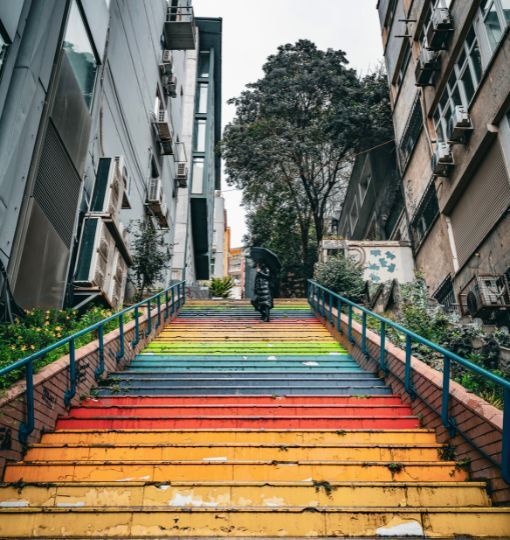
Istanbul is a city full of history, culture, and vibrant energy. But beyond the iconic mosques, bustling bazaars, and ancient ruins, lies a hidden network of secret alleys transformed into captivating art installations, such as the "Umbrella Streets." These charming streets, adorned with cascading umbrellas overhead, offer a whimsical escape from the city's hustle and […]

Istanbul is full of things to see. Diverse culture and deep history lie hand in hand in this amazing city. Museums, ancient remains, historical mosques, and churches are on one hand, vibrant modern art galleries, contemporary fairs, and interactive museums on the other Istanbul is one of the few capitals of the world bringing past […]
Istanbul is a city full of wonders, from its ancient history to its bustling streets, it is one of the greatest capitals of the world. One of the most iconic landmarks in Istanbul is the Golden Horn, a natural harbor that has played a vital role in the city's development for centuries. The Golden Horn […]

Istanbul, the heart of the Ottoman Empire, is a city steeped in history and culture. Now, it is a vibrant metropolis that embraces its rich heritage while also looking towards the future. During the Ottoman era, Istanbul was a melting pot of cultures and religions, and this is reflected in the city's many festive celebrations. […]

Istanbul is a vibrant and cosmopolitan city with a rich culinary tradition. Whether you're looking for fresh produce, local delicacies, or international brands, you're sure to find it at one of the city's many supermarkets and grocery stores. For visitors to Istanbul, it's helpful to have a basic overview of the different types […]
Love is in the air in Istanbul in November! As the city's autumnal charm gives way to the crisp embrace of the upcoming winter, Istanbul takes on a romantic and alluring ambiance that's hard to resist. The city's charming streets, adorned with the golden hues of falling leaves, provide the perfect setting for couples seeking […]

Turkey, a country known for its rich history and vibrant culture, can indeed surprise tourists with its unique approach to restroom facilities. Two main types of toilets are commonly found in Turkey: the traditional "alaturka" and the Western-style "alafranga" toilets, providing visitors with a distinctive bathroom experience. Beyond the unique restroom experiences, Istanbul […]
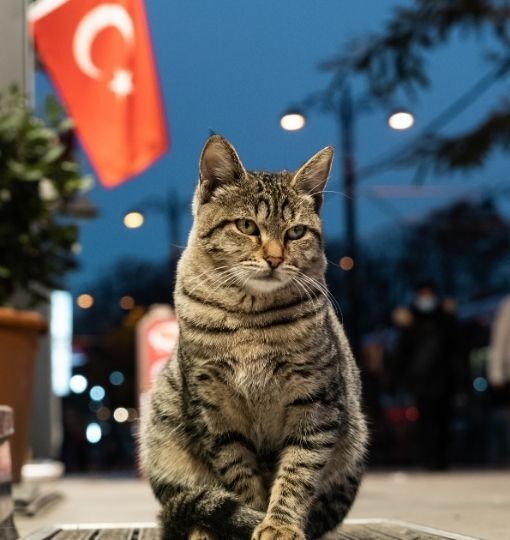
In the enchanting streets of Istanbul, there exists a unique tapestry of life where centuries-old traditions and modern-day delights converge. Istanbul, often endearingly called "Catstanbul," is home to a population of cats that have roamed these historic streets for generations. As these feline residents gracefully weave their way into the hearts of locals and visitors […]
As summer's heat gives way to the cooler embrace of autumn, Istanbul transforms into a captivating wonderland in October. This is the month when the city offers pleasant weather, fewer crowds, and a range of exciting experiences. If you're planning to explore Istanbul with your Istanbul Tourist Pass® in hand, October promises a journey filled […]

Istanbul, a city where East meets West, is not just a treasure trove of history and culture but also a vibrant hub for running enthusiasts. The running events in Istanbul offer a unique blend of athleticism, stunning scenery, and a journey through centuries of civilization. Whether you're a seasoned marathoner or a recreational jogger, Istanbul's […]
As the scorching summer sun begins to wane, September brings a refreshing change to Istanbul's climate and atmosphere. This beautiful month marks the start of autumn in this enchanting city, offering visitors a perfect blend of comfortable weather, fewer crowds, and a plethora of exciting experiences. If you're planning to visit Istanbul with your Istanbul […]

Nestled at the crossroads of Europe and Asia, Istanbul is a city that effortlessly marries the old with the new, creating a tapestry of cultures, history, and breathtaking beauty. Its sprawling skyline is adorned with minarets that reach for the heavens, while its vibrant bazaars exude an atmosphere of enchantment and wonder. From the historic […]
Istanbul is an unbelievably beautiful city that seamlessly blends the rich tapestry of its history with the vibrant energy of modern urban life. As you embark on your journey to explore this captivating metropolis, let the Istanbul Metro and other railway systems be your trusted transportation choice to navigate the treasures that await you. With […]
As the sun dips below the horizon, painting the sky with hues of orange and gold, Istanbul transforms into a mesmerizing canvas where history, nature, and modernity merge. Whether you're a traveler seeking breathtaking vistas or a photography enthusiast eager to capture the magic of the Golden Hour, Istanbul's sunset time scenes are nothing short […]

Istanbul, the enchanting city straddling Europe and Asia, comes alive in August with vibrant festivals, sunny beaches, and a plethora of cultural experiences. As the peak of summer, August brings scorching temperatures and a festive atmosphere that draws both locals and tourists alike. In this guide, we'll explore the highlights of Istanbul in August 2025, […]
Istanbul, a city renowned for its rich history and cultural heritage, conceals within its bustling streets a hidden gem of spiritual splendor—the Roman Catholic Church of Santa Maria Draperis. Standing proudly as one of the oldest Roman Catholic parishes in the city, this exquisite church has borne witness to centuries of cultural, religious, and historical […]

Welcome to an exciting journey through time as we explore one of Istanbul's most treasured architectural marvels, the Cercle d'Orient Building. Nestled in the vibrant district of Beyoğlu, this historic structure stands as a testament to the city's rich cultural heritage and the enduring spirit of a bygone era. But before we start let’s discover […]
Nestled in the heart of Istanbul's historic Asmalımescit neighborhood, a magnificent architectural treasure awaits those with an appreciation for beauty and history. Welcome to Casa Botter, an enchanting building that has gracefully transformed into an exhibition center, breathing new life into its storied past. Commissioned in the early 1900s by the esteemed Dutch tailor and […]
Welcome to Istanbul, a city where rich history, vibrant culture, and modernity intertwine. If you're wondering how to get to Sabiha Gökçen Airport from the bustling city center, look no further than the Istanbul Tourist Pass®. Our comprehensive pass not only grants you access to the city's top attractions and experiences but also provides seamless […]
Istanbul, a city steeped in rich history and cultural heritage, beckons travelers from around the globe. With its stunning architectural wonders like the majestic Hagia Sophia and the grand Topkapi Palace, Istanbul is anything but ordinary. And in the month of July, the city comes alive under the warm embrace of the summer sun, making […]

Istanbul, a city that straddles the continents of Europe and Asia, is not only known for its rich history and vibrant culture but also for its growing acceptance and inclusivity towards the gay and LGBTİ+ community. Over the years, Istanbul has emerged as a destination that embraces diversity and provides a welcoming environment for individuals […]
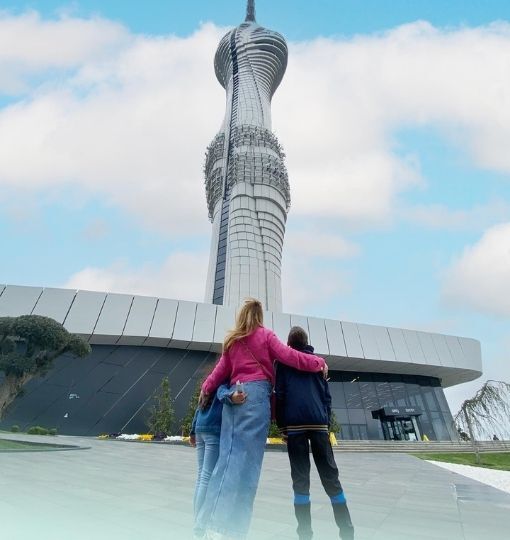
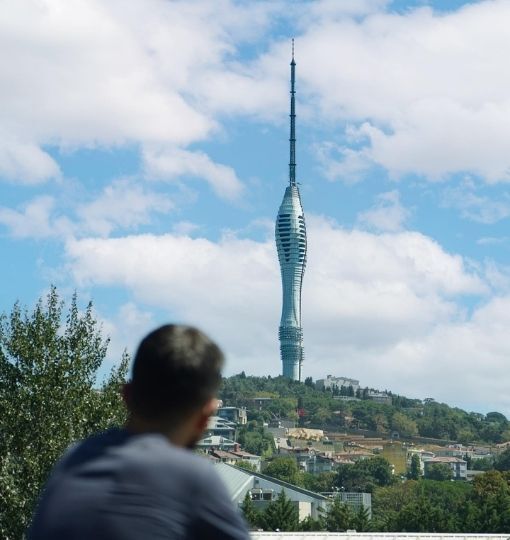
Discover Istanbul from new heights at Camlica Tower, the city's premier observation deck. Standing proudly at a towering height of 369 meters, this iconic landmark offers an awe-inspiring panoramic view of Istanbul's sprawling skyline. Whether you're a local resident or a curious traveler, Camlica Tower promises an unforgettable experience that combines breathtaking vistas, architectural marvels, […]

Sacrifice Feast, known as "Kurban Bayramı" in Turkish, holds great significance for Turkey and its people. This religious holiday is based on the Hijri calendar and is celebrated annually, occurring 11 days earlier each year according to the Gregorian calendar. In 2024, the eve of Eid al-Adha (Kurban Bayramı) will fall on Saturday, June 15, […]
Hagia Sophia, also known as Ayasofya, stands as a testament to Istanbul's rich history and architectural brilliance. This magnificent structure, with its captivating blend of Byzantine and Islamic influences, holds immense cultural and historical significance. In this article, we will explore the importance of Hagia Sophia delve into its architectural significance and beauty, highlight what […]

Istanbul, a city renowned for its rich cultural heritage, also boasts a lively music scene that attracts music enthusiasts from around the world. One of the most anticipated events is the MilyonFest Istanbul, the city's biggest open-air music festival. In this guide, we will delve into the energetic music scene of Istanbul, highlight the MilyonFest, […]

As one of the most vibrant and popular tourist destinations in the world, Istanbul welcomes millions of visitors each year. To ensure a safe and worry-free trip, it's important to familiarize yourself with the healthcare system in Istanbul. This comprehensive guide will provide you with valuable information about hospitals, medical services, and general healthcare in […]
June is a great time to visit Istanbul, Turkey. Especially, if you are thinking of getting a city break, then your route should be Istanbul! The weather is usually warm and sunny, with average temperatures ranging from 20 to 28 degrees Celsius (68 to 82 degrees Fahrenheit). It's a great time to explore the city […]

Looking for an exciting adventure that the whole family can enjoy? Look no further than the Flyzone included in Istanbul Tourist Pass®! With its wide range of attractions and activities, this pass is your ticket to endless fun and unforgettable memories. Among the top highlights of the pass is Flyzone, a thrilling flying experience available […]
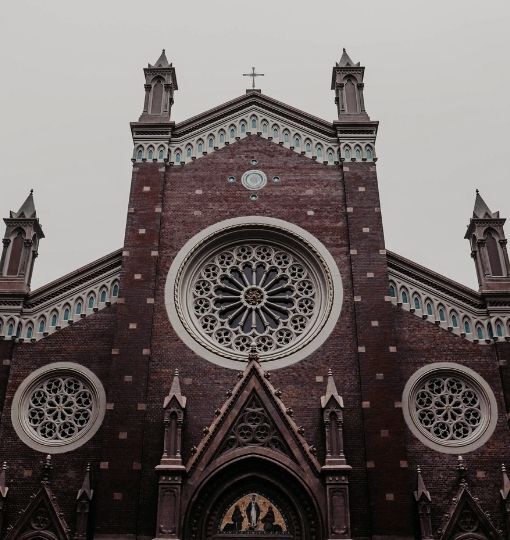
Nestled amidst the bustling streets of Istanbul lies a hidden gem that exudes beauty, serenity, and historical significance – the Church of St. Anthony of Padua or as in Turkish Sent Antuan Kilisesi. Tucked away in the vibrant Beyoğlu district, this captivating church is a testament to Istanbul's rich multicultural heritage. As you explore the […]
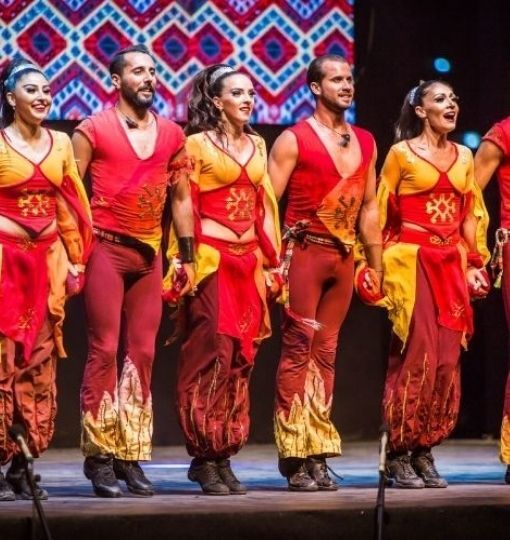
The Fire of Anatolia is a renowned Turkish dance group that has gained international acclaim for its captivating performances. Known for their dynamic choreography, vibrant costumes, and energetic music, they have become one of Turkey's most popular cultural exports. Introducing an exciting new addition to the Istanbul Tourist Pass® experience – a complimentary […]

Istanbul is preparing for the UEFA Champions League Final to be played at the Ataturk Olympic Stadium on June 10, 2023. The final match will kick off at 21:00 CET (22:00 local Istanbul time). Istanbul locals expect that about 50,000 fans will arrive in the city. It is not Istanbul's first time being […]
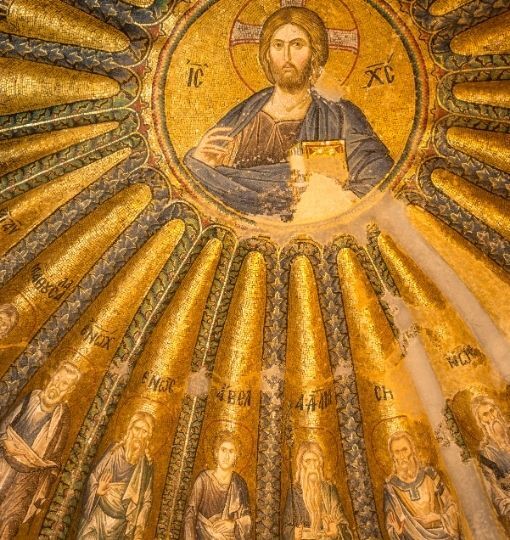
Located in the vibrant city of Istanbul, the Chora Mosque, also known as Chora Church, Chora Museum, or the Church of the Holy Saviour in Chora, stands as a testament to the Byzantine Empire's rich cultural and artistic heritage. This remarkable historical site, nestled in the Edirnekapı neighborhood, captivates visitors with its awe-inspiring mosaics and […]
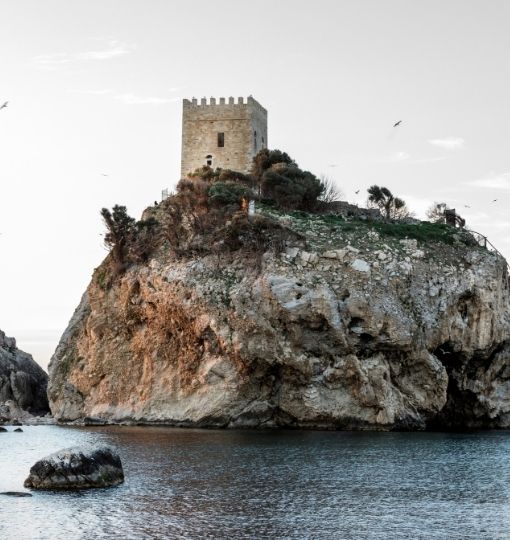
The towns of Sile and Agva, which are nestled along the Black Sea coast, provide a tranquil haven from Istanbul's hustle and bustle. These small communities, which are only a few hours' drive from the metropolis, are renowned for their breathtaking natural beauty, peaceful beaches, and classic architecture. Sile and Agva have something to offer […]
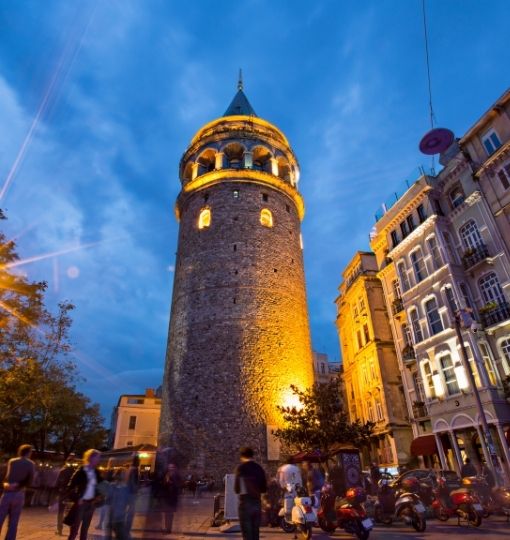
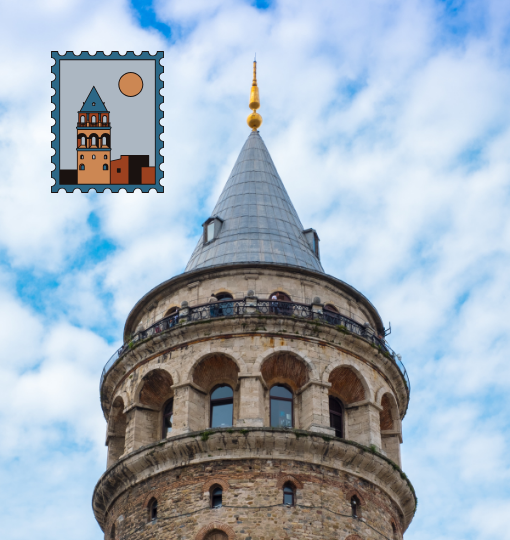
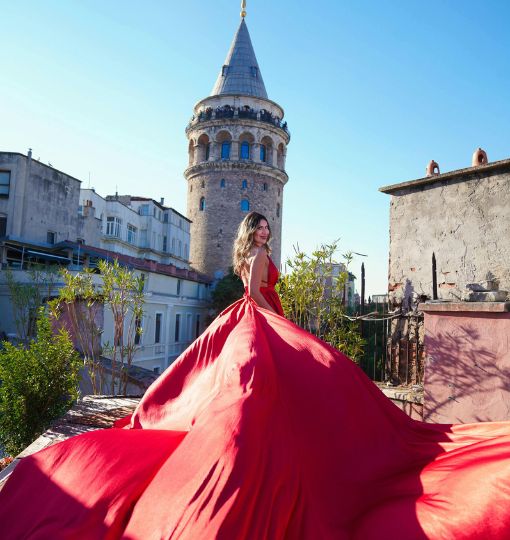
The Galata Tower is a historic stone tower situated in Istanbul, Turkey's Galata district. It was constructed in the Byzantine Empire in 1348, and over the years, it has served as a watchtower, a prison, and a fire tower, among other things. The tower has a cone-shaped top that provides an amazing panoramic perspective of […]
Located on the European side of Istanbul, Ortaköy is a charming and historic neighborhood that has become a popular destination for both locals and tourists. Situated on the banks of the Bosphorus Strait, which separates Europe and Asia, Ortaköy is known for its stunning views, lively atmosphere, and rich cultural heritage. Ortaköy was a Byzantine-era […]
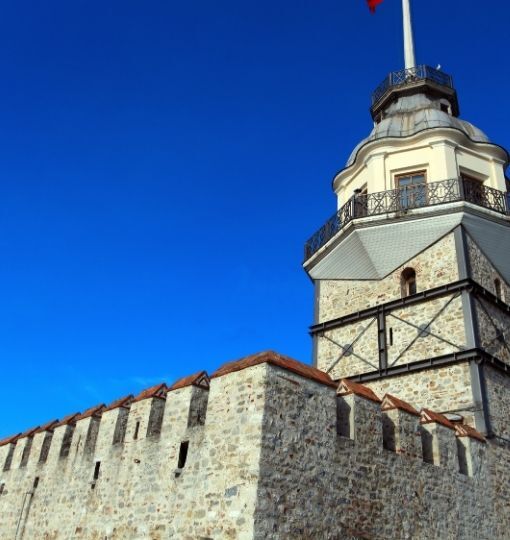
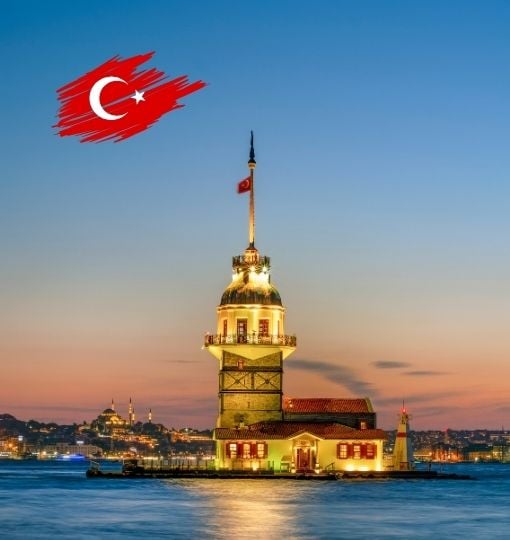
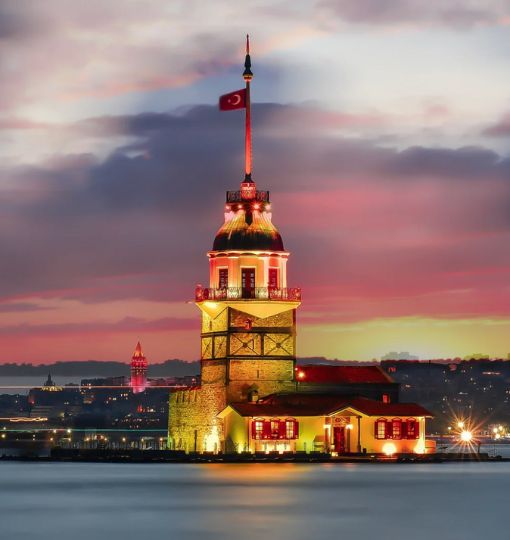
The Maiden's Tower, also known as Kız Kulesi in Turkish, is a small tower located on a tiny islet at the southern entrance of the Bosphorus Strait in Istanbul, Turkey. The tower has a history dating back to the Byzantine period, and it has been used for various purposes throughout history, including as a watchtower, […]

Istanbul in May is a magical time to visit this vibrant city, with its mild weather, blooming gardens, and bustling streets. The city is alive with cultural events, outdoor festivals, and colorful markets, offering visitors a unique opportunity to explore Istanbul's diverse neighborhoods, landmarks, and cuisine. May is the perfect time to stroll along the […]
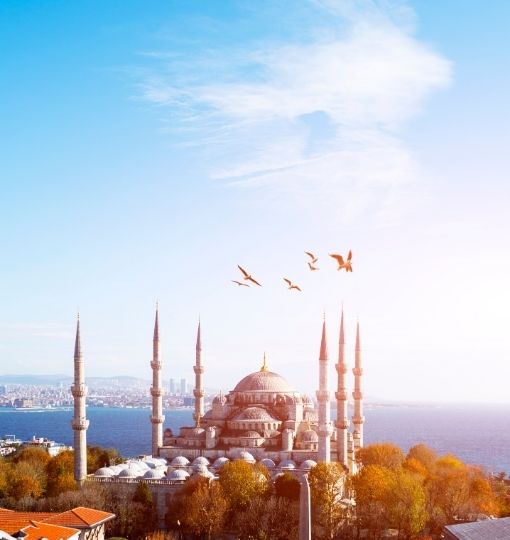
The Blue Mosque, also known as the Sultan Ahmed Mosque, is a historical mosque located in Istanbul, Turkey. It was built between 1609 and 1616 during the reign of Sultan Ahmed I and is one of the most famous landmarks of the city. Blue Mosque was under construction and it is reopened by April 2023. […]
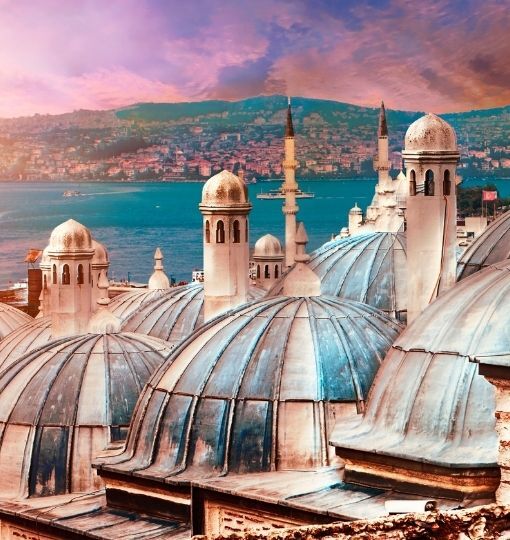
Suleymaniye Mosque is a magnificent Islamic monument that stands tall in the skyline of Istanbul. The mosque was commissioned by Sultan Suleyman the Magnificent and built by the renowned Ottoman architect Mimar Sinan. Located on the Third Hill of Istanbul, the mosque offers stunning views of the city and is considered one of the most […]
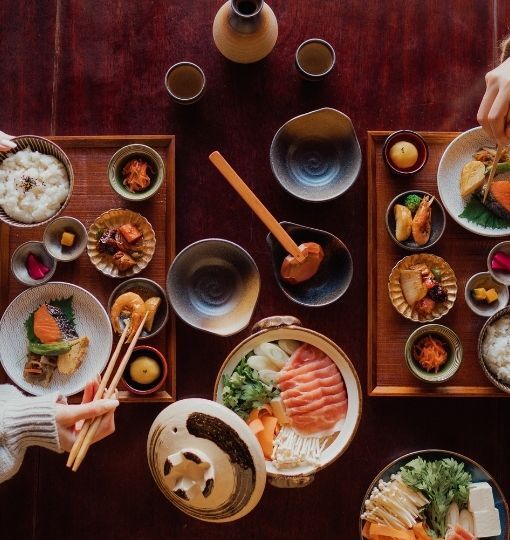
Istanbul is a melting pot of different cultures, and this is reflected in its diverse food scene. When it comes to Asian cuisine in Istanbul, there are many great options to choose from. From Japanese sushi to Chinese dim sum, Korean barbecue to Thai curries, Istanbul has it all. Many Asian restaurants in Istanbul are […]
Üsküdar is an ancient district located on the Asian side of Istanbul. This neighborhood has a rich history dating back to Byzantine times, and it's home to some of Istanbul's most important landmarks and tourist attractions. In this article, we are going to look at what you need to know about Üsküdar but before let’s […]
Istanbul is a beautiful city that offers plenty of activities and sights for families with kids. When planning a family trip to Istanbul, it's important to choose a hotel that caters to the needs of children and offers activities and amenities that will keep them entertained and happy. In this article, we are going to […]
Kadıköy is a bustling district located on the Asian side of Istanbul, Turkey. It's a lively neighborhood with cultural landmarks, delicious food, and fascinating sights. If you're planning a trip to Istanbul, in this article, we have gathered some of the best things to do in Kadıköy. But before we dig in, let’s have a […]

Istanbul is a city that attracts millions of visitors every year, with its rich history, culture, and delicious cuisine. However, one of the biggest challenges for travelers is finding affordable accommodation in the city. Fortunately, there are plenty of budget hotels and hostels that offer clean, comfortable, and affordable accommodations. In this article, we are […]
Istanbul is a beautiful city with wonderful things to do, see, and experience. One of the best things about this massive city is that it has many districts each having its own identity, culture, and lifestyle. In this article, we are going to look at one of the unique districts with a deep history and […]

If you are a vegan or vegetarian traveling, finding good vegan and vegetarian food can be a difficult task in places you visit. But don’t worry because especially during the past few years, Istanbul has become a great place to find various vegan and vegetarian options. Like in many metropolises in the world also in […]

April is the best time to visit Istanbul, especially in 2025. Spring officially begins in April in Istanbul, one of the most beautiful times in Istanbul. Now that winter has passed, the climate is gradually warming. One of the most picturesque cities to witness the change of seasons is Istanbul. Blooming flowers in beautiful parks, […]
Istanbul is a cosmopolitan city full of things to do, see, and experience. Generally, Istanbul is famous for its historical buildings, beautiful mosques, ancient churches, and amazing Bosphorus. But Istanbul has also vibrant city life and colorful nightlife. In this article, we are going to look at one of the unique places in Istanbul, Kilyos. […]
Istanbul is famous for its magnificent beauty and historical places. But if you drive a little away from the city center, you may come across also towns and villages with amazingly beautiful nature in Istanbul. In this article, we will have a look at one of the most popular small towns in Istanbul: Polonezkoy. […]
Istanbul has many amazing places to see and great things to experience. If it is your first time in Istanbul you may think that it is a great city with historical places and many of these places are in the old town area. But it is not completely true. Actually, Istanbul is a colorful metropolitan […]
Istanbul is a great city welcoming millions of visitors every year from all over the world. Tourists for amazing landmarks, patients for hair transplantation and many more operations, business persons for widening their business… Millions of visitors, many reasons to visit, a great destination for all: Istanbul. When you are visiting a city, […]
Istanbul has an amazingly rich history. There are many historical and natural wonders all around Istanbul, and Ihlamur Pavilion (Ihlamur Kasri) is one of them! Ihlamur means linden in Turkish. This is a place with a beautiful garden full of linden trees and it smells great, especially in Spring. So if you are in Istanbul […]
Istanbul is full of history and the most significant structures of this rich past are its beautiful places. Beylerbeyi Palace, one of the few remaining Ottoman imperial palaces on Istanbul's Asian side, continues to draw tens of thousands of tourists each year with its exquisite architecture and lush grounds. Be sure to visit this magnificent […]
Istanbul is beautiful in every season but there is one special time, it is even more beautiful than ever: during Ramadan. Ramadan is the holy month in Islam because it is believed that Islam’s holy book, Kuran was sent to the prophet at this time of the year. Let’s have a look at Ramadan and […]
Istanbul has many treasures both historical and natural. There is a lot to see in this amazing city of Istanbul but you may come across the same places over and over on the internet. In this article, we would love to share with you some lesser-known beautiful places in Istanbul so you can visit them. […]

Today, with the digitalization of many sectors, many of our workspaces fit into a single notebook. Remote working has become increasingly common, especially in the last 10 years. During Covid-19 restrictions, even companies that normally work from the office have gotten used to remote working conditions. These habits did not change after the pandemic. Now […]
Here comes the spring! Istanbul is beautiful in March. It is still cold but generally sunny, the trees are green, and life is joyous! But there is a Turkish saying “March makes you look through the door, burns a pickaxe and a shovel” which means that march has unreliable weather. In this article, we will […]
Istanbul is a surprising city full of wonders. Some of them are historical, some are natural but all of them are unique. This amazing cosmopolitan city has vibrant and rich nightlife as well! So it is fair to say that you're in luck if you appreciate a good night out and are traveling to Istanbul! […]
Thanks to its deep history which is comprised of many empires, cultures and religions, Istanbul is one of the most culturally rich and diverse cities in the world

Istanbul is a significant destination since it is located on Europe’s equator, where east and west converge.
Since it is the world’s largest covered market, the Grand Bazaar in Istanbul is a popular destination in Istanbul

Istanbul is a magnificent city with many wonders. In recent years, health is one of the top reasons to visit this amazing city. Especially for cosmetic reasons, people all over the world visit Istanbul’s great clinics. Recently one of the most common cosmetic procedures worldwide is hair transplantation. Mostly men but also women who have […]
.jpg)
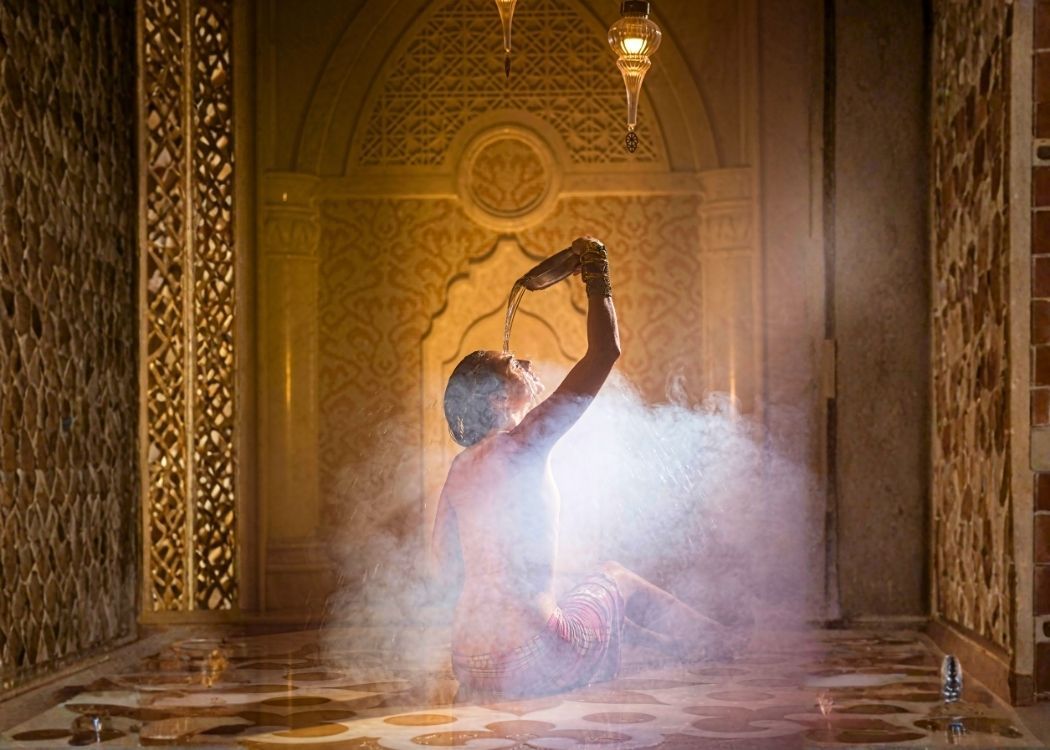
Istanbul's hammams, which were once used by sultans and the palace elite, today serve to tourists and nostalgic locals looking for a hot scrub surrounded by marble walls and tall domes. In our list of Istanbul's top Turkish baths, you'll find everything from inexpensive washes to luxurious masseur treatments. The list includes architectural marvels created […]

Istanbul is one of the world's most crowded cities, with a surface area of over 5,000 km². Getting around is not always straightforward. Furthermore, the topography of the area makes the construction of public transit difficult. Istanbul was built on several hills. In order to improve public transportation in Istanbul, the city is […]
Here are the most romantic days of the year. Whether in love or not, it is not easy to stay out of Valentine’s Day excitement. Especially if you love romantic dinners, lovely journeys, and new experiences to discover with your loved one, this time of year is the best for you. On this […]
Istanbul is one of the most visited cities in the world and is a dynamic metropolis. Millions of people travel through Istanbul every year as a result of its advantageous location on two continents, which makes it the ideal stopover when traveling between the East and the West. So if you decide to […]

Istanbul has a rich history and, thanks to its deep and complex history, a great food culture. In recent years, this unique food culture has met with great service to boost tourism. Until recently, Istanbul did not have any international coffee chains. The boutique cafés that first introduced 3rd wave coffee to Istanbul, on the […]
The Basilica Cistern, located southwest of Hagia Sophia, is one of Istanbul’s best tourist attractions.
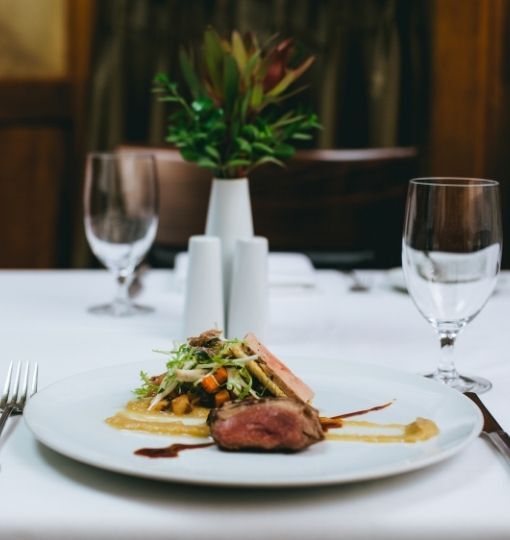
Istanbul has an amazing food culture thanks to its role as a meeting point of Turkish cuisine with world cuisines. There are thousands of restaurants, cafes, and eateries in this amazing city. Especially in the last years, fine dining restaurants are rising in number. So finally world famous Michelin Guide finally came to Istanbul to rate […]

Istanbul is a great city and millions of visitors every year come to this amazing city to witness its historic and natural beauty. In this article, we’ll take a look at some of the most frequently asked questions about Istanbul! But before we start, here check out other 100+ attractions you can visit […]
The Grand Bazaar has grown over time to include a variety of services in addition to direct commerce.
Istanbul is a city with a deep history and amazing stories. There are many things to explore in this beautiful city. In this article, we will take a closer look at one of the legends rooted in the city's rich history. Before starting digging into the past, check out the 100+ amazing attractions, […]
Istanbul is beautiful in every season. Even in winter, the city has a unique beauty that attracts visitors. Especially when it snows, walking through the streets of Istanbul can be a memory to remember. The city has so much to offer its visitors every month of the year. In this article, we will […]
Istanbul has so much to offer! There are many attractions, museums, and experience zones in this magnificent city. So that you do not get lost in all these offers, we have selected the best for you and created the Istanbul Tourist Pass®! There are 100+ attractions, show&go skip-the-line tickets, guided tours, and experiences for a […]
Istanbul is a bit wet but still so beautiful in January. In this new year, in 2025 we are expecting a rainy January but don’t worry there are plenty of things to do indoors in this beautiful city. Let’s start digging into what to do in January in Istanbul but the best way to […]

In Istanbul, there are many things to do, many great foods to eat, and many traditional drinks to taste. In this article, we look at the famous Turkish coffee which is in the Intangible Cultural Heritage of Humanity of UNESCO. So let’s dig into this amazing Turkish tradition, from preparing Turkish coffee to serving ritual […]

Istanbul is a city that can surprise you in every season; winter is magical, autumn is beautiful, spring is lively, and summer, ah summer, is full of life! Like throughout the year, Istanbul is a great place to be during the Christmas season. The whole city is in a festive atmosphere because the new year […]
The end of 2024 is here! December is an amazing time to visit Istanbul, and Istanbul is a great city to meet the new year! Here is all the information about the weather, events, Christmas markets, and more gathered for you. Save this page to your bookmarks in case of updates! Whenever you […]

Istanbul is a great city for a lot of things but it is definitely heaven for shopping lovers. Besides historical bazaars, amazing markets, and shopping streets; as of the end of 2023, there are 114 shopping malls in Istanbul! Most of these are medium size shopping centers but there are also many huge shopping mall […]

Istanbul is a romantic city if you are in love. With deep history, amazing views, and great attractions Istanbul can be a perfect place for a honeymoon! If you are lucky enough to be in ınstanbul with your loved one, then here are the 10 most romantic things to do in Istanbul, and a bonus. […]

In Istanbul, you can find many different things to do as a family. Istanbul is a kids friendly city so don’t hesitate to come to this magnificent city with your big family. Since Turkish people generally have big families, they travel, shop, or walk altogether with kids and the elderly. With our 30+ years […]

Istanbul is a vast city, with so much to offer. Although there are so many spectacular places that almost all tourists have on their lists, you can get the most out of the city only by experiencing how life for a true Istanbulite is. Below destinations are the places only ones who have good taste […]

If you are already in or planning to come to İstanbul, then you know this beautiful city is full of things to do and must-see places. People say that even a lifetime is not enough to see all of İstanbul. It is crowded, messy, chaotic, huge but amazingly beautiful, breathtakingly vibrant, and alive with its […]
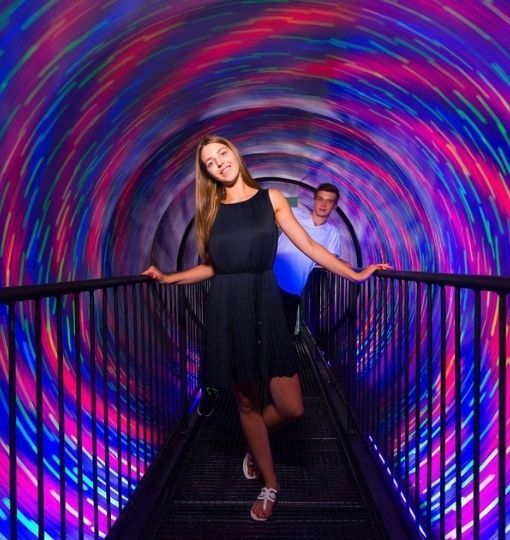
The Museum of Illusions in Istanbul is a place to enter the fascinating world of illusions that will trick your confidence in your senses, and amaze you doing it. It is a fascinating museum to be confused, to have fun, and to learn about the borders of your own mind. This amazing experience is […]
Istanbul is magnificent with its deep history and cosmopolitan culture. The city has a colourful and vibrant identity which is composed of various cultures of the world. Lebanese culture is one of them. A rising number of Lebanese restaurants and cafes shows the common points between the two cuisines; the popularity of Turkish TV shows […]

A special public transportation card just for you! Istanbul is a magnificent city and it is huge. There are many things to see around the city and most of the time the best way to get somewhere is public transportation. In Istanbul, locals use a personalized card called the Istanbul Card […]
Istanbul is magnificent with its history, its one-of-a-kind geography, its vibrant life, and its position as the meeting of different cultures. There are many attractions all around the city and it is for sure that one lifetime is not enough to see all of Istanbul. In Istanbul Tourist Pass®, we love to share […]
Istanbul is one of the few cities in the world where a lifetime isn’t enough to see all of it. The city is the centre for different cultures mixed with great history and with contemporary. Completely massive and sometimes chaotic but also still incredibly beautiful. In this article, we handpicked the top 10 […]

Love is in the air in Istanbul in November! As the city's autumnal charm gives way to the crisp embrace of the upcoming winter, Istanbul takes on a romantic and alluring ambiance that's hard to resist. The city's charming streets, adorned with the golden hues of falling leaves, provide the perfect setting for couples seeking […]
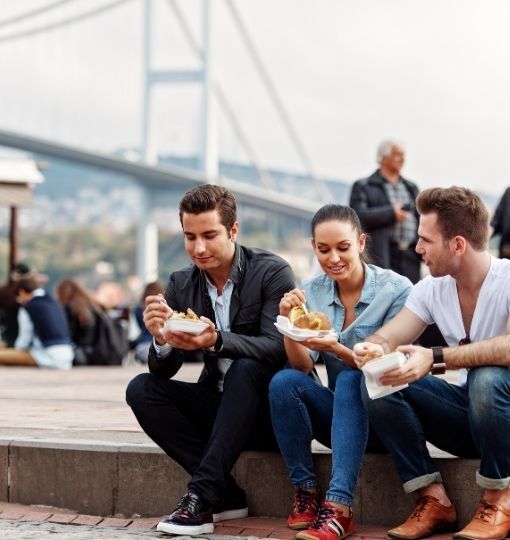
Istanbul is a vibrant city with different cultures, deep history, and also with a great selection of foods! Street foods have a special place in Turkish culture but especially in Istanbul, street food is an inseparable piece of the city’s identity. Today even fine-dining restaurants in Istanbul serve street-food-inspired platters. In this article, […]
As you may already know, Istanbul is an amazing place to enjoy various different kinds of food! In every hour of Istanbul, you can find a reason to eat some delicious food, enjoy some snacks and have a great cup of Turkish Coffee. But there is only one meal Turkish people love and value the […]
Istanbul is beautiful. With the glamorous Bosphorus and the Golden Horn
Istanbul is a centre for different cultures including religions. There are 158 historic churches in Istanbul and many of them are still active. Churches are very important in the city's historical significance. Historically, Christianity has been practised in Istanbul since the 4th century. Numerous churches exist in Istanbul, belonging to different sects, denominations, […]
Istanbul has been the meeting point of different cultures throughout history. Because of that reason, the city has a great variety of different cuisines. In this richness, Turkish cuisine has a special place. Turkish cuisine is not in the place it deserves in the world yet. Especially in recent years, Turkish chefs are […]
Travelling to Istanbul is a breathtaking experience for those who visit even for a couple of days. You take photos and videos of this memorable trip but also want some things to take with you when you leave to remind you of a time well spent. You also want to carry a piece of this amazing city […]
Istanbul is the meeting point of history with modernity. The city has deep roots coming through centuries and still vibrantly living, and breathing. Art has always been a reflection of the city’s rich identity and cosmopolitan culture. In getting to know a city deeply, museums have always been special places. In this article, […]
Istanbul is a great destination for shopping besides its many other riches. Historically the shopping ecosystem of Istanbul has been always vibrant and colourful. The magnificent Grand Bazaar, one-of-a-kind Spice Bazaar, small street shops or huge shopping malls spread all over the city; are all parts of the great shopping culture of Istanbul. Galataport […]
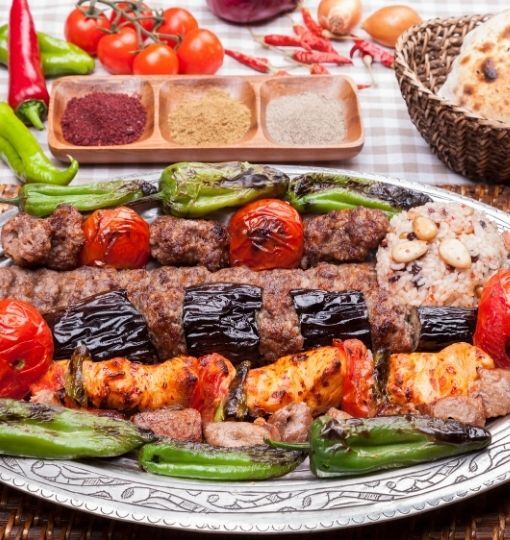
Istanbul is not only the meeting point of cultures but also of cuisines! There are various options to taste delicious food from all over the world in the city. While visiting the magnificent Hagia Sophia or taking great Instagram photos in the colorful streets of the old town, you will get hungry and start to look around for some […]
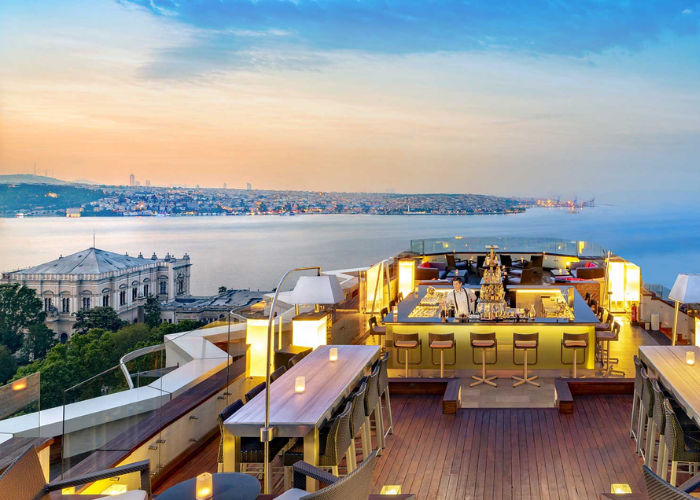
If one had but a single glance to give the world, one should gaze on Istanbul. Alphonse de Lamartine Istanbul is full of surprises in every corner. The city can surprise you with its colours, sounds, and amazing views as well as the variety of food options. […]

Istanbul, a city full of zest, has so much to offer to its visitors from across the globe. Whether you're interested in its historic architecture, deep-rooted culture & heritage, delicious food, or the city's flashy nightlife, there's something for everyone. Unlike popular beliefs, locals here love to spend nights partying away. Istanbul's party […]
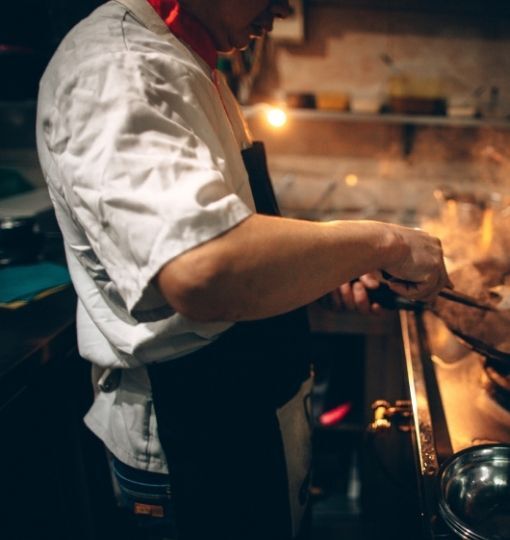
Indian cuisine is widely loved across the globe for its rich ingredients, intoxicating aromas, and fresh blend of spices. Its historic staple diet consisting of whole-wheat flour, rice, and vegetables makes it unique and flavoursome. Travellers, especially from south Asia, are always on the lookout for quality restaurants offering Indian cuisine. If you're one of […]
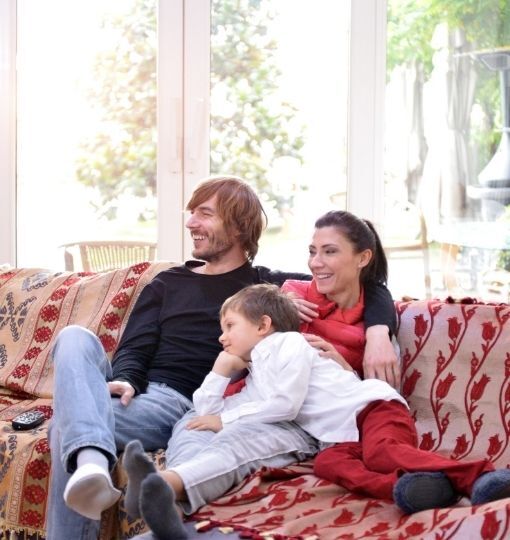
Where to stay in Istanbul with family You finally booked your flight, and are eager to see the beauty of Istanbul within days from your flight. For your trip here, you rightfully want to stay at one of the best hotels in Istanbul for families that will satisfy your family’s expectations. We, as […]
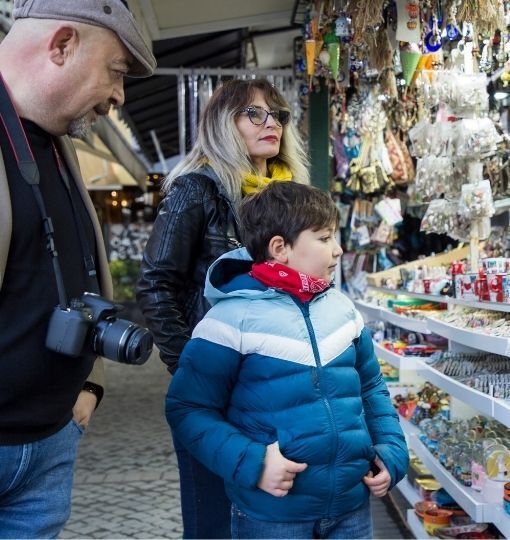
Istanbul, a city steeped in history and culture, is also a fantastic destination for families. With its vibrant atmosphere, delicious cuisine, and diverse activities, there's something for everyone. Explore historic sites, wander through bustling bazaars, and relax in charming parks. Take a boat trip on the Bosphorus, indulge in delicious Turkish cuisine, or simply stroll […]
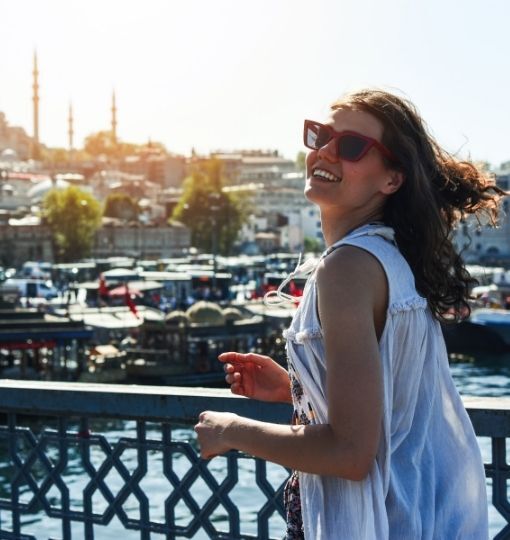
What to do in August Dear guest, Istanbul lover-to-be! You finally arrived in one of the most popular cities around the world, we hope you throughly enjoy it! Whilst you just arrived, we have few recommendations and tips for making your experience even cooler. Let’s go one by one! First off, […]

Except for historical places, would you like to discover entertainment places that your children will love in Istanbul? Istanbul is one of Turkey's most fascinating cities. It reflects the true essence of Turkish culture with its architecture, cuisine and lifestyle. Istanbul has great advantages in many aspects. The city, which has made a […]
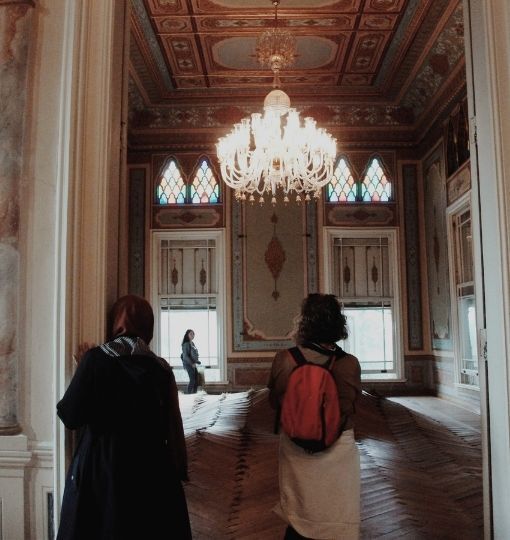
Istanbul has a diverse range of great museums. While many of its galleries and pavilions are well-known in the art and historical worlds, the city also has a diverse range of the unexpected for visitors wanting to go beyond the usual museum fare. Istanbul Archaeological Museum The main Archaeological Museum, the Museum […]
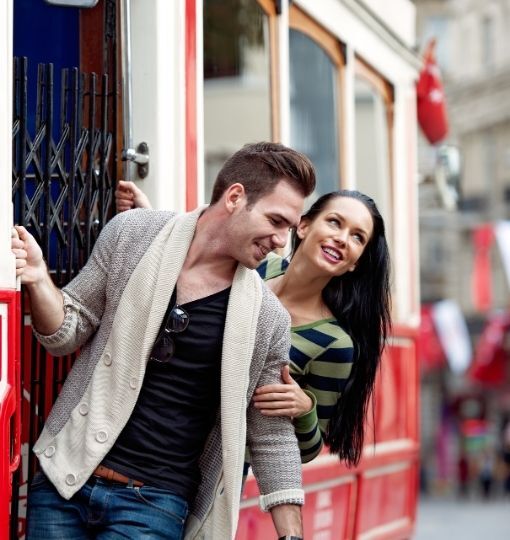
Why is Taksim the first neighborhood that comes to mind when Istanbul is mentioned?
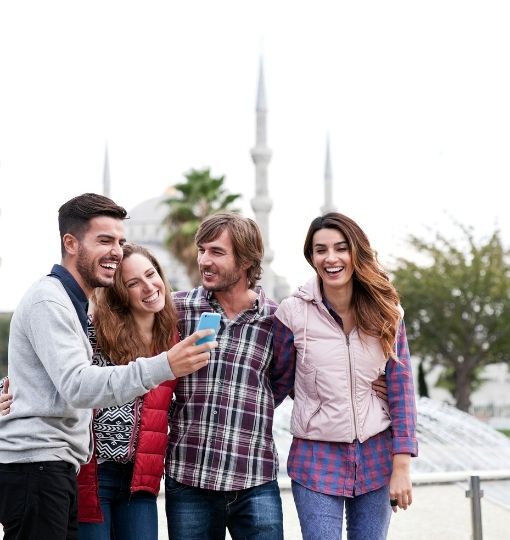
Visiting Istanbul is a once in a lifetime experience. The city amazes its visitors every single time. You have lots of activities to do in the city by yourself, so we assure you that you will never get bored. All of the historical sites in Istanbul will take days to be discovered, so you do […]
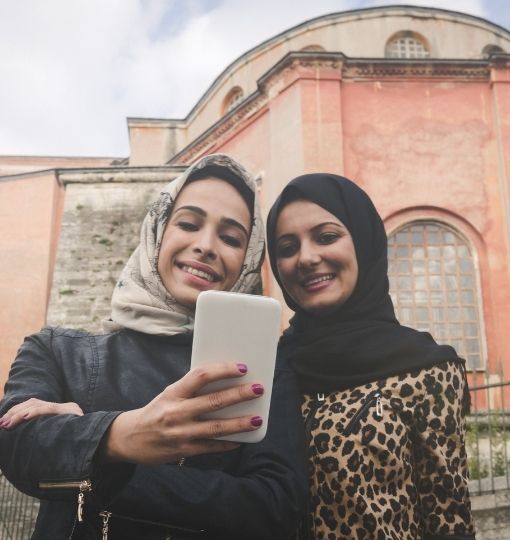
Istanbul is a magical city with a plethora of tourist attractions, historical sites, and well-known landmarks. From Galata Tower to Topkapi Palace, Istanbul, the cosmopolitan city sandwiched between Asia and Europe, has everything a cultural visitor might want. With dozens of museums, monuments, and facilities to choose from, it's easy to get lost in Istanbul's […]
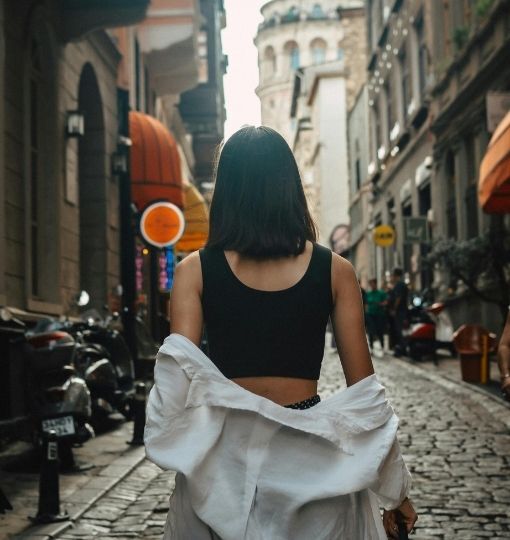
Istanbul's civilization goes back thousands of years, and the city will supply you with the old cultural soul you need. Historic sites, urban sites, and museums can be found in all four corners of Istanbul. It is the focal point for the fusion between Anatolian and European culture: if we go back in time, we […]
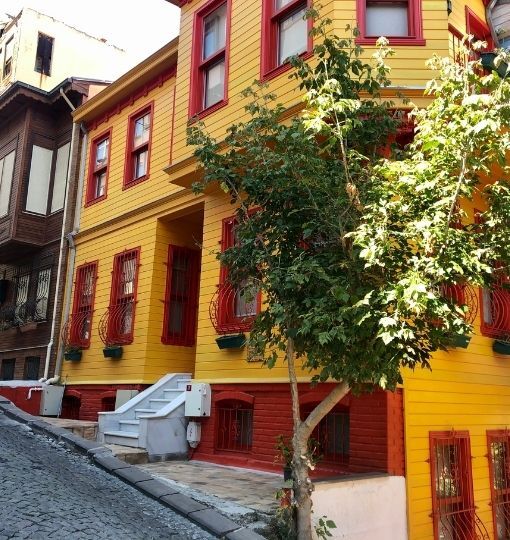
Are you considering moving to Istanbul? Surely you aren't the only one on the planet who has considered doing anything like this! Due to the availability of the best colleges and universities, a very modern health care system, and the fact that most of Istanbul's districts are prosperous and elite places, millions of people around […]
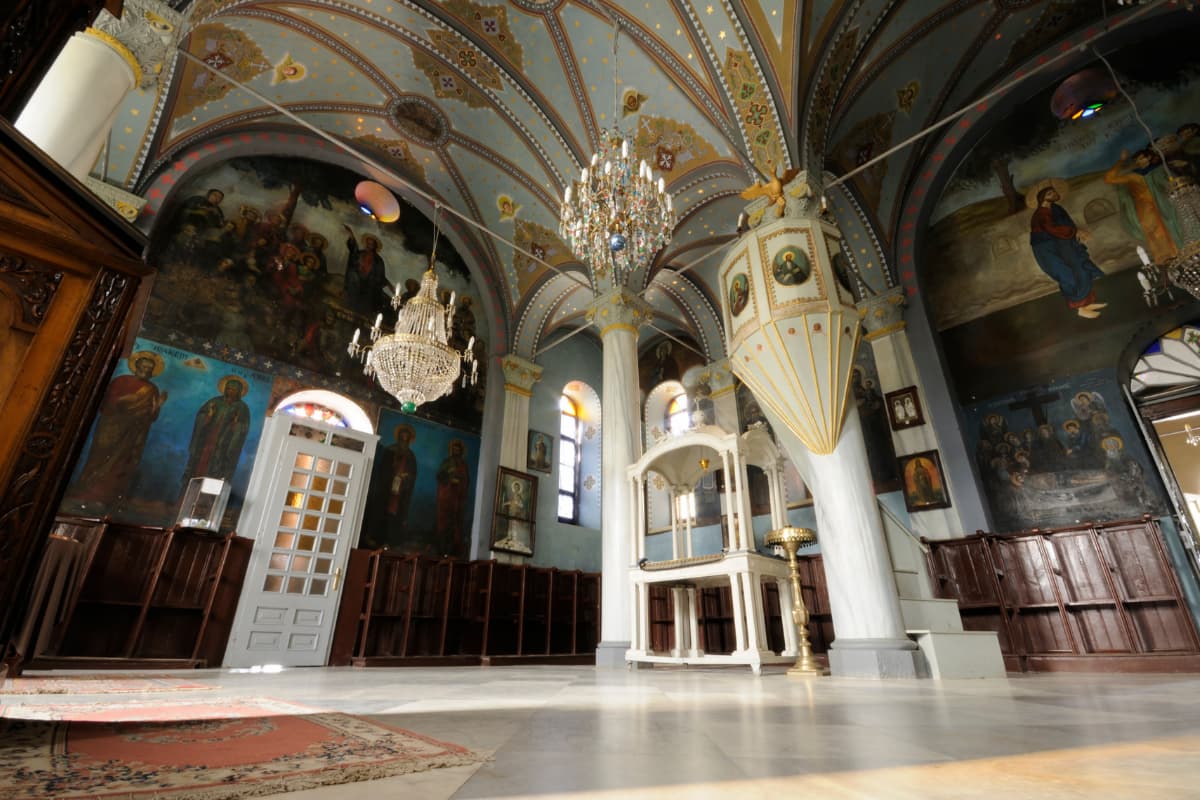
Aya Yorgi Church was founded in 1751, according to Patriarchate documents. The former church, a modest two-story tiled structure with a small church, shrine, and prayer area, is known as the old church. The Aya Yorgi Church, on the other hand, is a modern structure on the hill that was constructed of face stone in […]

One of the most overlooked problems about traveling to another country is staying connected to the Internet without going broke.
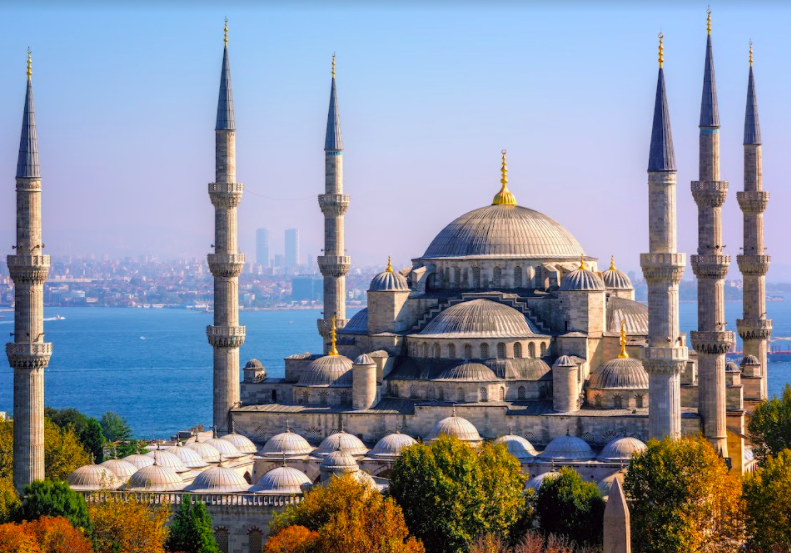
A mosque built by Mehmet Agha over 500 years ago attracts millions of tourists each year. Its blue appearance is due to fine tiles from Iznik
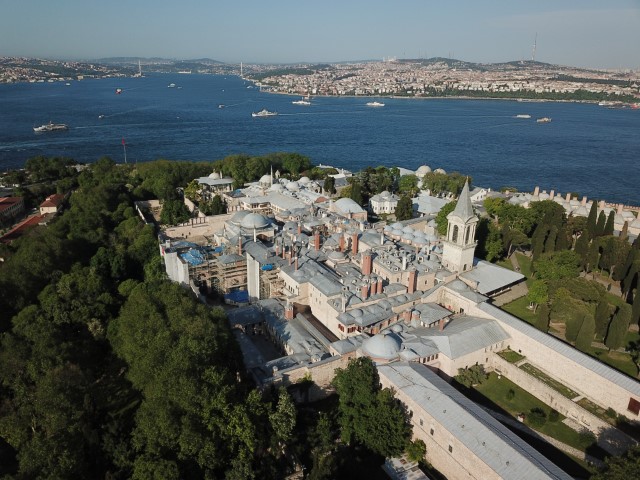
Explore the magnificent Topkapi Palace. Discover the world of sultans, ambitious courtiers, and stunning treasures.
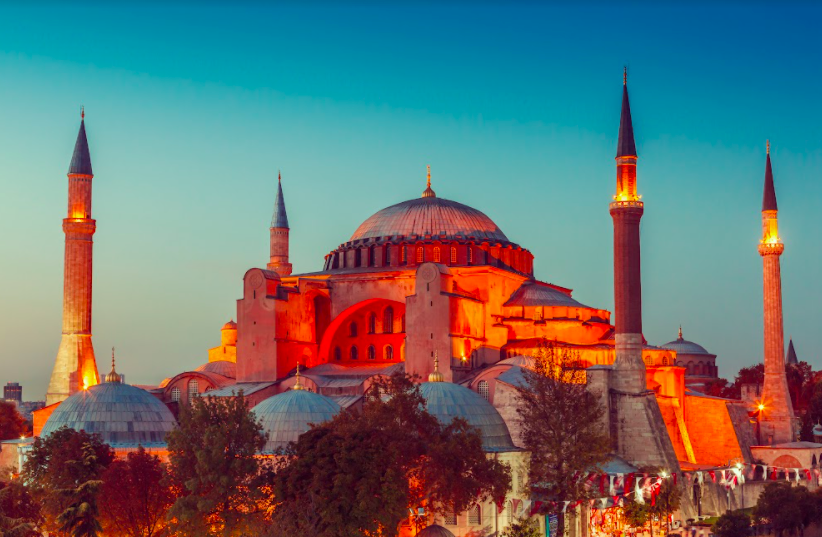
Are you ready to explore 1500 years of history with Hagia Sophia? Hagia Sophia is one of the most visited attractions in Istanbul! It will amaze you
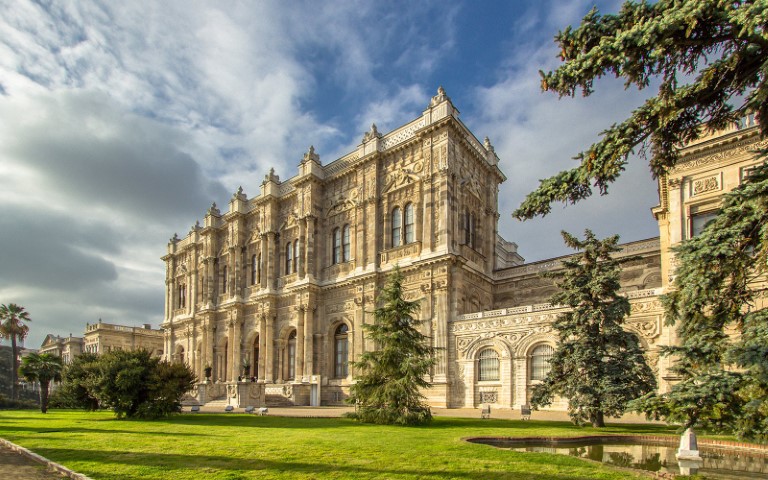
Dolmabahçe Palace was the Ottoman Empire’s center for almost a century, then became the home of Atatürk, founder of the Turkish Republic.
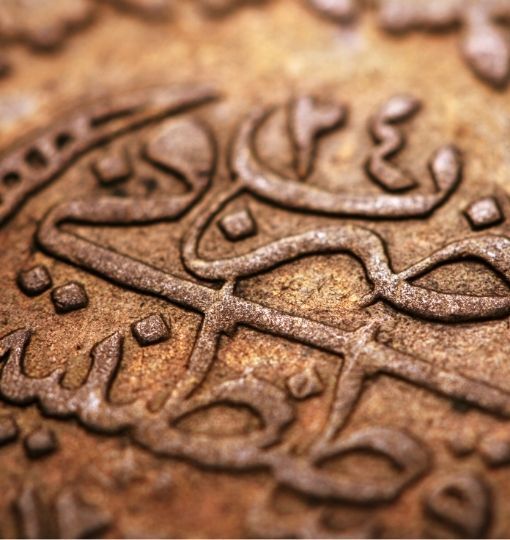
When you visit Istanbul, you will find tens of traces from the glamorous Ottoman Empire. Having ruled the city for over 600 years, Ottoman architecture and arts had a great impact on Istanbul's city soul. During your Istanbul trip, you will find Hagia Sophia, Galata Tower, Topkapi Palace and other iconic landmarks in Istanbul that […]
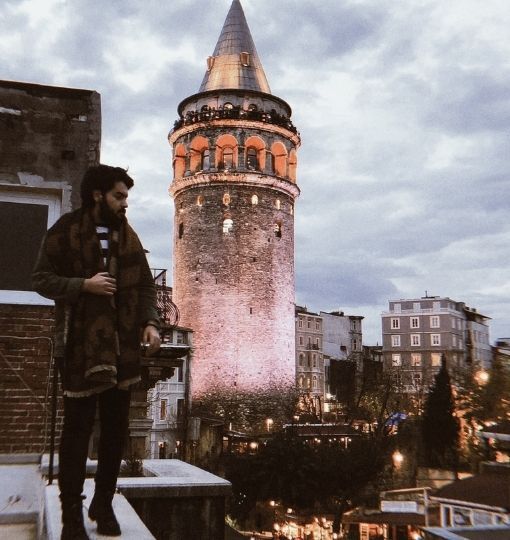
Galata Tower is one of the most magnificent sights in Istanbul, overlooking “Beyoglu” and “Karakoy” from its incredible location.
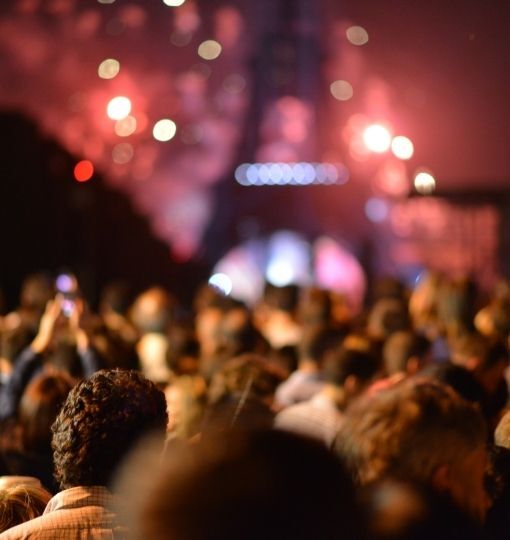
Istanbul's yearly calendar is jam-packed with fantastic events and entertainment to suit everyone's interests. Our guide will teach you about and allow you to participate in some of Istanbul's most well-known festivals and events, including what they have to offer, locations, festival programming, and more! Aside from the winter months, Istanbul organizes several art festivals and music […]
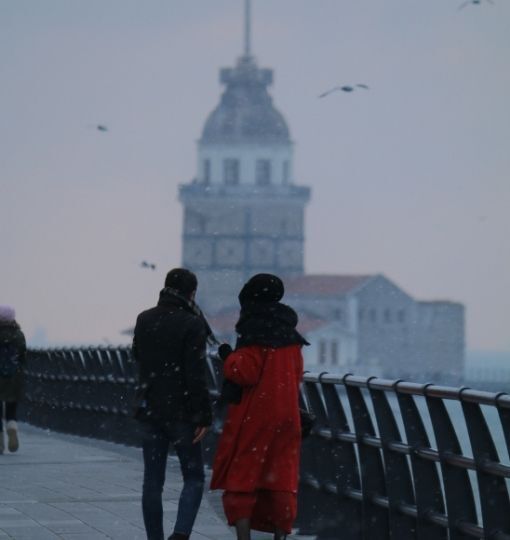
Istanbul is a city of various historical textures. From countless Ottoman palaces and mansions to historical sites like museums, this city has thousands of years of history behind it, and the best part is, a great portion of that history can still be experienced today. Some of the more underrated historical attractions of the city […]
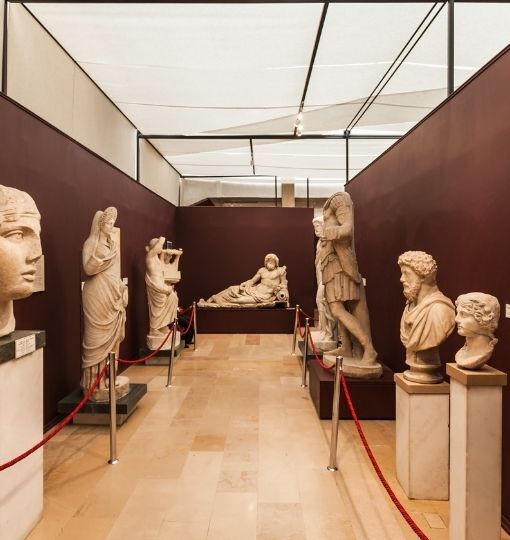
Istanbul, the largest city in Turkey, is also the most visited tourist destination. In 2014, it even surpassed Rome and Milan as the ideal city. While its historical past is undoubtedly a big draw for many tourists, they are also willing to experience the wide range of activities one of which is the city museum. […]

Istanbul is, certainly, the apple's eye for visitors from all over the globe. Istanbul offers a great experience for all of its inhabitants by providing an atmosphere that is appropriate for a variety of lifestyles. There are many benefits to living in Istanbul. Istanbul is distinguished by its luxurious properties, multicultural social structure, […]
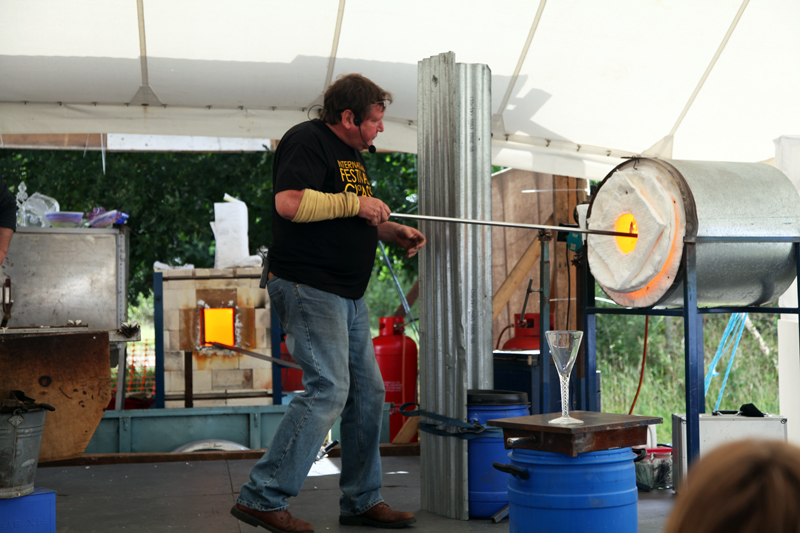
There is no shortage of activities to take part in a city like Istanbul. There are always more museums to visit, more historical sites to explore and more restaurants to give a try. While these are all great, many people overlook the value of learning a new skill. Joining workshops is the most social and […]
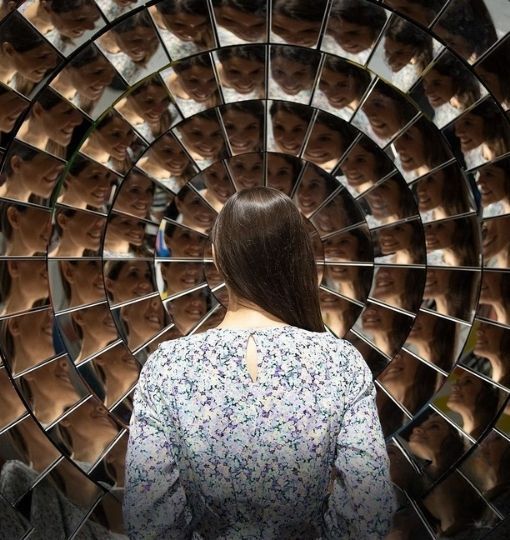
Finding fun attractions in Istanbul may seem challenging at first, but upon closer inspection, the city reveals itself as a treasure trove of exciting experiences. Whether you're traveling with kids or seeking entertainment for yourself, Istanbul offers a wide range of activities that cater to all age groups. From theme parks and museums to historical […]

Do you want to send a letter, document, postcard in Turkey? Doesn’t matter if you want to send it locally or abroad, you can accomplish your goal using PTT (Posta ve Telgraf Teskilati in Turkish, meaning “post and telegraph directorate”). You can easily recognize post offices in Istanbul by their yellow and dark colored PTT signs, which […]
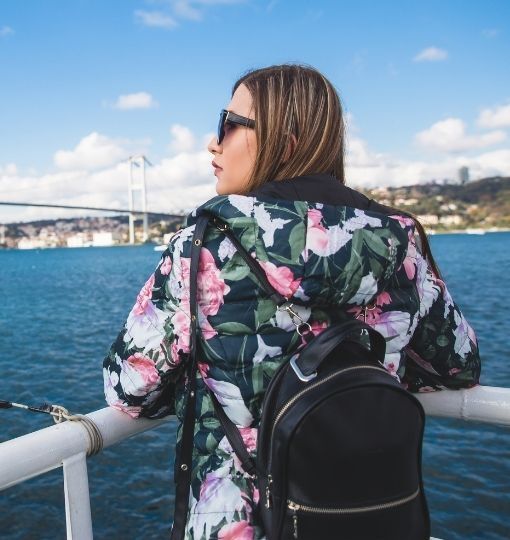
You are visiting Istanbul and you want to have fun on the Bosphorus for the whole day! This is fantastic because anybody visiting the city will enjoy all the sea has to offer via a Bosphorus Cruise in Istanbul. Istanbul is located on the Bosphorus Strait. It connects the Black Sea and the Sea of Marmara […]
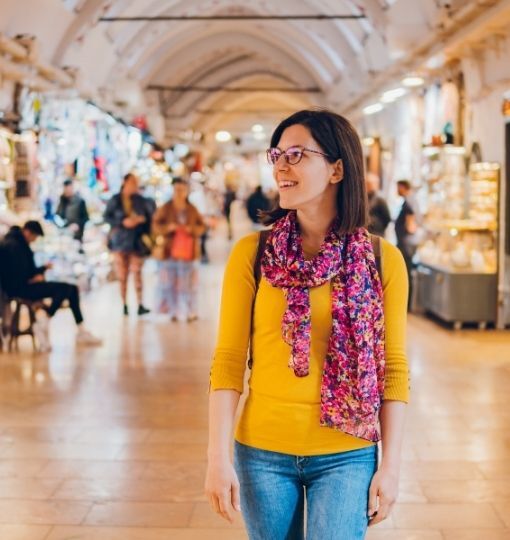
Many visitors from all around the world consider Istanbul a dreamy destination.

Turkey has developed a qualification scheme based on 132 requirements to ensure "secure tourism," which requires steps to be taken in businesses and modes of transportation to deter the virus from spreading. These projects have benefited visitors in Istanbul, and the government has kept tourism alive by opening tourist attractions in Istanbul. Turkey took steps […]

Istanbul owes its place as Turkey’s most colorful and lively city to many factors.

If there is one thing you will never get bored of doing during your stay in Istanbul, that is visiting its countless amazing museums.
As one of the most popular and lively districts on the European side of Istanbul, Besiktas is famous for its colorful population, students, cultural activities, various shops and its football club.
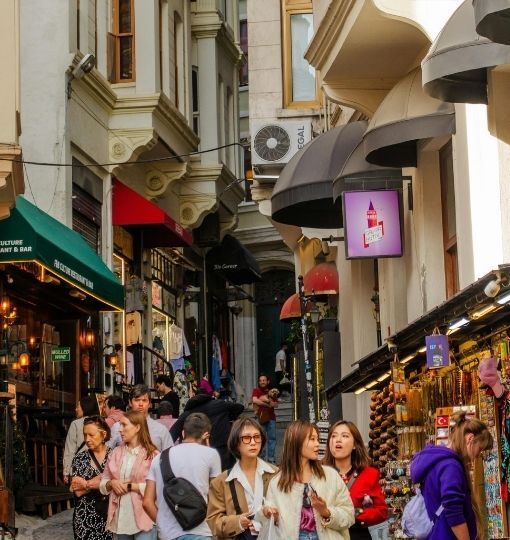
When people think of shopping in Istanbul, they typically think of the Grand Bazaar and its maze-like alleys filled with everything from carpets to local spices. If you're searching for anything other than the bustle of the extra-large covered market, though, the city has much to offer. Culture Trip selects the finest shopping alleys in Istanbul, from antique […]
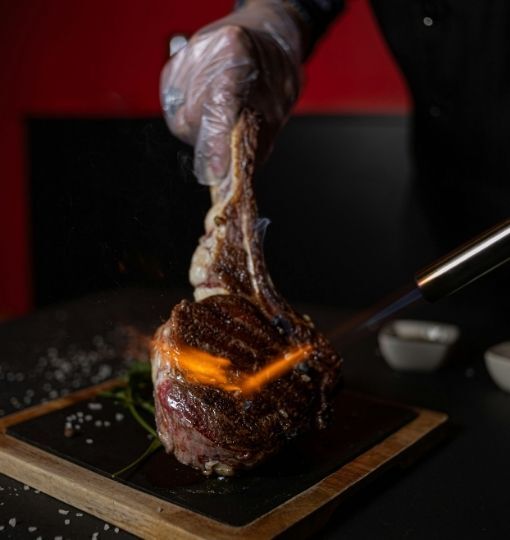
Meat plays a huge role in Turkish cuisine, and like many other cultures, Turkish people love steak. There is no doubt that Istanbul is home to Turkey’s greatest steakhouses, ranging from traditional restaurants to more modern steakhouses. You can find many different great places to eat steak in Istanbul, and no Turkish food tour is truly complete until you try Turkish steaks. If you are looking for a place to enjoy a great meal with well-prepared red meat, here are our top steakhouses in Istanbul.

If you are in Istanbul and want to visit the city to the fullest, you may have to go through a PCR test. However, booking a PCR test in Istanbul can be challenging if you are a foreigner to the city. This is why Istanbul Tourist Pass offers an optional PCR test service in Istanbul […]

Istanbul’s nightlife, which includes a number of great bars, complements the city’s rich history, cultural heritage, and financial capability

In recent decades, medical tourism has been one of the fastest-growing sectors. As the world has become more globalized, borders have lost their significance, and healthcare has benefited enormously from this transition.
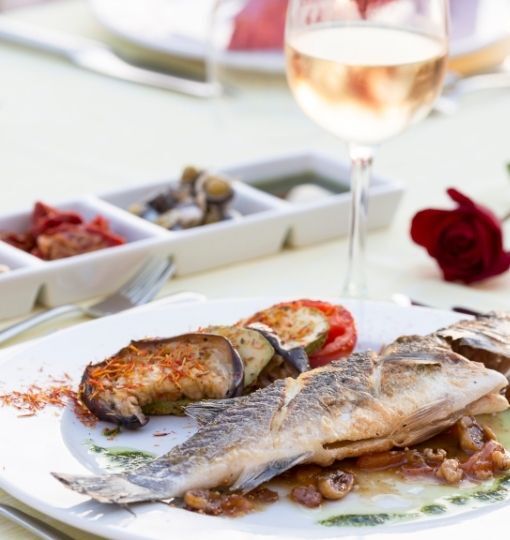
Bosphorus is one of the best gifts that Istanbul gives to its visitors. Its view is undoubtedly glorious, whether you are sitting near a shore or going on a Bosphorus Cruise Because
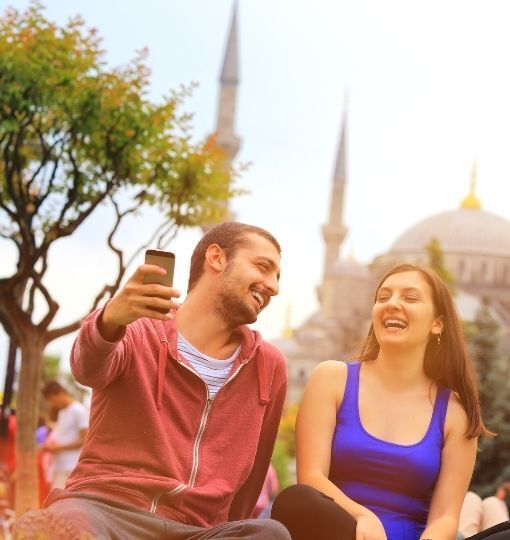
Hundreds of years old palaces, churches & mosques, traditional Turkish Baths, bazaars, beautiful sights, strait that separates Europe and Asia

One of the coolest attractions to visit in Istanbul! Imagine all the attractions and iconic places from all over Turkey combined into one!

Want to use Google Maps while out about in Istanbul or travelling around Turkey? Want access to Facebook and Instagram to upload your holiday pictures?
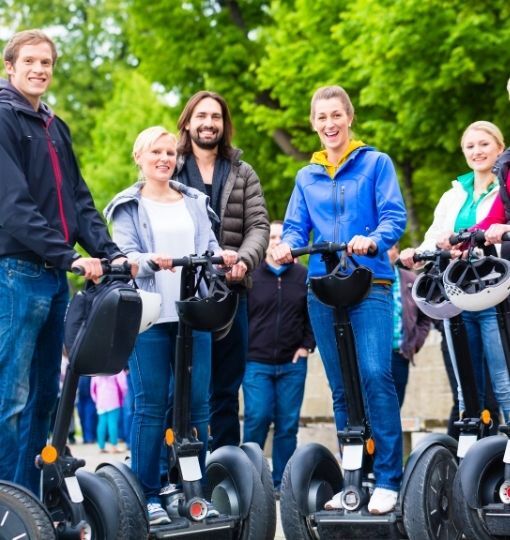
We welcome you to explore Istanbul with our list of the finest things to see and do on both the European and Asian sides of the city, as well as our recommendations for the must-see sites and museums on the ancient peninsula. We've included lots of things off the tourist route, such as searching for […]
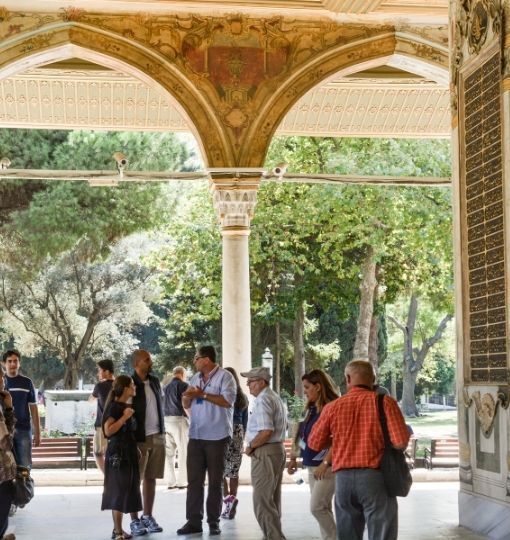
If you’re visiting Istanbul for the first time or the tenth, you’re certainly aware that..
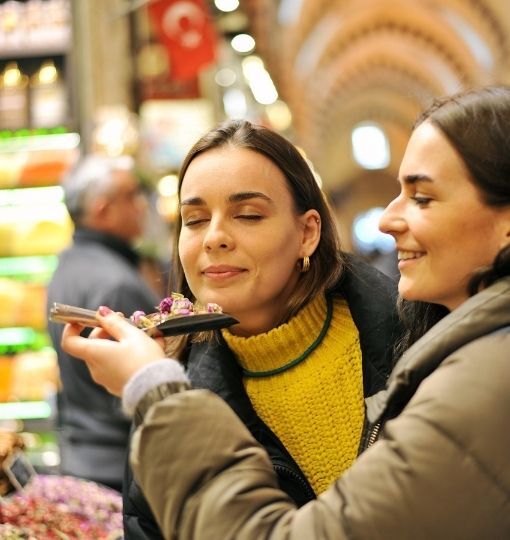
The historical Egyptian Bazaar is one of Istanbul’s main bazaars that dates back to the Ottomans.
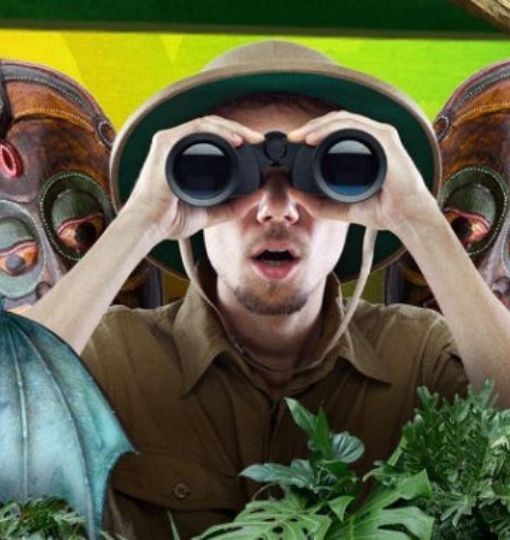
When you travel to Istanbul, you may be overwhelmed with the city from time to time. If you are looking for a place to get away from the urban city life, and want to experience the wild spirit of the jungle, Safari in Istanbul is just for you.
Istanbul Tourist Pass goes beyond and above your expectations, and every plan includes a one-day Bursa trip! If you’re planning a day trip to Bursa, you’ll probably want to know what there is to see
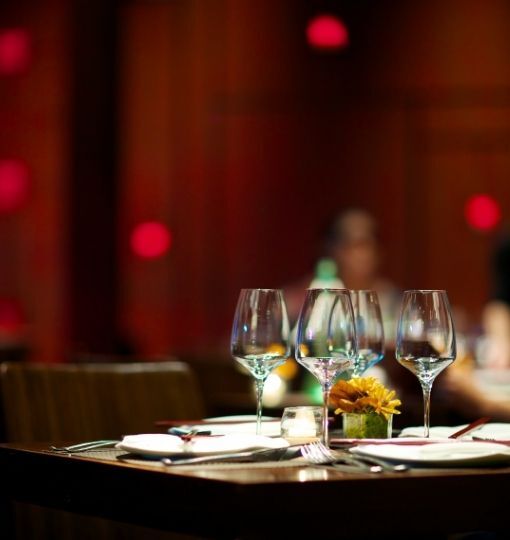
Well-established, fine, and luxury restaurants in Istanbul serve a wide variety of Turkish cuisine. Istanbul also has a diverse variety of world cuisines to sell, including Mediterranean, Japanese, Italian, French, Turkish, Indian, Chinese, Portuguese, and Thai cuisine. Istanbul has a diverse variety of high-quality restaurants in each of its districts and neighborhoods. Of course, it […]
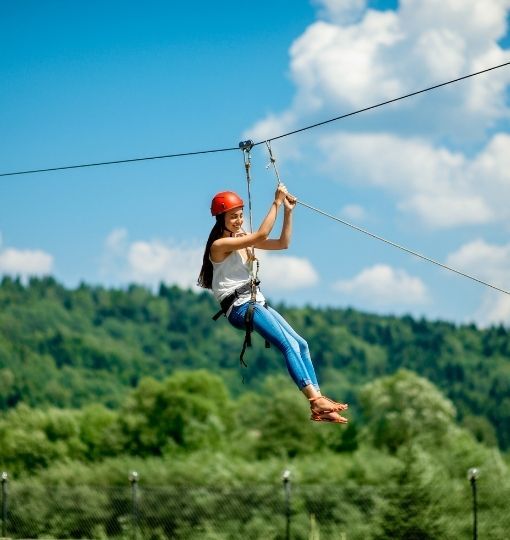
Any city appears to be one-of-a-kind, but visiting Istanbul is truly exceptional. After all, there is no other city on the planet that crosses two continents.

Make sure you remain safe on your trip to Istanbul! When visiting Istanbul, you will be on the move a lot, and minor inconveniences can arise.

Istanbul is one of the most accessible cities for a vacation. If you're thinking about visiting Istanbul during the pandemic, you're probably wondering what precautions the city takes to ensure your safety. We can inform you that Istanbul is coronavirus-free and that if you take the required precautions, you will not be exposed to the virus. Covid […]

When you’re feeling artsy and creative, Istanbul’s cosmopolitan city will provide you with a plethora of choices. If you’ve seen all of Istanbul’s historical sites and want to get a sense…

Whether you are visiting Istanbul for the first or the 10th time, you probably know that the city amazes its visitors every time.
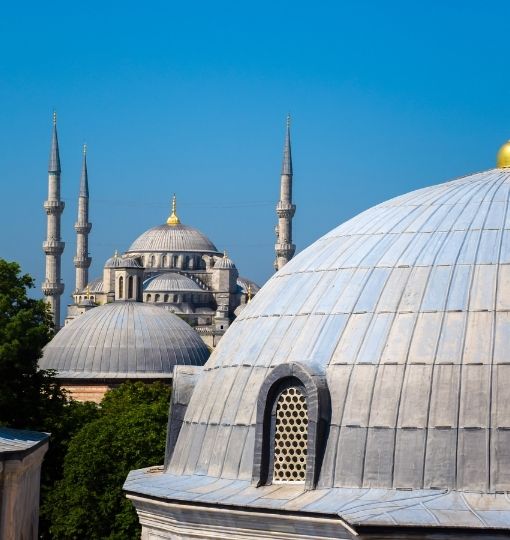
If a question is asked which is the best mosque built by the Turks, the first mosque that will come to mind will undoubtedly

Below the city's skyline of historic architectural marvels, there are plenty of fun activities to do in Istanbul with your family. The young ones may enjoy a day out at one of the many theme parks, some of which provide roller coaster rides while others focus on encouraging their creativity. Consider leaving Istanbul entirely with […]

If you want to visit museums in Istanbul, but are not sure which ones are the best, you are in the right place. Istanbul, in terms of history, culture, and art, is one of the greatest cities in the world. More than 80 museums, spanning from archaeology and historical museums to contemporary and fine art museums, […]
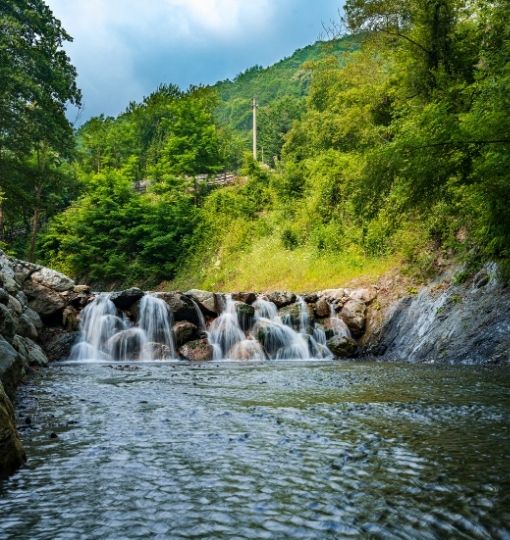
Take a day off, and visit Sapanca Lake and Maşukiye to get away from the hustle and bustle of Istanbul. Visiting Sapanca
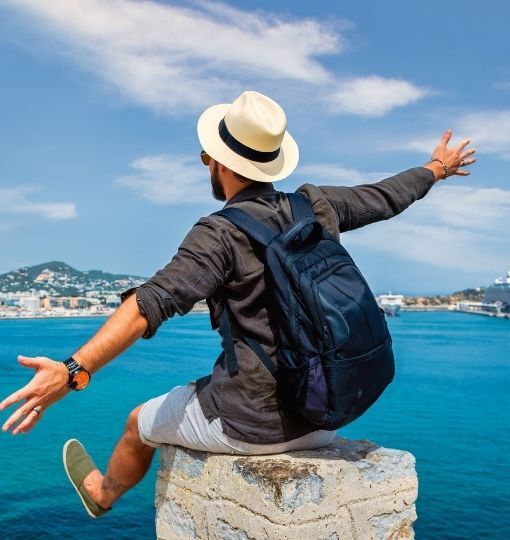
Many visitors from all around the world consider Istanbul a dreamy destination. Layers of history, tradition, colors, and scents are buried under the surface of the unique city, which links two continents where you can feel the East and the West. When you need a break from it all, there's always a beautiful park, a […]

The New Istanbul Airport (IST) is in Istanbul’s northwestern neighborhood of Arnavutkoy, near the Black Seashore. The New Istanbul Airport is approximately 45 kilometers from the main Istanbul city center districts.
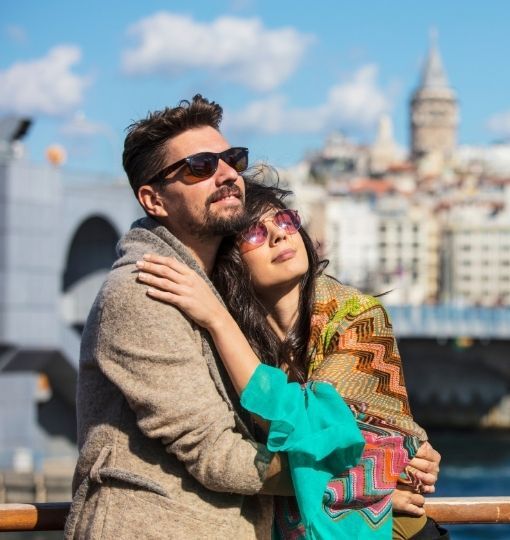
Istanbul is one of the world's major metropolises, having been coveted by empires for ages and spanning both Europe and Asia. Founded about 1000 BC, the Byzantine Empire's great capital, Constantinople, developed into the Byzantine Empire's great capital, and after the Ottoman conquest of the city, it kept its magnificent position as the empire's heart. […]
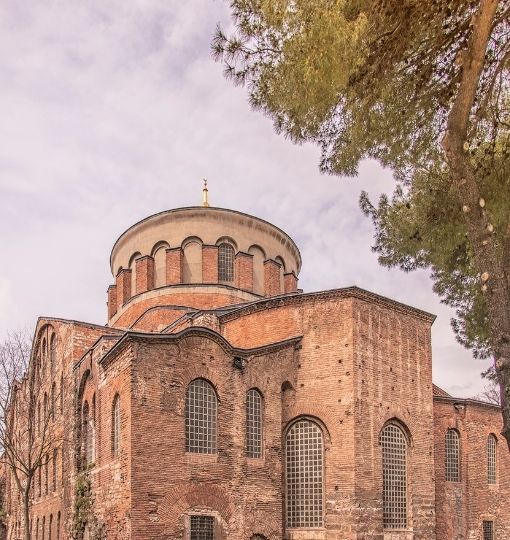
Hagia Irene Church is the structure with the longest history among the Byzantine churches in Istanbul.

In many major cities throughout the globe, touring a city in an open-top double-decker tourist bus is extremely frequent. So it is with Istanbul. On this article, you'll discover all the information you need about the Panoromic Istanbul bus trip, including insider tips. So it's time to take a bus trip to see the finest […]

A person looking for the first time about Istanbul will have a particular query in mind: what is a Bosphorus Cruise? The Bosphorus is a waterway in Istanbul that connects the Black Sea with the Marmara Sea, as well as separating Asia from Europe. Naturally, it divides the city of Istanbul into two […]

The summer heat in Istanbul is constant from mid-June until mid-October. The warmest months in Istanbul during summer are July and August, when temperatures may exceed 35 degrees Celsius. Summer is also the most peaceful season of the year in Istanbul. Istanbul residents typically spend their vacations in their hometowns or at one […]
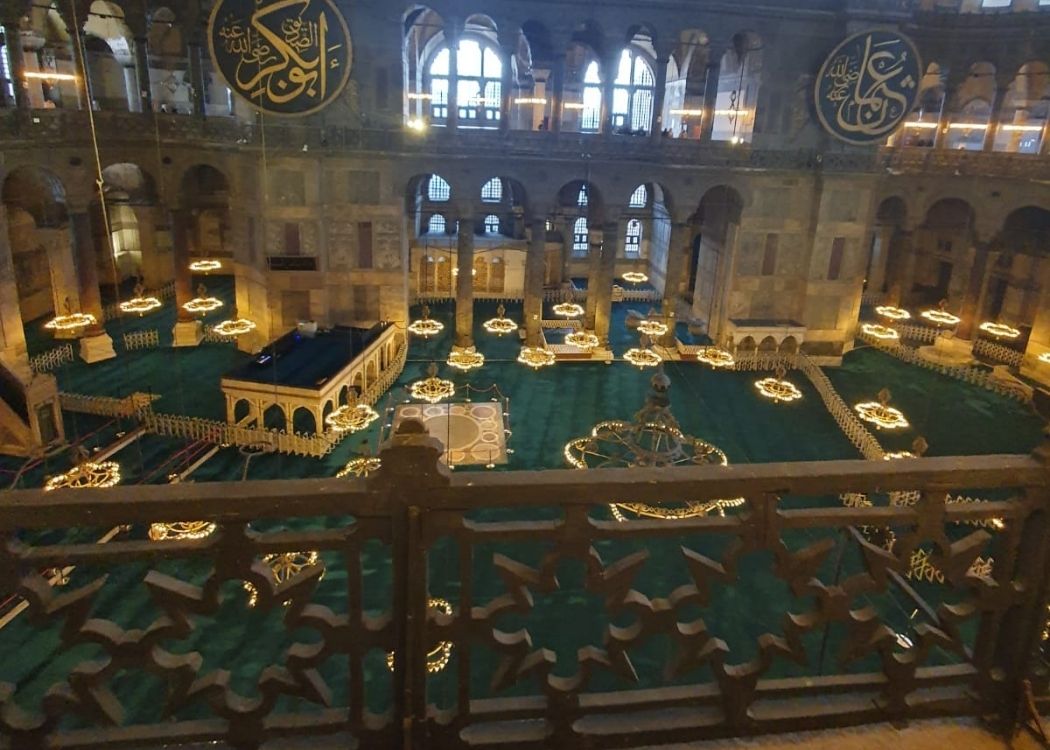
Let’s take a closer look at Hagia Sophia. The church of the divine knowledge, also known as ayasofya in Turkish, is a significant byzantine historical place…
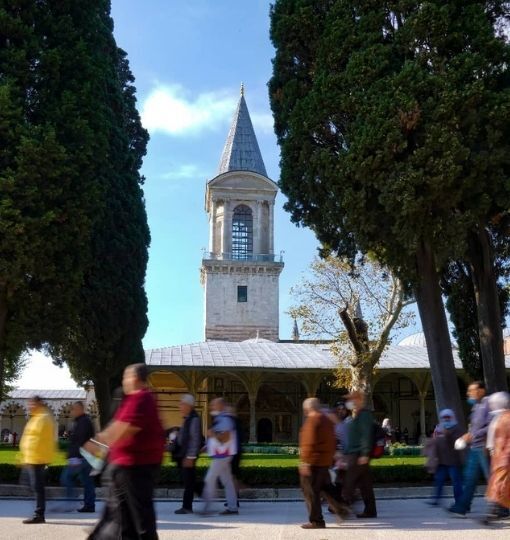
The Topkapi Saray Palace is located in Istanbul, Turkey. It is the largest palace in Istanbul’s Old City and it served as a major center of the Ottoman Empire…

Istanbul is the cosmopolitan center of history, culture, entertainment, and spending the most enjoyable times among nature and cultural monuments.
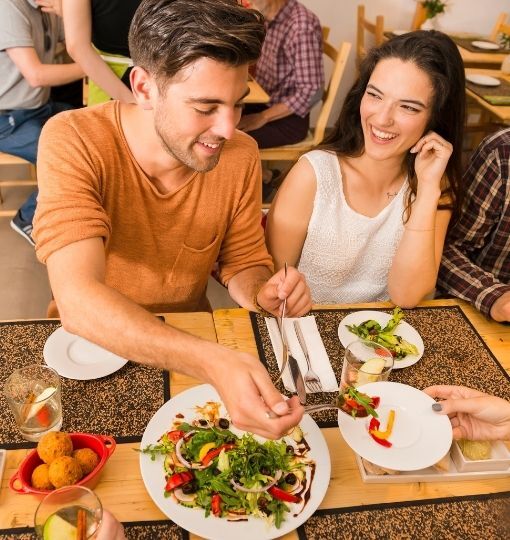
Turkey has an amazing kitchen with countless delicious dishes, desserts, pastries and much more, so much so that you can reserve a couple of days just for a Turkish Food Tour

Sapanca, with its many lovely aspects, is one of Istanbul’s historical spots . This lovely district, which is bordered on the east by Adapazar, the north by Lake Sapanca,

Turkey’s most beautiful city, Istanbul is not only mesmerizing, but it is also famous for its shopping scene
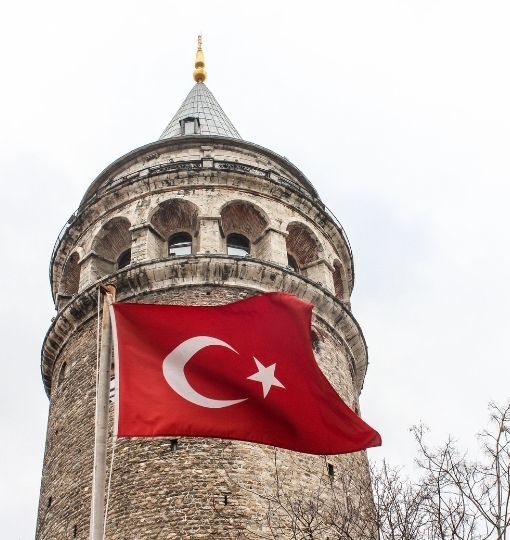
Galata Tower is one of the most magnificent sights in Istanbul, overlooking “Beyoglu” and “Karakoy” from its incredible location…
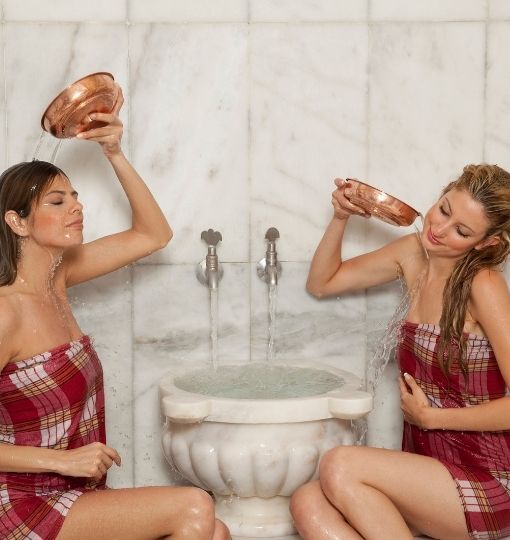
While most tourists come to Istanbul to visit its grand historical palaces and many important museums, there is much more to be discovered in this city. Some of the most overlooked attractions are the historic baths and fountains in Istanbul. You can find many of these scattered all around the city, and each and every […]
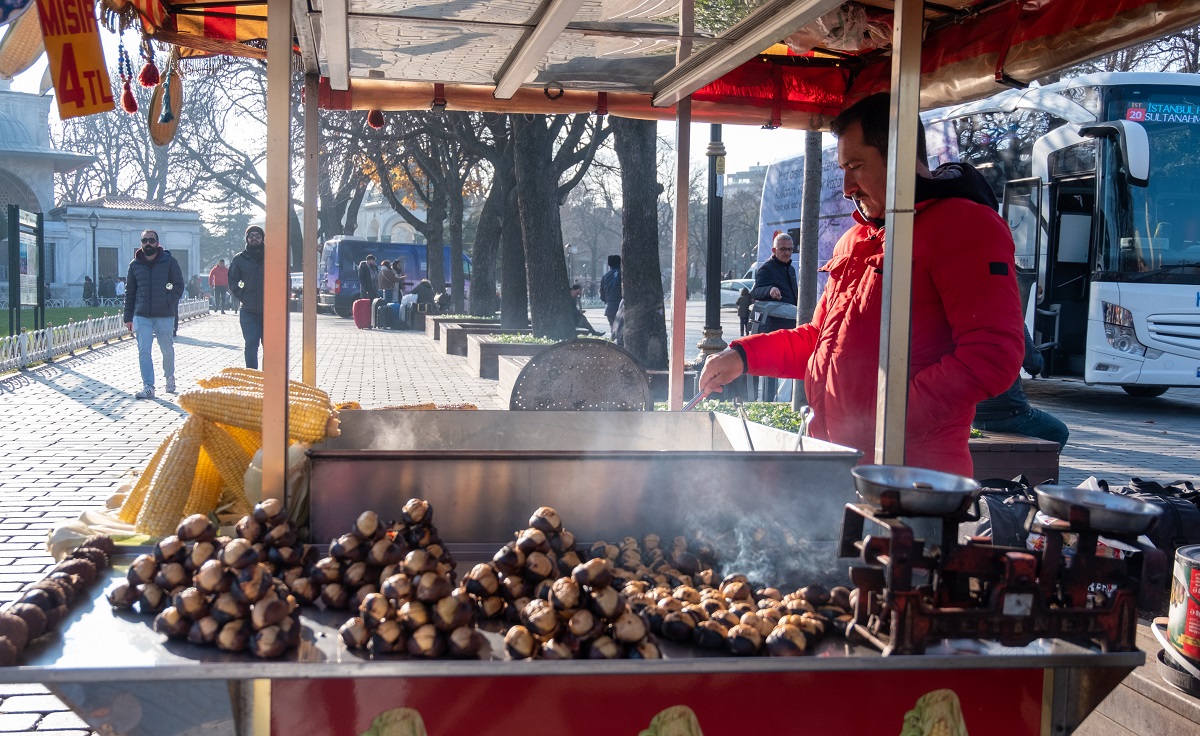
Millions of people have been locked up in their homes since Covid 19 started. Many travelers are counting days to travel the world again!
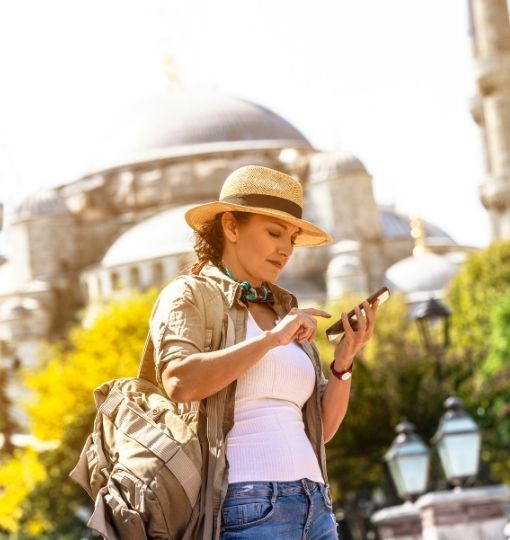
It's very thrilling to go to another! However, it may be worrisome, particularly when you first arrive and are unsure how to go to your hotel, whether the cabs are reliable, how you'll speak with the driver, and so on! We understand and are here to assist you. Your Istanbul trip should be smooth, after […]
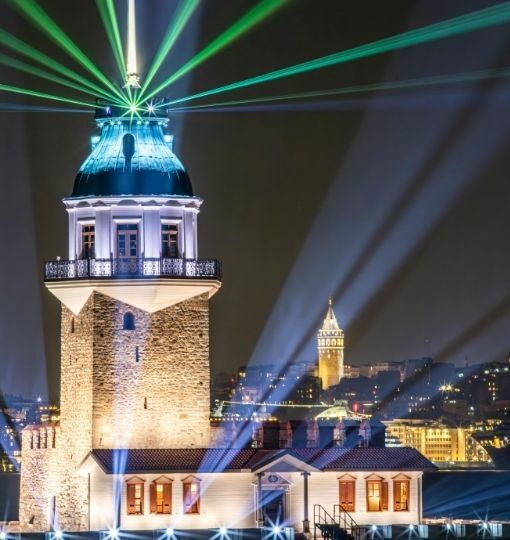
The Maiden’s Tower is definitely one of the most iconic attractions of Istanbul. You can see this iconic islet tower in many pictures of the Bosphorus.
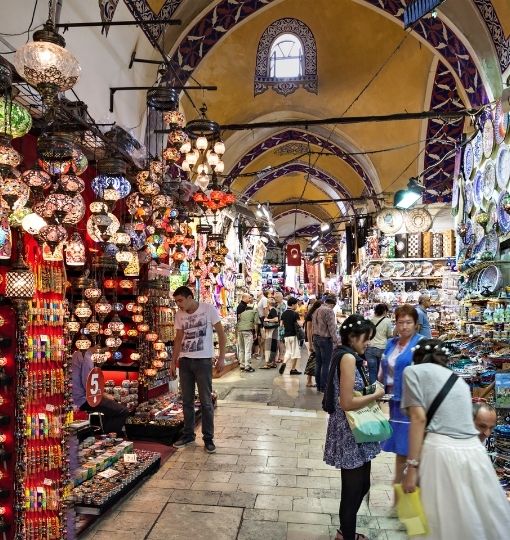
If you consider shopping, there is no alternative within the borders of Turkey but Istanbul.

Welcome to Istanbul, the enchanting metropolis that straddles the divide between Europe and Asia, where the echoes of a glorious past intertwine with the rhythm of a vibrant present. This ancient city, with its rich history spanning over millennia, beckons you to embark on an unforgettable journey through its timeless wonders. We'll delve […]
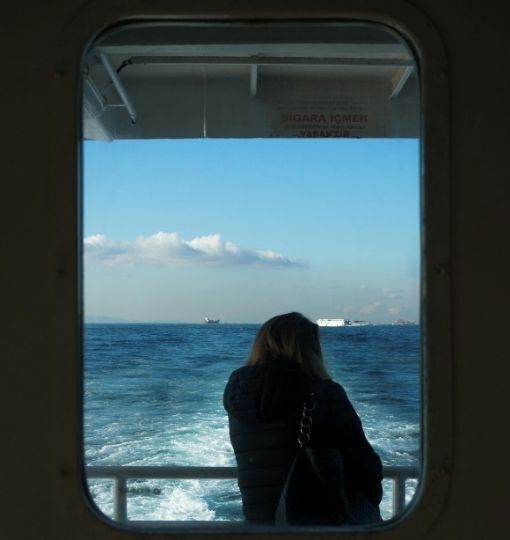
Istanbul's public transportation system has advanced considerably in the past 10 years, and this has had a major impact on the quality of service and transit comfort in the city. Istanbul, like any advanced European city, has a network of multiple mass transportation modes, ranging from regular buses to metro and tram networks that cover […]
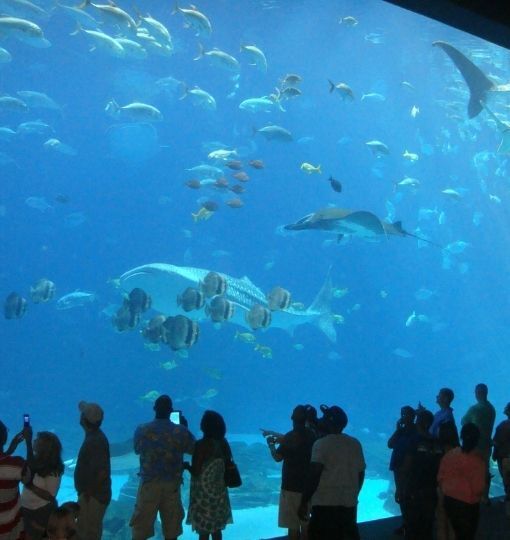
Sea Life Istanbul, among the numerous tourist attractions in Istanbul, may be one of the most interesting locations to visit. It is the world's fifth largest aquarium, and it attracts visitors of all ages, regardless of their interest in marine life. If you want to visit Istanbul Aquarium, which has a variety of fascinating sea […]
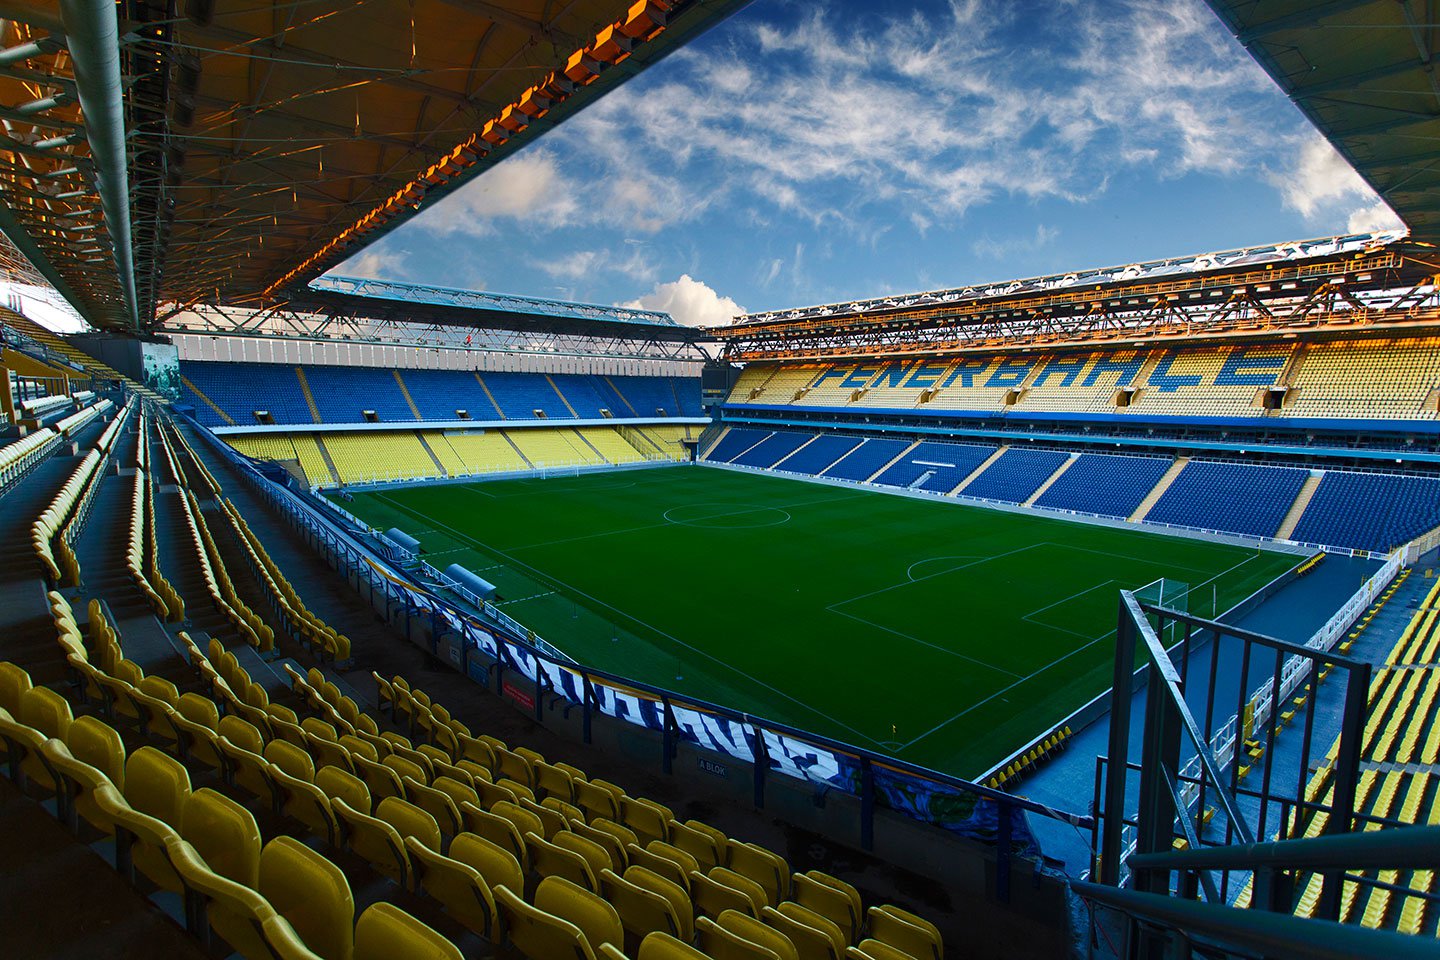
Visit private areas of the Fenerbahçe Şükrü Saracoğlu Stadium and Sports Complex, learn about the legendary history of this successful soccer team and enjoy an unbelievable experience..

When planning your visit to Istanbul, you might wonder how many days are enough to fully explore this captivating city. While Istanbul offers an abundance of attractions and experiences, a recommended duration for a satisfying visit is around three to five days. And what better way to optimize your time and make the most of […]
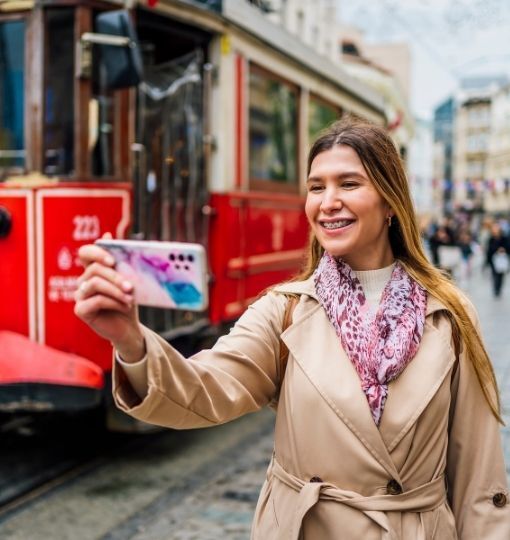
Have you ever experienced the satisfaction of conquering a prominent landmark?
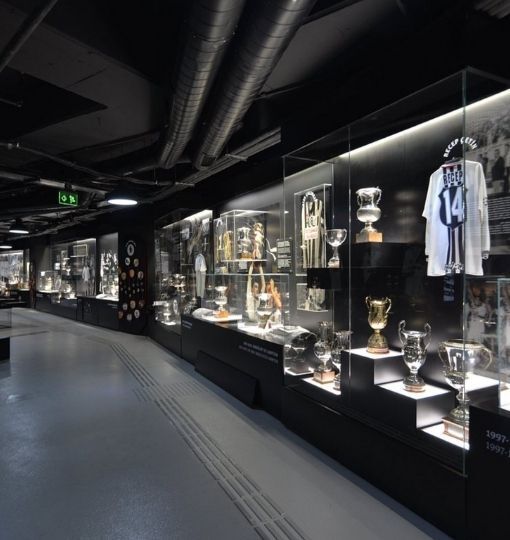
What's There? Besiktas JK, one of the top soccer teams in Turkey, opens the doors to its home stadium in Istanbul, the Tupras Stadium, with a tour which you can attend thanks to the Istanbul Tourist Pass®. Get access to private areas of the stadium, learn about the glorious history of […]
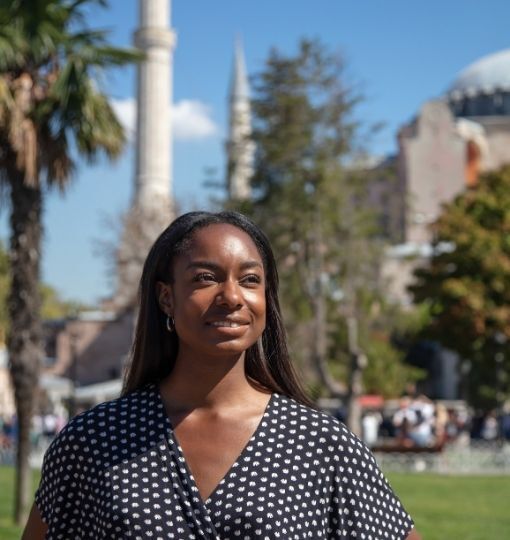
Sultanahmet is one of Istanbul's most popular tourist destinations. Istanbul's old city and historical district, a communications centre, and a major sightseeing, entertainment, and shopping area for visitors to visit in Istanbul in order to enjoy Istanbul's old city sou. Sultanahmet is a tourism center that blends heritage, architecture, culture, and art. Here's a quick […]
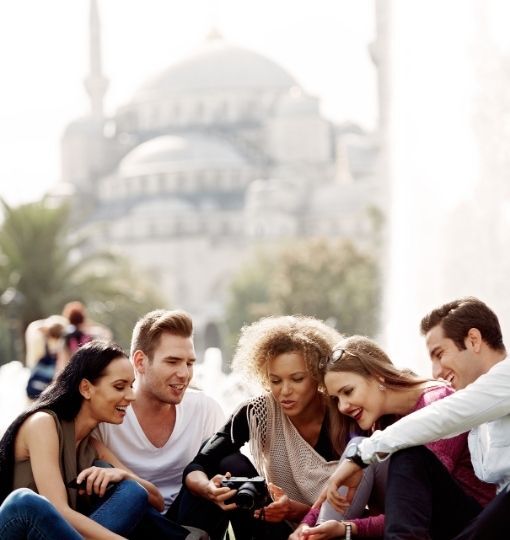
Discover the best things to do in Istanbul in just 3 days! From mosques to markets, explore history, culture, and delicious food.
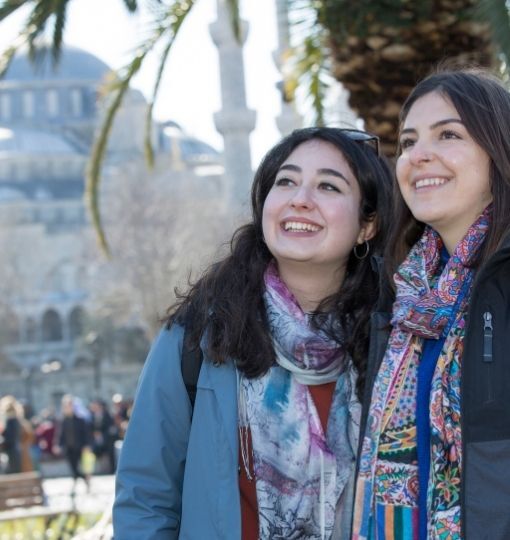
Planning a trip to Istanbul and wondering when is the best time to visit this vibrant city? Look no further! In this article, we will guide you through the ideal time to experience Istanbul's enchanting blend of history, culture, and natural beauty. Whether you're captivated by the ancient wonders of Hagia Sophia and the Blue […]
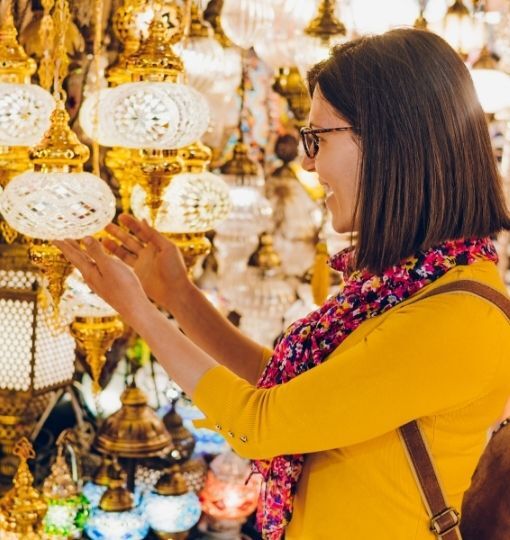
With over 4000 shops, the Grand Bazaar is the oldest covered market (or bazaar) in Istanbul and one of the largest in the world.
The Beşiktaş JK Museum is located inside the Vodafone Park that is the shrine of the Beşiktaş football team
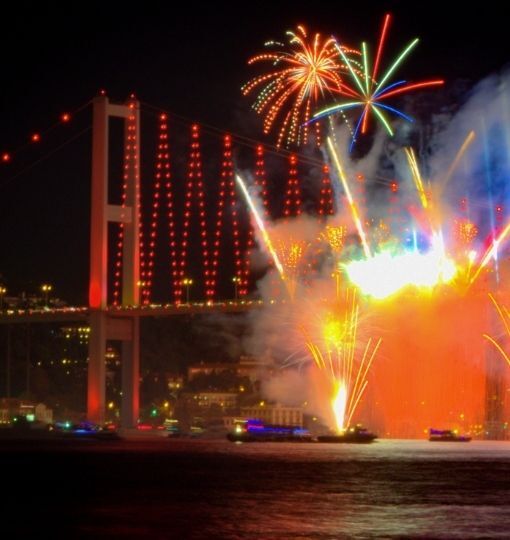
For about 16 centuries, Istanbul is among the most significant cities in the world, ruled by multiple different civilizations.
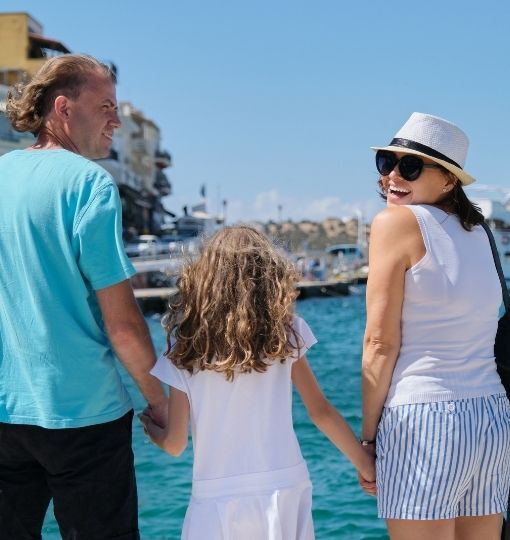
Istanbul is undoubtedly a lovely place. With scenic sightseeing spots in Istanbul and historical sites, offers a diverse range of activities, from landmark mosques to museums in Istanbul.
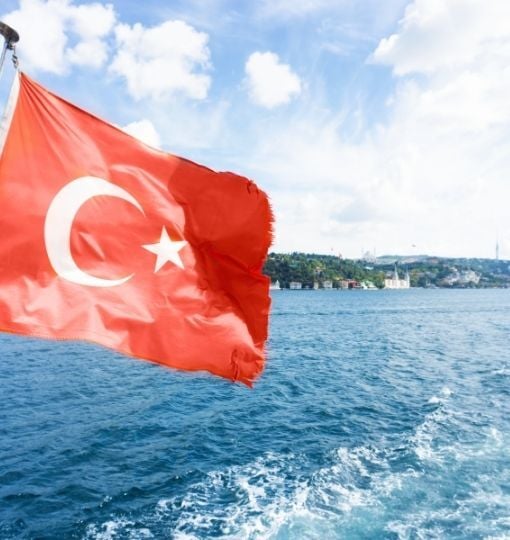
At night, the view from the already amazing Bosphorus Strait is even better! The shining lights of the city, Maiden’s Tower and Bosphorus Bridge provide a magical setting from which..

The Istanbul Toy Museum is a toy museum in Istanbul, Turkey, situated in the Goztepe neighborhood of the Kadikoy district. Sunay Akin, a Turkish poet and writer, established the museum in 2005. The museum opened on April 23, Turkey's National Sovereignty and Children's Day, which is a national holiday. The museum now has 4,000 toys […]
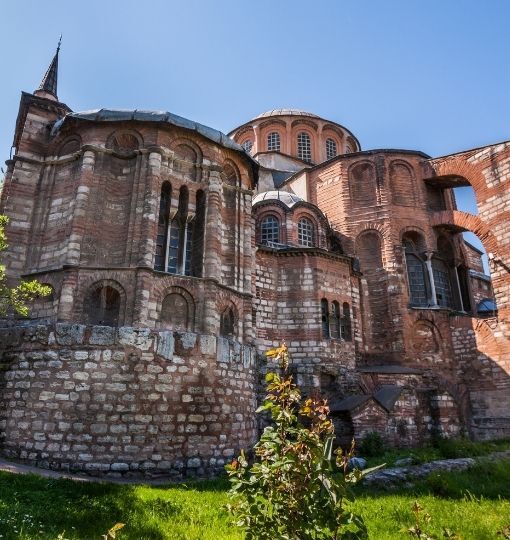
The Kariye Mosque (in Turkish, Kariye Camii) is a medieval Greek Orthodox church in Istanbul’s Edirnekap neighborhood that is now used as a mosque.
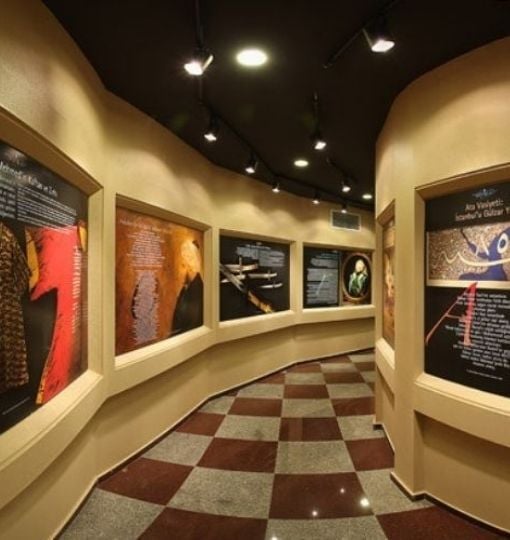
Istanbul, a region with centuries of tradition, now has some of the world’s best museums. In recent decades, the city has also established itself as a center of contemporary art.
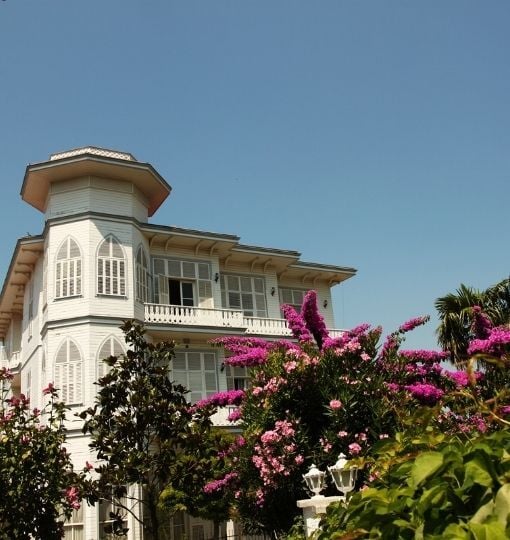
Escape the hustle and bustle of Istanbul and embark on a delightful day trip to Büyükada. Unlike the quick stops at other tourist attractions, Büyükada deserves a full day of exploration to truly appreciate its beauty and tranquility. Although it may seem like a significant investment of time, rest assured that the experience will be […]
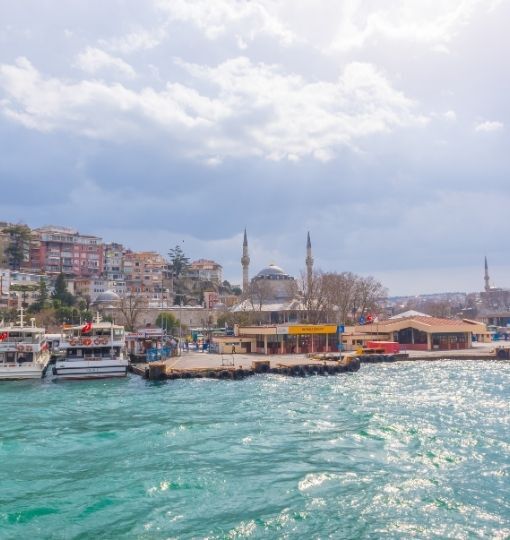
Istanbul is the world’s only megalopolis that spans two continents. The Bosphorus Strait, which links the Marmara Sea with the Black Sea, separates Europe from Asia. There are three major suspension bridges connecting Istanbul’s European and Asian coasts, as well as vapors that run all day.

Adventure Places in IstanbulIstanbul leaves no stone unturned in its quest to send thrill-seekers into a frenzy. There are enthralling events in Istanbul
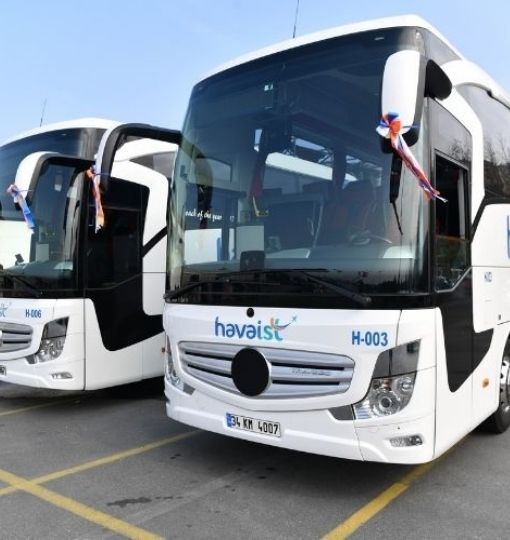
It’s so fun to travel to Istanbul! However, it can be overwhelming, particularly when you first arrive and are unsure how to get to your hotel, if the taxis are reliable, how you’ll interact with the driver, and so on! We are here to assist you with airport shuttles in Istanbul.

Abdülmecid I, the Empire’s 31st Sultan, ordered Dolmabahçe Palace to be constructed between 1843 and 1856.
.jpg)
Be transported back in time by one of the oldest and most beautiful mosques in the world, the Blue Mosque.
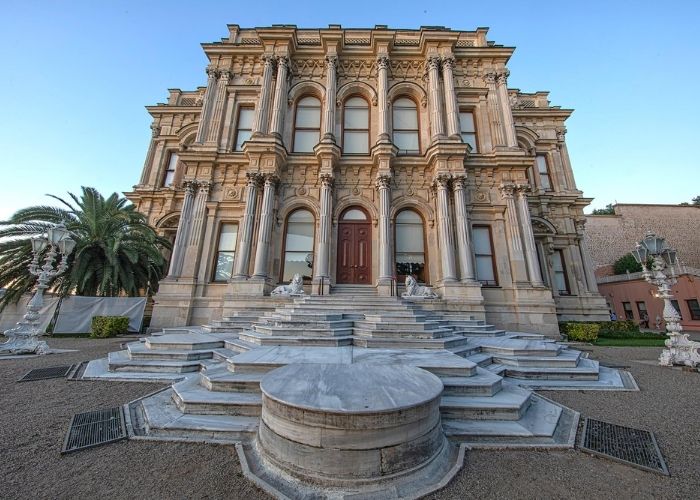
One of the very few Ottoman imperial palaces in the Istanbul’s Asian side, Beylerbeyi Palace still draws thousands of visitors every month to its beautiful..
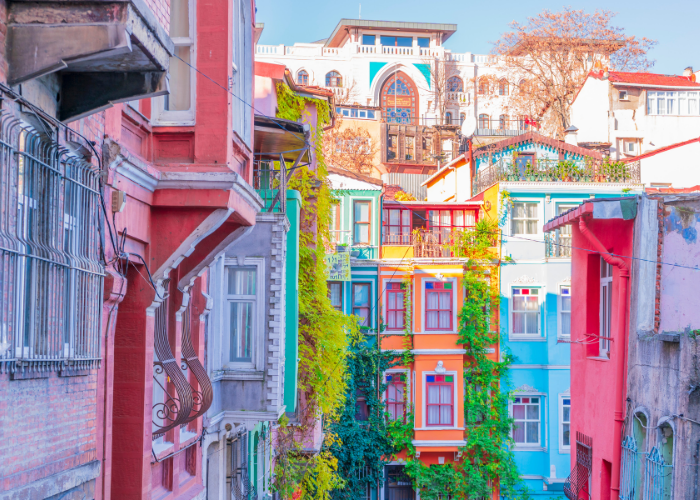
Greet the day with a sense of wonder as you step into the kaleidoscopic world of Balat, an enchanting district concealed within the heart of Istanbul. This vibrant neighborhood holds secrets of the past, with its vividly painted wooden homes and quaint cafes that exude an aura of happiness. Embrace the thrill of discovery as […]
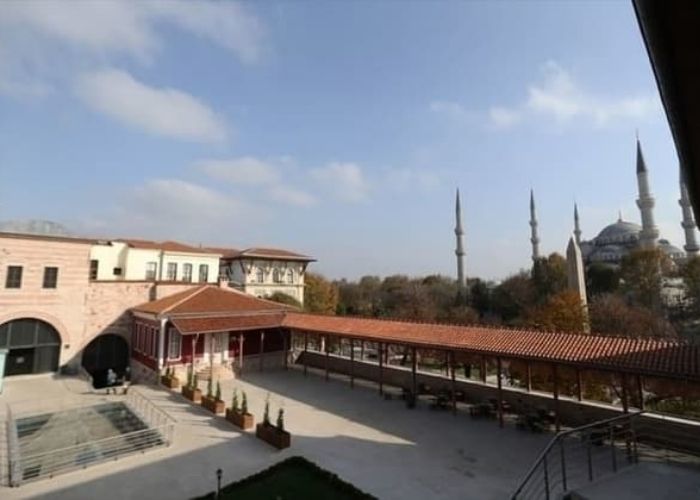
The Museum of Turkish Islamic Art, besides being the first Turkish museum to encompass Turkish and Islamic Art, is also the last museum that opened in the Ottoman Period.
Looking for travel ideas for 2017? Look no further, you are on the right place. Once again, Istanbul, one of the most cosmopolitan cities in the world has taken its place among the Top 2016 Travelers’ Choice Destinations list on TripAdvisor. According to the famous travel website, Istanbul was the second best destination to be […]


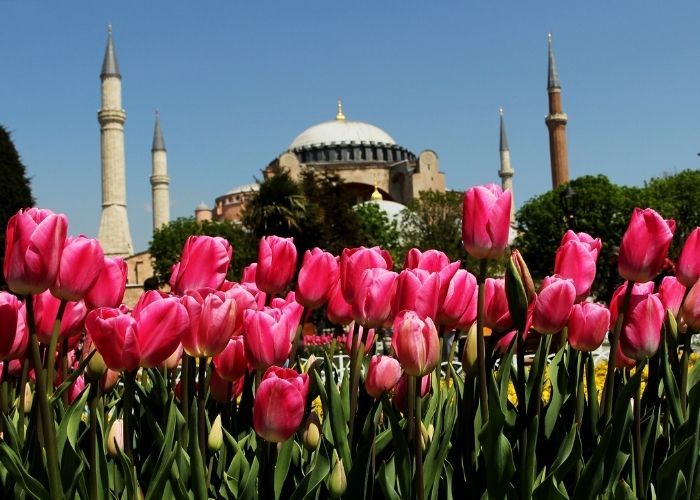
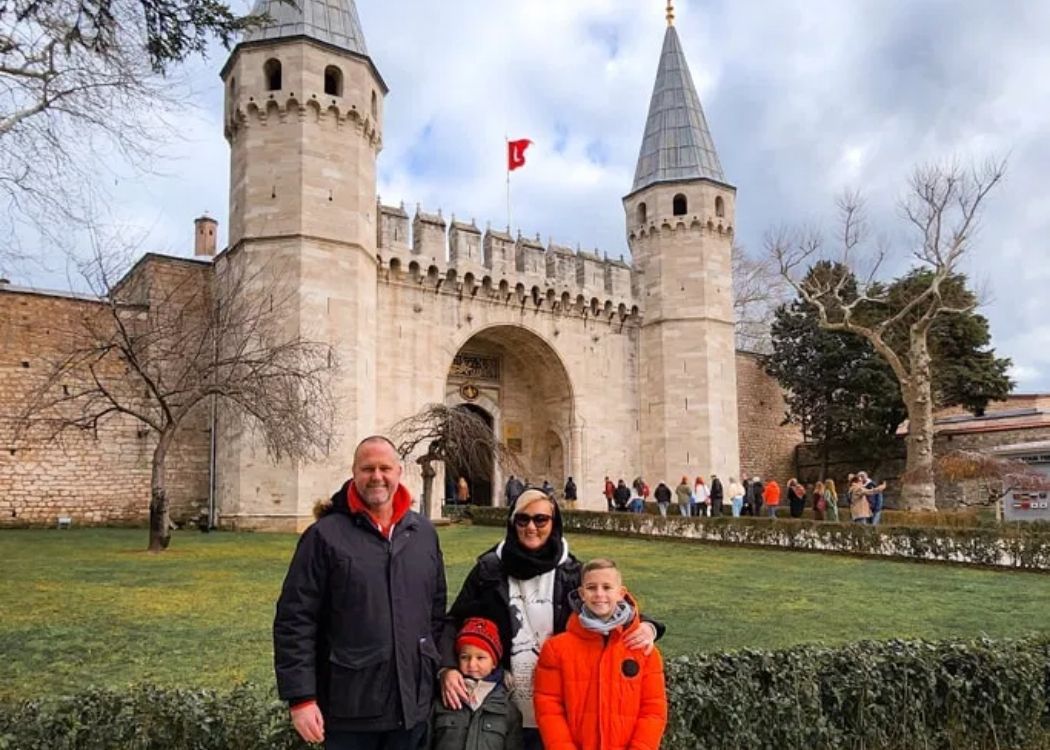
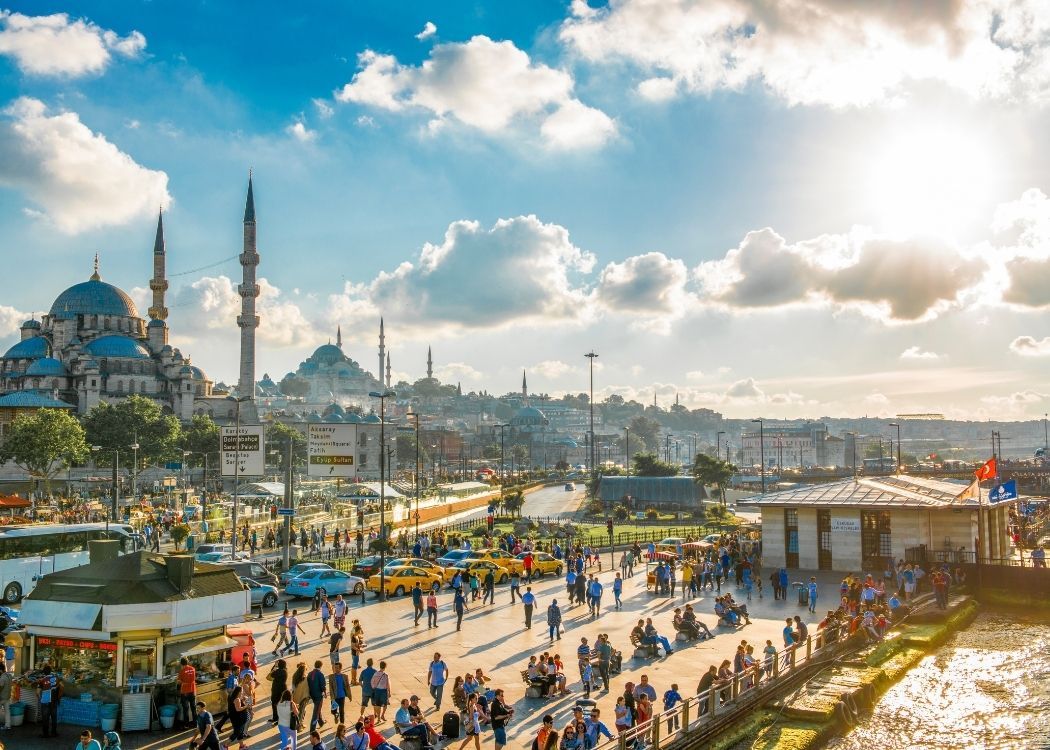


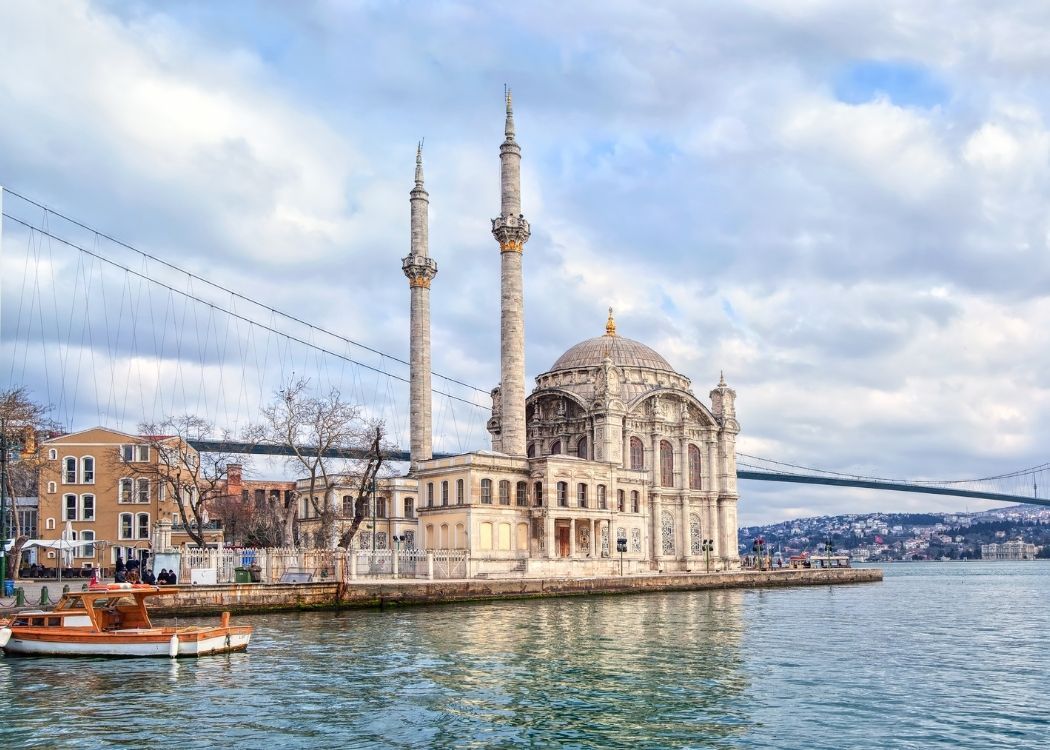
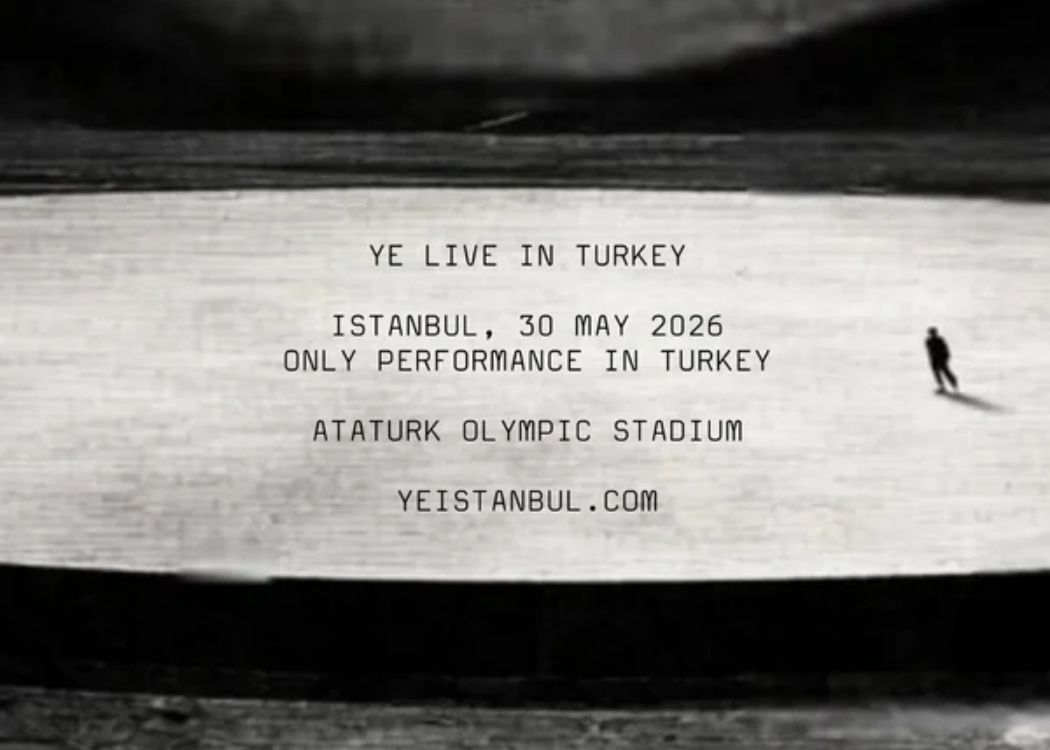
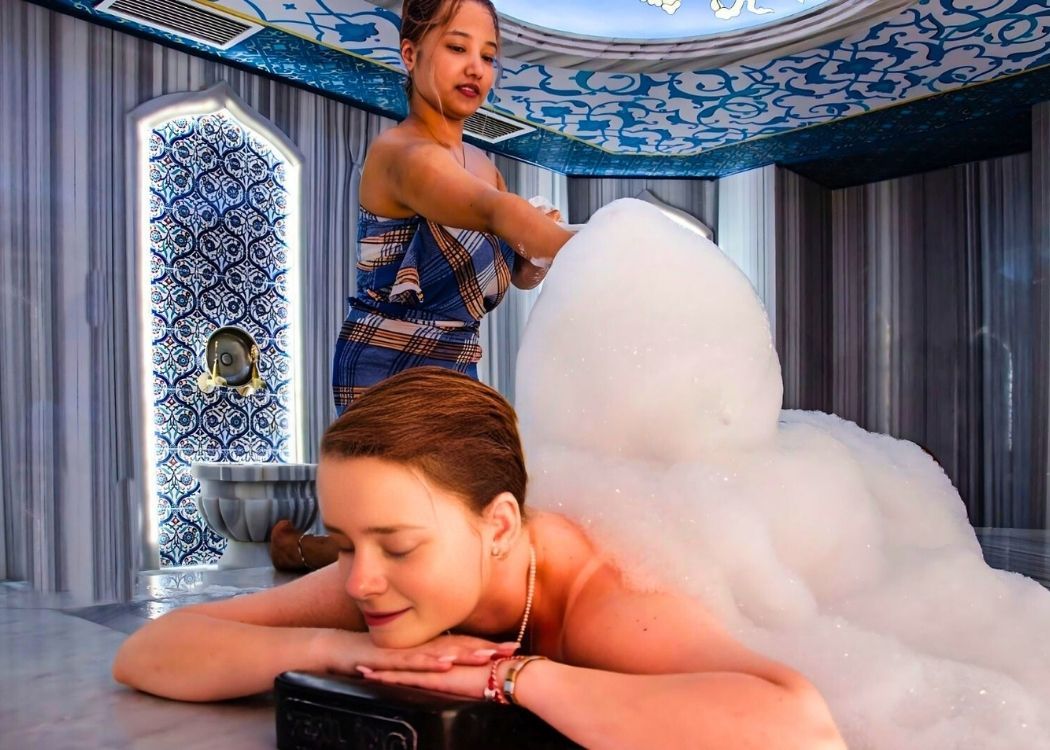
Get Your Free 3-Day Istanbul Itinerary — Sign up with your email and get a free 3-day Istanbul itinerary — designed to help you explore Istanbul like a local — sent right to your mailbox.